Introduction
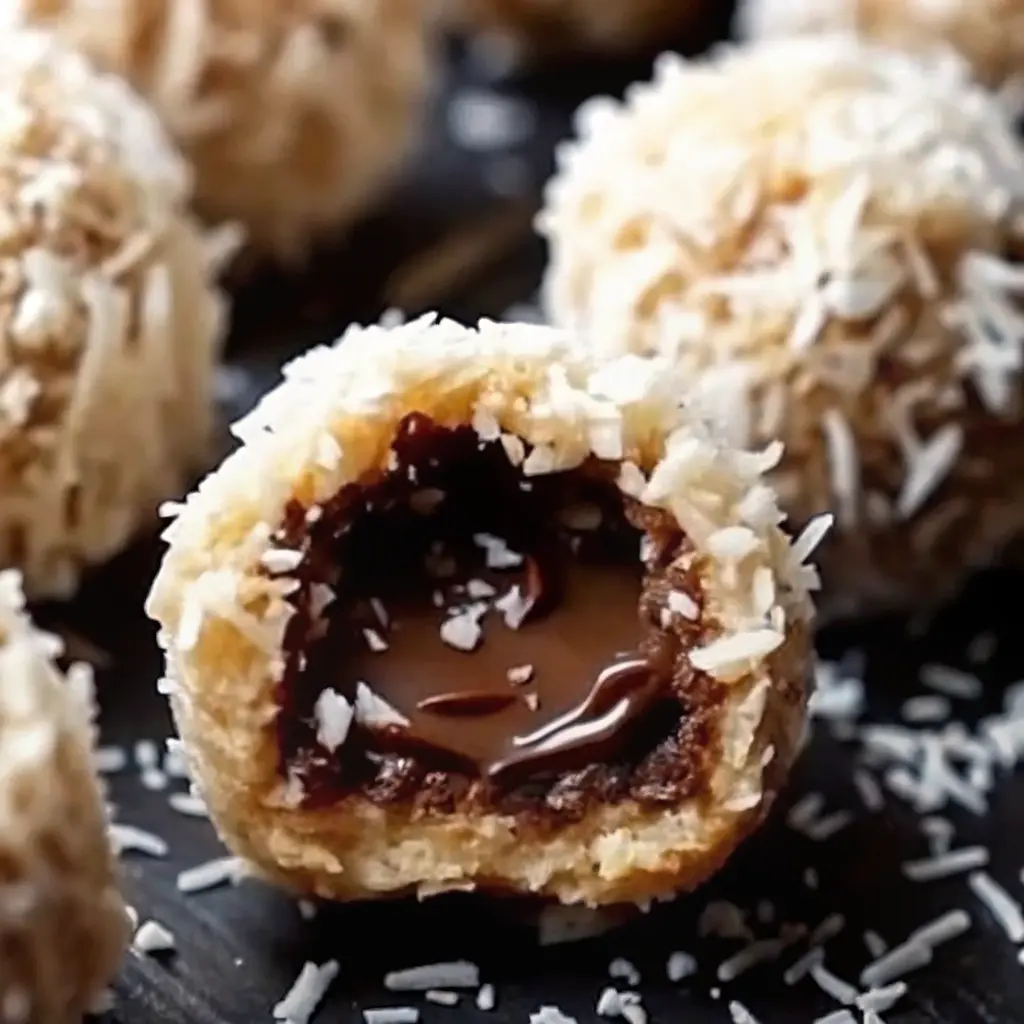
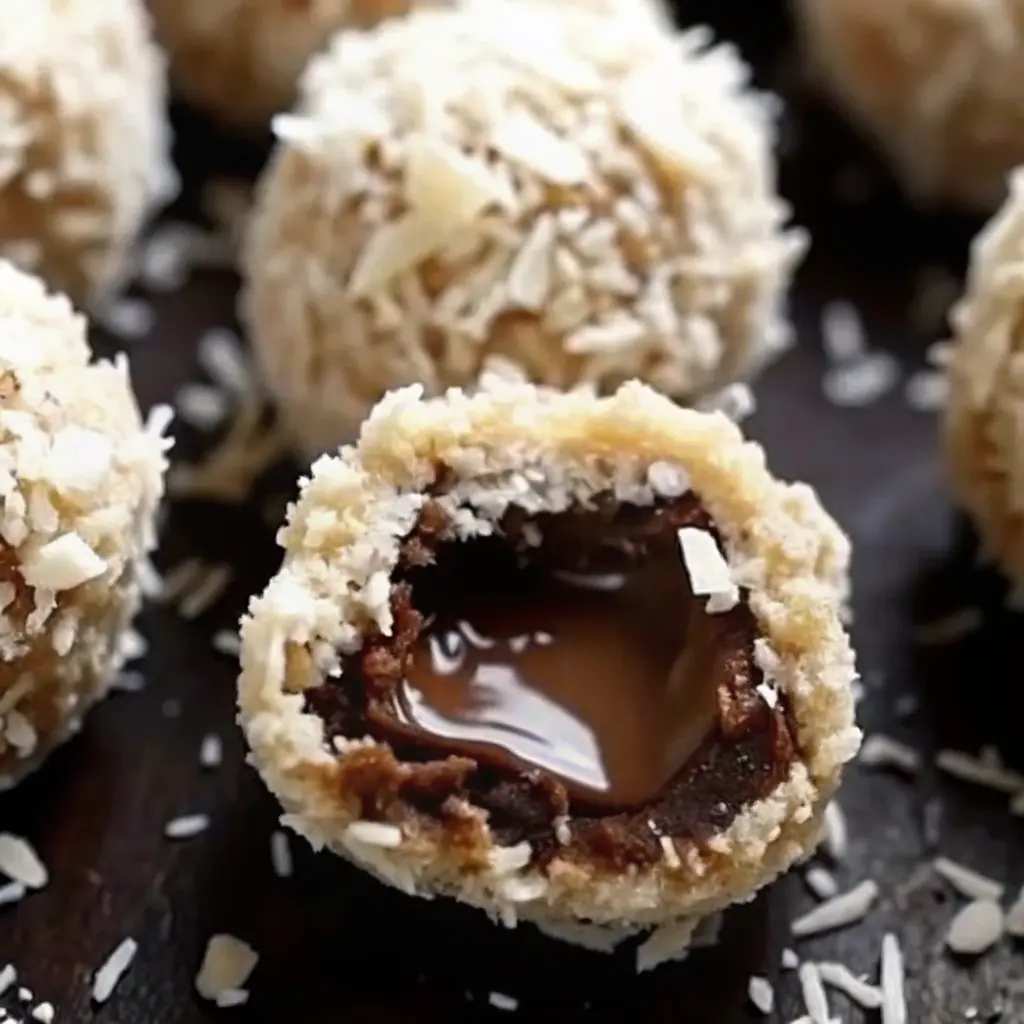
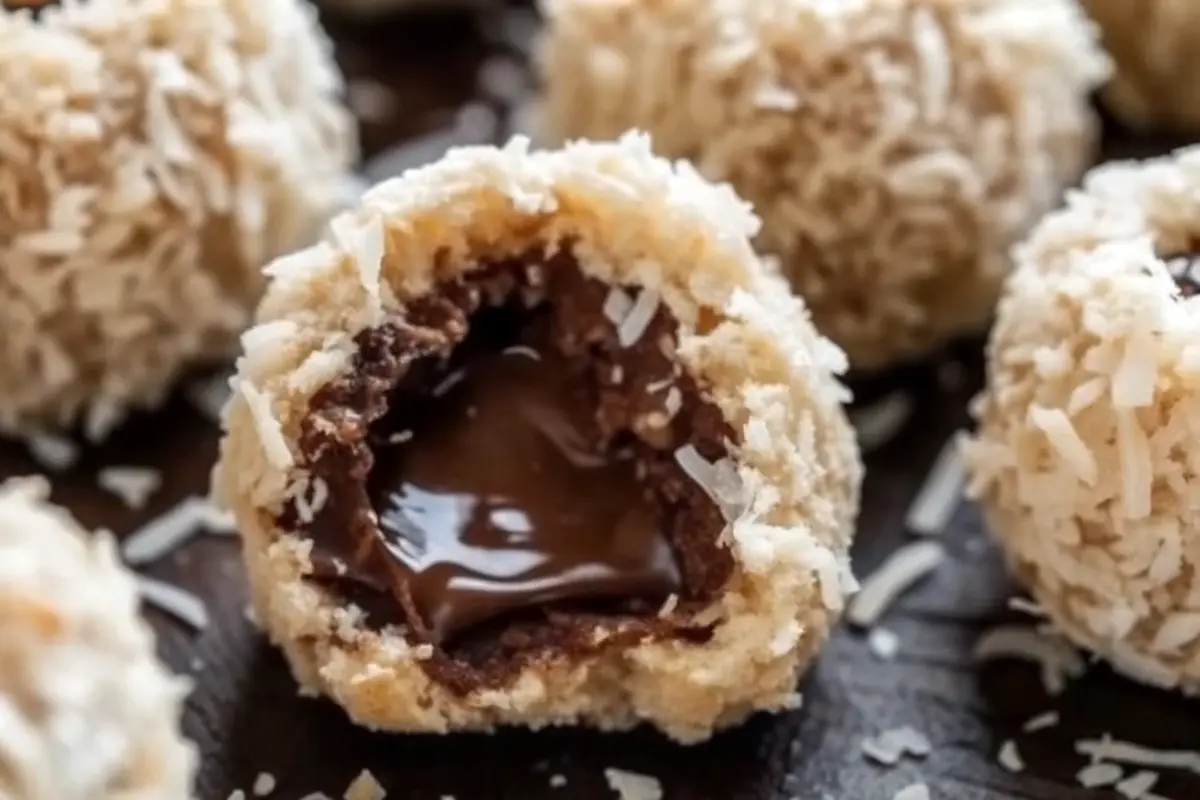
There are few desserts that check all the boxes: easy to make, indulgent, bite-sized, freezer-friendly, and absolutely gorgeous when plated. That’s exactly what these Chocolate Coconut Bliss Balls with a Creamy Chocolate Center deliver. Think of them as part truffle, part no-bake treat, and part flavor bomb rolled into one perfect bite.
These bliss balls bring together the chewy sweetness of coconut, the depth of cocoa, and the luxury of a smooth chocolatey center. Whether you’re preparing them for a festive platter, gifting them as homemade confections, or stashing them in the fridge for a quick after-dinner treat, these little spheres are the definition of pure bliss.
For anyone who has ever wondered how chocolatiers achieve that glossy shell or how a soft center hides inside a neat coconut ball, you’re in the right place. This recipe breaks everything down—from ingredients to assembly tricks, storage, and troubleshooting—so you can master Chocolate Coconut Bliss Balls with a Creamy Chocolate Center at home.
Ingredients Overview
The beauty of Chocolate Coconut Bliss Balls with a Creamy Chocolate Center lies in how customizable they are. Below is the breakdown of what makes them work.
The Base Dough
- Coconut: Choose between desiccated coconut for a finer texture or shredded coconut for more chew. Here’s what “desiccated coconut” comes from.
- Cocoa or Cacao Powder: Unsweetened for intensity; raw cacao if you want a slightly fruitier note.
- Sweetener: Medjool dates are a favorite for their caramel-like sweetness and sticky texture, but maple syrup or condensed milk can also work.
- Binder: Coconut oil, nut butter, or a mix of both. They ensure the dough sticks together.
The Creamy Chocolate Center
- Ganache pearls: Made from melted chocolate and cream, chilled until scoopable.
- Nut butter truffle: Soft almond or cashew butter mixed with melted chocolate.
- Tahini-chocolate fudge: Nut-free, sesame-smooth, with a touch of salt.
The Coating
- Finely shredded coconut for a snowy look.
- Cocoa powder for a deep, dramatic finish.
- Crushed pistachios or sesame seeds for color and crunch.
Equipment & Prep Notes
You don’t need fancy tools, but a few items make life easier:
- Food processor: For blending dates, nuts, and coconut.
- Small cookie scoop or teaspoon: Keeps ball sizes consistent.
- Parchment paper: Prevents sticking while chilling.
- Baking tray or plate: Flat surface for assembly.
- Optional: A chocolate thermometer if you’re tempering for a glossy shell.
Crafting the Creamy Center (3 Ways)
This step is where the magic happens. The center transforms these from ordinary coconut bites into Chocolate Coconut Bliss Balls with a Creamy Chocolate Center.
Option A: Quick Ganache Center
- Heat equal parts chocolate and cream until smooth.
- Chill until thick but scoopable.
- Roll into mini pearls (about ½ teaspoon each).
Option B: Tahini-Chocolate Fudge Center
- Combine melted chocolate with tahini.
- Add a pinch of sea salt for balance.
- Chill, then scoop small nuggets.
Option C: Nut-Butter Truffle Center
- Blend chocolate with almond, cashew, or peanut butter.
- Freeze until firm.
- Portion into pea-sized scoops.
Pro tip: Always pre-chill or freeze centers before wrapping. It keeps them neat and prevents messy leaks later.

Making the Outer Mixture (Base Dough)
There are multiple ways to prepare the base mixture, depending on ingredients you have on hand.
Date-Based Dough
- Pulse nuts in a processor until sandy.
- Add dates and cocoa, blend until sticky clumps form.
- Adjust texture with coconut oil.
No-Dates Version
- Use oats, almond meal, maple syrup, and shredded coconut.
- This produces a slightly lighter, less sticky base.
Condensed-Milk Variant
- Mix desiccated coconut, condensed milk, and cocoa powder.
- Creates a rich, bounty-style chew with minimal effort.
Balancing Texture
- Too dry? Add a teaspoon of coconut oil.
- Too sticky? Add extra oats or desiccated coconut.
Assembly: Wrap, Roll, and Coat
- Scoop about a tablespoon of base dough.
- Flatten into a disk.
- Place a chilled chocolate pearl in the center.
- Wrap dough around pearl, sealing edges.
- Roll between palms until smooth.
- Coat in coconut, cocoa, or seeds.
Optional: Dip the whole ball in tempered chocolate for a glossy truffle effect.
Chill, Set & Serve
- Chill the finished balls in the fridge for at least 1 hour.
- Flavor develops as they rest—cocoa melds with coconut beautifully.
- Serve chilled for firmness or at room temp for a softer bite.
Variations & Flavor Spins
One of the joys of Chocolate Coconut Bliss Balls with a Creamy Chocolate Center is how adaptable they are. Once you’ve mastered the base recipe, you can get creative with endless twists.
Bounty-Bar Inspired
- Use only coconut and condensed milk in the outer mixture.
- Chill, then wrap around chocolate ganache pearls.
- Dip in dark chocolate for that classic candy-bar vibe.
Vegan & Nut-Free
- Replace nut butter with sunflower seed butter or tahini.
- Choose dairy-free chocolate for both the ganache and shell.
- Coat in sesame seeds for an earthy crunch.
Protein-Packed
- Add a scoop of protein powder to the outer dough.
- Adjust texture with a little extra coconut oil or syrup.
- Coat in hemp seeds or crushed almonds for a power snack.
Festive Holiday Versions
- Add cinnamon, nutmeg, and cloves for a spiced winter feel.
- Tint shredded coconut with natural food colorings (like beet juice for pink or matcha powder for green) before rolling.
- Wrap individually for edible holiday gifts.
Citrus Twist
- Add orange or lime zest to the outer mixture.
- Use white chocolate pearls for contrast with the coconut.

Storage, Freezing & Make-Ahead
These bliss balls aren’t just delicious—they’re practical. You can make them in bulk, keep them ready for guests, or prep them ahead of holidays.
Room Temperature
- If coated in coconut (not chocolate), they can last 1–2 days in a cool spot.
- Avoid leaving them out in the sun or warm kitchens, as chocolate centers may melt.
Refrigerator
- Store in an airtight container for up to 7 days.
- Separate layers with parchment to prevent sticking.
Freezer
- Place bliss balls on a tray and freeze for 1 hour.
- Once solid, transfer to a freezer-safe container or bag.
- Freeze up to 2–3 months for best taste.
- Thaw in the fridge or at room temperature for 30 minutes before serving.
Gifting
- Package in small tins or treat bags.
- Add parchment layers to keep them neat.
- Keep chilled until gifting time to maintain shape and texture.
Troubleshooting: Common Problems & Fixes
Even simple recipes have hiccups. Here’s how to troubleshoot Chocolate Coconut Bliss Balls with a Creamy Chocolate Center.
Problem 1: The Dough Is Too Dry
- Add 1 teaspoon of coconut oil.
- Add a splash of maple syrup.
- Process again until sticky.
Problem 2: The Dough Is Too Sticky
- Add extra oats, cocoa, or desiccated coconut.
- Chill for 15 minutes, then try rolling again.
Problem 3: The Chocolate Center Oozes Out
- Chill or freeze the ganache pearls longer.
- Wrap dough tightly around the center.
- Seal edges before rolling smooth.
Problem 4: The Coating Looks Dull
- If dipping in chocolate, it may not have been tempered.
- Try reheating and cooling chocolate correctly before dipping.
- For quick fixes, roll in coconut or cocoa instead of dipping.
Problem 5: Uneven Shape
- Use a cookie scoop to portion evenly.
- Roll between palms with gentle pressure.
- Chill if too soft to handle.
Serving Ideas & Presentation
How you serve Chocolate Coconut Bliss Balls with a Creamy Chocolate Center can elevate them from casual snack to elegant dessert.
- On a dessert board: Pair with fresh fruit, other truffles, and cookies.
- In cupcake liners: Keep them neat and professional-looking.
- As party favors: Wrap in cellophane bags tied with ribbon.
- For holidays: Drizzle with contrasting chocolate (white over dark, or dark over white).
- With toppings: Sprinkle with crushed pistachios, cacao nibs, or edible glitter.
Frequently Asked Questions (FAQs)
What are bliss balls made of?
Bliss balls are typically made of coconut, cocoa, nuts or seeds, and a sweetener like dates or maple syrup. Our version has the bonus of a creamy chocolate center for extra indulgence.
How do I make bliss balls without dates?
Replace dates with maple syrup or honey, and add oats or almond meal for structure. The texture will be slightly less sticky but equally tasty.
Can I make bliss balls nut-free?
Yes! Swap nut butter for tahini or sunflower seed butter. Seeds like pumpkin or hemp can also replace chopped nuts in the base.
How long do bliss balls last in the fridge?
Up to 7 days when stored in an airtight container. They stay firm, chewy, and delicious throughout the week.
Can I freeze bliss balls?
Absolutely. They freeze beautifully for up to 2–3 months. Thaw in the fridge or at room temperature before serving.
Do I need to temper chocolate for the shell?
Not strictly. You can melt chocolate and dip, but it may look dull. If you want that shiny, professional finish with a snap, tempering is worth the extra step.
Conclusion
Chocolate Coconut Bliss Balls with a Creamy Chocolate Center are the perfect dessert for so many occasions. They combine the rustic charm of no-bake treats with the sophistication of filled truffles. With their customizable flavors, freezer-friendly storage, and easy assembly, they can be tailored to any palate or event.
Print
Decadent Chocolate Coconut Bliss Balls with a Creamy Chocolate Center
- Total Time: PT50M
- Yield: 12 bliss balls 1x
- Diet: Gluten Free
Description
Indulge in these decadent Chocolate Coconut Bliss Balls featuring a rich, creamy chocolate center wrapped in a layer of chewy coconut goodness. Easy to make, no-bake, and perfect for gifting, snacking, or serving as a bite-sized dessert, these bliss balls are a delightful treat that look as good as they taste.
Ingredients
For the Bliss Ball Shell:
- 1 ½ cups shredded unsweetened coconut
- ½ cup almond flour (or crushed graham crackers)
- 3 tbsp cocoa powder
- 4 tbsp honey or maple syrup
- 2 tbsp coconut oil (melted)
- 1 tsp vanilla extract
- Pinch of salt
For the Creamy Chocolate Center:
- ½ cup semi-sweet chocolate chips
- 2 tbsp heavy cream (or coconut cream for dairy-free)
Optional Coating:
- Extra shredded coconut
- Cocoa powder
Instructions
- Prepare the Creamy Center:
- In a microwave-safe bowl, melt the chocolate chips with cream in 20-second intervals, stirring until smooth and creamy.
- Let it cool slightly, then spoon small amounts (½ tsp each) onto a parchment-lined tray. Freeze for 30–40 minutes until firm.
- Make the Bliss Ball Mixture:
- In a mixing bowl, combine shredded coconut, almond flour, cocoa powder, honey (or maple syrup), melted coconut oil, vanilla extract, and a pinch of salt.
- Stir until the mixture comes together into a sticky dough.
- Shape the Balls:
- Scoop out 1 tablespoon of dough, flatten it in your hand, and place a frozen chocolate center inside.
- Roll into a ball, sealing the chocolate inside. Repeat until all are done.
- Coat & Set:
- Roll each ball in extra shredded coconut or cocoa powder for a pretty finish.
- Place in the refrigerator for at least 30 minutes to firm up before serving.
- Prep Time: PT20M
- Cook Time: PT30M
- Category: Dessert
- Method: No-Bake
Nutrition
- Serving Size: 1 bliss ball
- Calories: 140 kcal
- Sugar: 7g
- Fat: 11g
- Saturated Fat: 7g
- Trans Fat: 0g
- Carbohydrates: 10g
- Fiber: 3g
- Protein: 2g


1 thought on “Decadent Chocolate Coconut Bliss Balls with a Creamy Chocolate Center”