If you crave that shatter-crisp tortilla wrapped around juicy, seasoned chicken with melty cheese and all the fixings, you’re in the right place. This complete guide to Crispy Chicken Chimichangas walks you through everything—how to build a balanced filling, fold like a pro, and get that signature crunch three ways: deep-fried, oven-baked, or air-fried. You’ll also find fool-proof tips, make-ahead and freezing directions, flexible variations, and an extensive FAQ so you can master chimichangas on your very first try.
In case you’re curious about the backstory, chimichangas are commonly described as a Tex-Mex specialty (widely enjoyed across the American Southwest). For a high-level overview, see this general reference on chimichangas, useful context as you plan your flavor profile and toppings.
Why You’ll Love Crispy Chicken Chimichangas
- Triple-method flexibility: Deep-fry for the classic restaurant finish, or get golden results in the oven or air fryer.
- Balanced filling design: A juicy, well-seasoned chicken base, just enough binder (beans or rice) for structure, and the right cheese for melt.
- Crunch control: Learn how to prevent soggy shells, avoid seam blowouts, and keep that tortilla crisp from first bite to last.
- Make-ahead & freezer-friendly: Assemble now, crisp later—perfect for weeknights, meal trains, or game-day spreads.
- Fully customizable: From chipotle-lime zing to salsa verde brightness, swap proteins, cheeses, and toppings to match your taste.
What Exactly Is a Chimichanga?
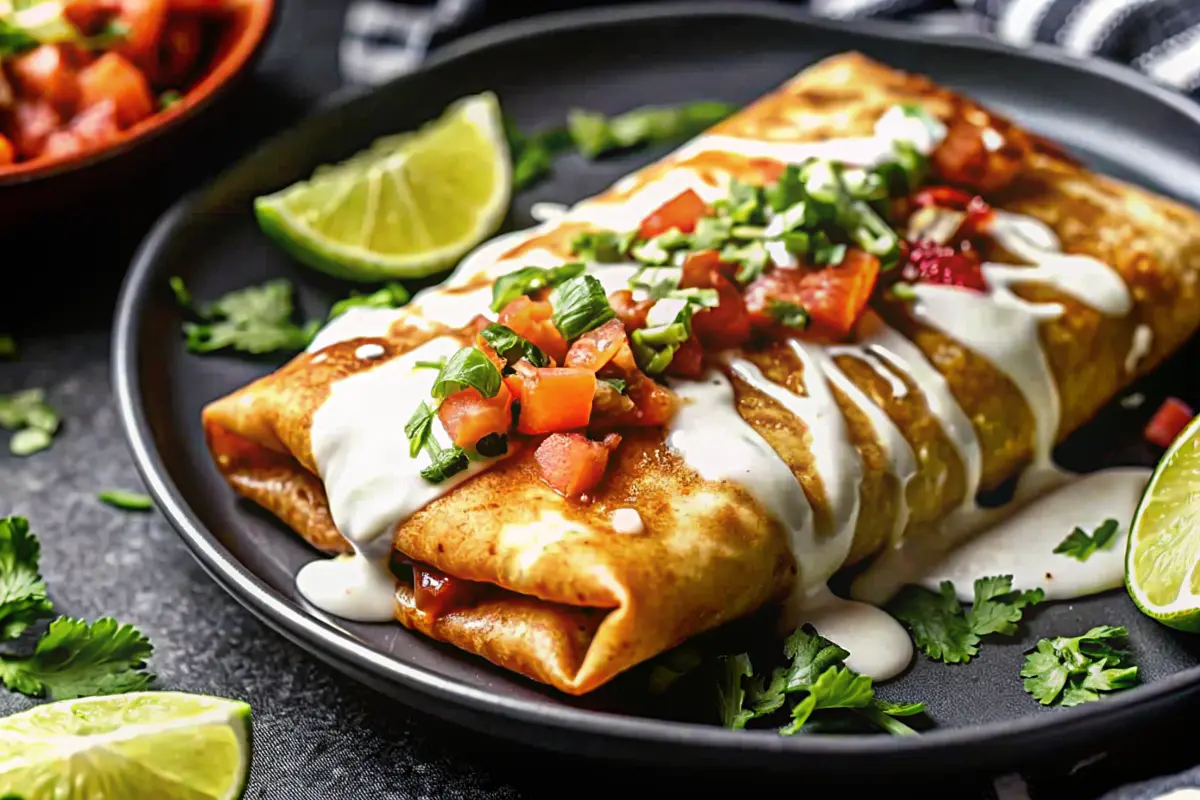
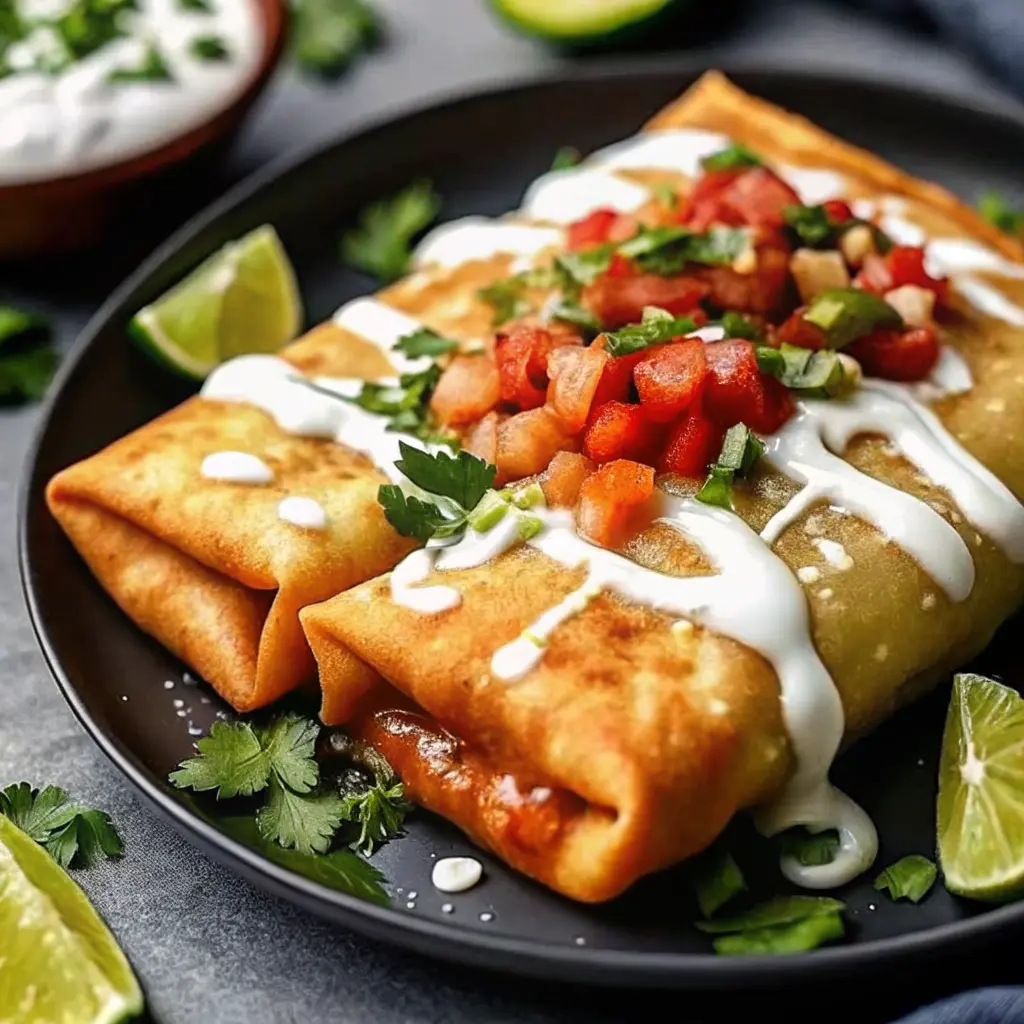
At its simplest, a chimichanga is a deep-fried burrito: a flour tortilla filled (often with meat, beans, and cheese), folded tightly, and cooked until the exterior turns blistered, golden, and crispy. Unlike an enchilada—which is sauced and baked—chimichangas are typically crisped first, then served with cool, fresh toppings (shredded lettuce, pico de gallo, guacamole, sour cream) and sometimes a warm sauce on the side or drizzled over the top. Our focus today is the ever-popular Crispy Chicken Chimichangas, but the method adapts to other fillings beautifully.
Ingredient Overview
Perfect Crispy Chicken Chimichangas start with a filling that’s savory, cohesive, and not too wet. Think of the filling like a team: each player contributes flavor, texture, or structure.
Core Building Blocks
- Flour Tortillas (8–10 in / 20–25 cm):
- Large enough to fold and tuck.
- Soft, pliable tortillas prevent cracking—warming helps (see Steps).
- Chicken:
- Shredded rotisserie, poached, pressure-cooked, or leftover roast.
- Season to taste—your chicken should be delicious before it meets the tortilla.
- Binders (choose 1–2):
- Refried beans for a creamy body.
- Seasoned rice for bulk and stability.
- A small spoon of cream cheese or sour cream can smooth things out (optional).
- Cheese:
- Cheddar, Monterey Jack, pepper jack, queso quesadilla—anything that melts well.
- Aromatics & Seasoning:
- Onion, garlic, ground cumin, chili powder, smoked paprika, oregano, black pepper, salt.
- Fresh lime for brightness; chopped cilantro if you like.
- Optional Heat:
- Jalapeño, serrano, canned green chiles, chipotle in adobo (minced).
Ratio Guidelines (per chimichanga, adjust to your tortilla size)
- Chicken: ~½ cup packed, shredded
- Binder (beans/rice): ~¼ cup total
- Cheese: ~¼ cup shredded (more for extra ooze)
- Add-ins (onion/pepper): ~2–3 tbsp
- Saucy components: minimal—drain salsa or simmer to reduce; you want juicy, not soupy
Equipment Checklist
- Deep-Fry Path: Heavy pot or tabletop fryer, thermometer, spider/skimmer, cooling rack.
- Oven Path: Sheet pan + wire rack, pastry brush or oil spray.
- Air Fryer Path: 4–6 qt basket (or larger), parchment liners (optional), oil spray.
- Assembly Helpers: Cutting board, tongs, foil for resting, paper towels for draining.
The Crispy Chicken Chimichangas Master Recipe
Ingredients (Base Version)
- 3 cups shredded chicken (seasoned to taste)
- 1 cup refried beans or 1 cup seasoned rice (or ½ cup of each)
- 1½–2 cups shredded cheese (Cheddar/Jack mix is great)
- ½ small onion, finely diced (or 2–3 green onions, sliced)
- 1–2 cloves garlic, minced
- 1–2 tbsp lime juice
- 1 tsp ground cumin
- 1 tsp chili powder
- ½ tsp smoked paprika (optional)
- Salt & black pepper to taste
- 6 flour tortillas, 8–10 in (20–25 cm)
- Neutral oil or melted butter for brushing/spraying (oven/air fryer)
- Neutral frying oil (deep-fry path)
Optional Flavor Extras
- 1–2 tbsp chopped canned green chiles or minced jalapeño
- 1–2 tsp adobo from chipotles
- 2 tbsp chopped cilantro
To Serve
- Shredded lettuce, pico de gallo, guacamole, sour cream, salsa verde or red enchilada sauce, lime wedges, radishes, cilantro
Step 1: Make a Cohesive, Not-Too-Wet Filling
- In a skillet over medium heat, warm a drizzle of oil. Soften onion 2–3 minutes; add garlic for 30 seconds.
- Stir in shredded chicken. Season with cumin, chili powder, smoked paprika, salt, pepper, and lime.
- Mix in your binder(s)—refried beans and/or rice—until the filling looks cohesive.
- If using salsa or adobo, add a small amount and cook 1–2 minutes to reduce excess liquid.
- Off heat, fold in half the cheese (save the rest for direct layering inside the tortilla).
Step 2: Warm Tortillas for Crack-Free Folding
- Stack tortillas and warm briefly:
- Microwave: 20–30 seconds wrapped in a towel.
- Skillet/Griddle: 15–20 seconds per side.
- Keep them covered so they stay pliable.
Step 3: Fill, Fold, and Tuck (Seam Security 101)
For each tortilla (8–10 in):
- Spread 2–3 tbsp refried beans (if using) in the center zone for “glue.”
- Add ~½ cup chicken filling in a neat log.
- Sprinkle ~¼ cup cheese over the chicken.
- Fold the sides tightly over the filling.
- Fold the bottom up over the sides and filling; roll tightly toward the top edge.
- Place seam-side down on a tray while you fill the rest.
Step 4: Deep-Fry (Classic Restaurant Finish)
- Heat neutral oil in a deep pot to about 350–365°F (175–185°C).
- Fry 1–2 chimichangas at a time, seam-side down first, 2–4 minutes per side, until deeply golden.
- Transfer to a rack set over a sheet pan. Let excess oil drip and steam escape for maximum crispness.
- Repeat with remaining chimichangas.
Why this works: High, stable oil temperature creates fast crust formation, minimizes oil absorption, and locks in structure so the seams stay put.
Step 4: Oven-Bake (Crisp, Golden, Hands-Off)
- Preheat oven to 400°F (205°C). Place a wire rack over a sheet pan.
- Brush or lightly spray each chimichanga with neutral oil or melted butter.
- Bake ~20–25 minutes, turning once at the halfway mark, until the tortillas are golden and crisp.
- Cool briefly on the rack.
Why this works: Elevated airflow + fat on the exterior encourages blistering and browning without deep-frying.
Step 4: Air-Fry (Fast, Even Crisp)
- Preheat air fryer to 400°F (205°C) for a few minutes.
- Lightly oil-spray chimichangas and arrange in a single layer (work in batches).
- Cook ~7–10 minutes total, flipping at the halfway point.
- If needed, add 2–4 minutes to reach your ideal color and crunch. Rest on a rack.
Why this works: Concentrated hot air and a lightly oiled surface yield quick, even browning.
Step 5: Finish & Serve
Plate over a bed of shredded lettuce, then add pico de gallo, guacamole, and sour cream. For a sauced finish, spoon on warm salsa verde or a thin red enchilada sauce. Garnish with cilantro and lime.

Variations & Substitutions
- Chipotle-Lime Chicken: Add minced chipotle and fresh lime zest to the filling; finish with a drizzle of chipotle crema.
- Salsa Verde Chicken: Use shredded chicken mixed with tomatillo-based salsa; top with cilantro, onion, and queso fresco.
- Creamy Green Chile: Stir in chopped green chiles and a spoon of cream cheese for a silky, mild heat.
- Loaded Bean & Rice: Go heavier on beans and Spanish-style rice for a bulked-out, budget-friendly twist.
- Cheese Profiles:
- For great melt: Monterey Jack, Oaxaca-style, queso quesadilla.
- For flavor punch: Sharp Cheddar, pepper jack.
- Wrap Options: Regular flour tortillas work best. Gluten-free wraps can work but may brown differently and be more fragile—warm thoroughly before folding.
- Protein Swaps: Turkey, tinga-style chicken, or leftover roast chicken; season assertively.
Make-Ahead, Storage, Reheating & Freezing
- Make-Ahead (Best Practice):
- Assemble chimichangas and refrigerate up to 24 hours.
- Brush/spray with oil just before baking/air-frying, or fry to order.
- Short-Term Storage (Cooked):
- Cool on a rack, then store loosely wrapped in the fridge for a day or two.
- Re-crisp in the oven or air fryer until hot and crunchy again.
- Freezing (Great for Busy Weeks):
- Assemble unbaked chimichangas, place on a parchment-lined tray, and freeze solid.
- Transfer to freezer bags; label.
- Bake/air-fry from chilled for best seam integrity (thawing can introduce condensation).
- Reheating Tips:
- Oven: 375–400°F (190–205°C) on a rack until hot and crisp.
- Air Fryer: 360–380°F (180–193°C) a few minutes per side, then finish hotter if needed for crunch.
- Avoid microwave-only reheats—steam softens the crust.
Troubleshooting Guide
- Soggy Shells
- Filling too wet—reduce liquids or increase beans/rice.
- No rack—resting on a plate traps steam; always use a rack.
- Burst Seams
- Overfilling—scale back by 1–2 tablespoons of filling.
- Cold tortillas—warm thoroughly for elasticity.
- Not seam-side down first—always set the seam early in cooking.
- Greasy Feel (Deep-Fry)
- Oil too cool—preheat properly and let it recover between batches.
- Overcrowding—fry in small batches.
- Bland Filling
- Season more assertively (salt, acid from lime, a touch of heat).
- Add aromatics (onion/garlic) and a finishing squeeze of lime.
Frequently Asked Questions (FAQs)
1) Are chimichangas Mexican or American?
They’re widely associated with Tex-Mex/Southwestern U.S. cooking. While stories point to Arizona eateries for their popularization, what matters most in your kitchen is the technique—a tightly folded tortilla that crisps to perfection.
2) What’s the difference between a chimichanga and a burrito?
A chimichanga is essentially a fried (or oven/air-fried) burrito. Burritos are typically not fried; chimichangas are crisped to a golden shell and finished with toppings on the side or on top.
3) Can I bake or air-fry instead of deep-frying?
Absolutely. A hot oven or preheated air fryer plus a light oil brush/spray delivers excellent crunch with minimal effort.
4) How do I keep chimichangas crispy?
- Keep the filling cohesive and not watery.
- Set seam-side down first when cooking.
- Don’t overcrowd your fryer/air fryer/oven racks.
- Always cool on a wire rack.
5) What fillings work best?
Shredded chicken with a modest amount of beans or rice and a melty cheese is a classic. Add green chiles, chipotle, or salsa verde for personality.
Conclusion
From the first bite of that shatter-crisp tortilla to the last forkful of melty, seasoned chicken, Crispy Chicken Chimichangas are all about contrast—golden crunch outside, savory comfort inside. With three reliable paths—deep-fried, oven-baked, and air-fried—you can choose the finish that fits your mood, your gear, and your timeline. Keep the filling cohesive (not wet), warm your tortillas for a tight fold, start seam-side down, and always rest on a rack for peak crunch. From there, it’s pure fun: load up with pico de gallo, guacamole, a squeeze of lime, and your favorite drizzle of salsa verde or red enchilada sauce.
Print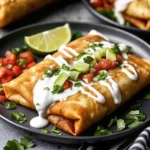
Best-Ever, Mouthwatering Crispy Chicken Chimichangas
- Total Time: PT45M
- Yield: 6 chimichangas 1x
Description
These Crispy Chicken Chimichangas are golden-fried tortilla wraps filled with flavorful shredded chicken, melty cheese, and zesty Mexican spices. Crispy on the outside and gooey on the inside, they’re a restaurant-style Tex-Mex favorite that’s easy to make right at home.
Ingredients
- 3 cups shredded chicken (seasoned to taste)
- 1 cup refried beans or 1 cup seasoned rice (or ½ cup of each)
- 1½–2 cups shredded cheese (Cheddar/Jack mix is great)
- ½ small onion, finely diced (or 2–3 green onions, sliced)
- 1–2 cloves garlic, minced
- 1–2 tbsp lime juice
- 1 tsp ground cumin
- 1 tsp chili powder
- ½ tsp smoked paprika (optional)
- Salt & black pepper to taste
- 6 flour tortillas, 8–10 in (20–25 cm)
- Neutral oil or melted butter for brushing/spraying (oven/air fryer)
- Neutral frying oil (deep-fry path)
Optional Flavor Extras
- 1–2 tbsp chopped canned green chiles or minced jalapeño
- 1–2 tsp adobo from chipotles
- 2 tbsp chopped cilantro
Instructions
- Prepare the filling
- In a bowl, mix shredded chicken, cream cheese, salsa, cheddar, chili powder, cumin, garlic powder, salt, and pepper until well combined.
- Assemble the chimichangas
- Lay out a tortilla. Spoon about ⅓ cup of filling into the center.
- Fold in the sides and roll tightly like a burrito, securing the edges with a toothpick if needed. Repeat for all tortillas.
- Fry until crispy
- Heat ½ inch of oil in a large skillet over medium heat.
- Fry 2–3 chimichangas at a time, seam side down, until golden and crispy (about 2–3 minutes per side).
- Remove and drain on paper towels.
- Alternative method — bake or air fry
- Baked: Brush chimichangas with oil and bake at 400°F (200°C) for 20–25 minutes, flipping halfway.
- Air Fryer: Air fry at 375°F (190°C) for 12–15 minutes, turning once.
- Serve
- Top with sour cream, guacamole, or pico de gallo. Serve warm and enjoy that crunch!
- Prep Time: PT20M
- Cook Time: PT25M
- Category: Main Dish
- Method: Fried
- Cuisine: Tex-Mex
Nutrition
- Serving Size: 1 chimichanga
- Calories: 420 kcal
- Sugar: 2g
- Sodium: 630mg
- Fat: 24 g
- Saturated Fat: 9g
- Unsaturated Fat: 13g
- Trans Fat: 0g
- Carbohydrates: 28g
- Fiber: 2g
- Protein: 26g
- Cholesterol: 85mg