What Are Christmas Pinwheel Cookies?
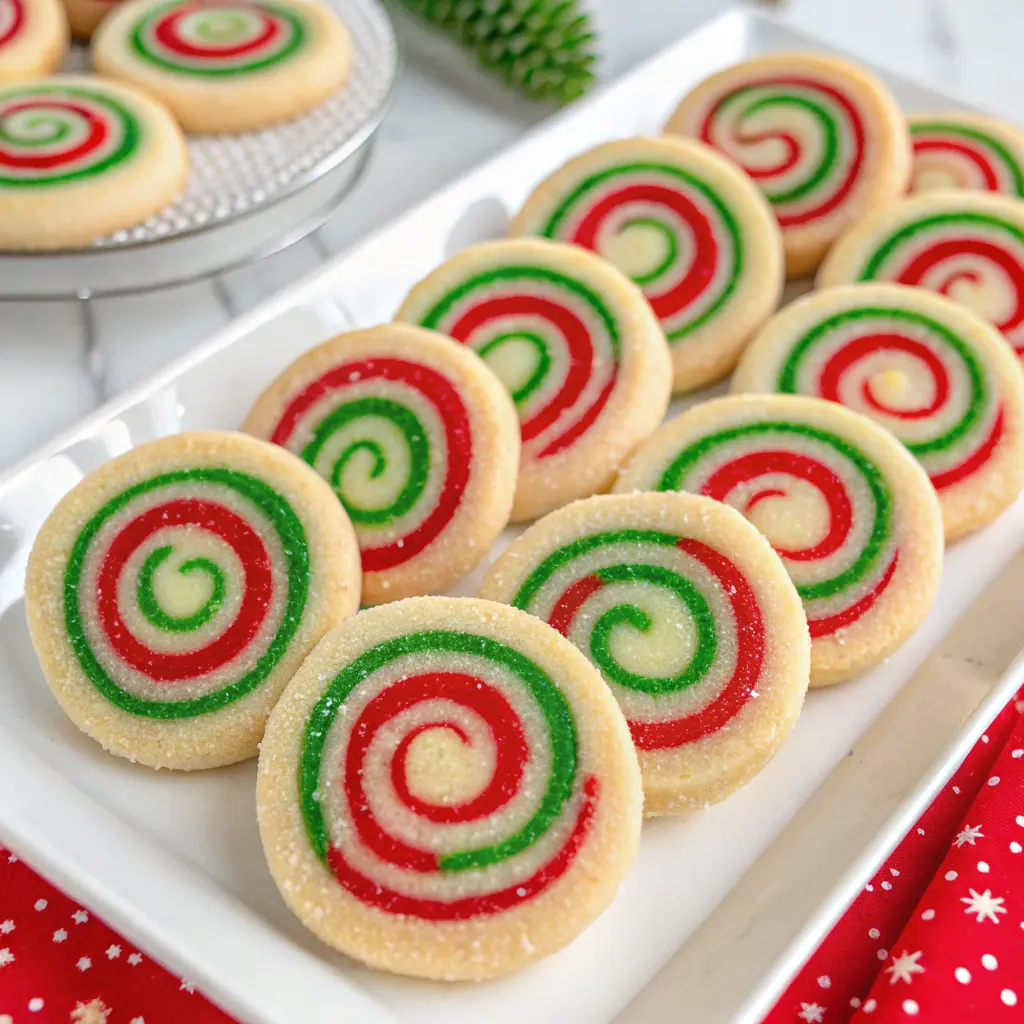
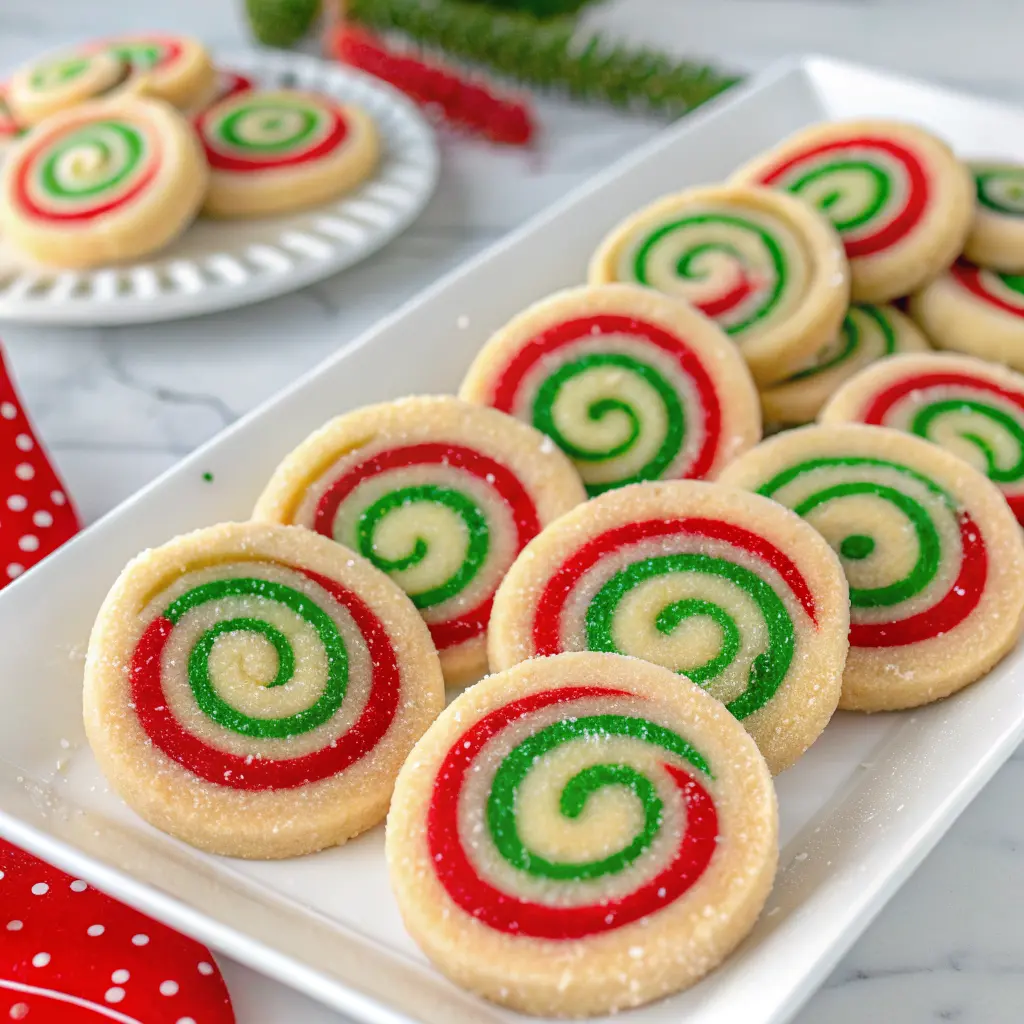
Christmas Pinwheel Cookies are festive spiral cookies made from a simple buttery sugar-cookie dough that’s divided, tinted with color (usually red and green), stacked in layers, and rolled up into a log. Once chilled, the log is sliced into rounds showing that classic candy-cane-style swirl.
They’re often called:
- spiral Christmas cookies
- Christmas swirl sugar cookies
- slice-and-bake Christmas cookies
- holiday pinwheel cookies
Compared with cut-out cookies, which rely on cookie cutters and detailed decorating, pinwheels get their drama from the pattern baked right into the dough. That makes them perfect when you want something eye-catching but still simple to decorate and easy to transport.
Key Ingredients for Perfect Christmas Pinwheel Cookies
The beauty of Christmas Pinwheel Cookies is that they use pantry-friendly ingredients. Getting these basics right sets you up for success.
Base Dough Ingredients
For a classic, buttery slice-and-bake sugar cookie dough, you’ll typically use:
- Unsalted butter – Softened to room temperature for easy creaming
- Granulated sugar – For sweetness and structure
- Egg or egg yolk – Helps bind and adds richness
- Vanilla extract – The classic flavor base
- Almond or peppermint extract (optional) – Adds a holiday twist
- All-purpose flour – The main structure of your dough
- Baking powder – Very small amount, just enough lift so cookies aren’t dense
- Fine salt – Balances the sweetness
Some bakers swap part of the granulated sugar for powdered sugar for a more tender crumb, or use just egg yolk for rich, slightly more delicate pinwheel cookies.
Color & Decoration Ingredients
To get that bold, cheerful spiral, you’ll want:
- Gel food coloring – Red and green are the stars. Gel is best because:
- It gives vivid color with just a few drops
- It won’t throw off the dough texture the way liquid color can
- Sprinkles or nonpareils – For rolling the dough log so the edges are coated in color
- Sanding sugar or sparkling sugar – Adds shimmer and crunch to the edges
You can stick to traditional red and green, or choose your own palette—think red and white for candy-cane vibes, or gold and white for a New Year’s cookie tray.
Optional Flavor Boosters
To give your Christmas Pinwheel Cookies a unique, signature taste, you can add:
- Peppermint extract for a candy-cane twist
- Orange zest for a citrusy holiday note
- Almond extract for a classic bakery flavor
- Cocoa powder in one layer for chocolate-vanilla spirals
Use these in small amounts so they enhance, not overpower, the vanilla base.
Tools & Equipment You’ll Need
You don’t need fancy equipment to make Christmas Pinwheel Cookies, but a few tools make the process smoother and the spirals cleaner.
Essential tools:
- Stand mixer or hand mixer
- Large mixing bowl
- Rubber spatula
- Measuring cups and spoons
- Rolling pin
- Parchment paper or silicone baking mats
- Plastic wrap
- Sharp knife or bench scraper
- Baking sheets
- Wire cooling racks
Nice-to-have extras:
- Kitchen scale – Helps divide dough evenly between colors
- Ruler – For measuring neat rectangles (great for tight spirals)
- Offset spatula – To help lift and stack dough layers
- Bench scraper – For trimming edges and guiding the roll
A little precision with measuring and rolling goes a long way in producing pinwheel cookies that look uniform and professional.
Step-by-Step: Making the Cookie Dough
This is a straightforward sugar-cookie dough with just a few extra steps for coloring and layering.
1. Cream the Butter and Sugar
- Beat softened unsalted butter and granulated sugar together until:
- Pale in color
- Light and fluffy
- Proper creaming helps:
- Evenly distribute sugar
- Trap air for a tender texture
Take your time here; this step lays the foundation for your Christmas Pinwheel Cookies.
2. Add Egg and Flavorings
- Add the egg (or egg yolk) and beat just until combined.
- Mix in vanilla extract and any optional extracts (such as almond, peppermint, etc.).
- Scrape down the bowl so everything mixes evenly.
You want the mixture smooth and emulsified, but not over-mixed.
3. Incorporate the Dry Ingredients
- Whisk all-purpose flour, baking powder, and salt in a separate bowl.
- Add the dry ingredients to the butter mixture on low speed until just combined.
- Finish by gently folding with a spatula, stopping once no flour streaks remain.
Over-mixing at this stage can make the dough tough and more likely to crack, so keep it gentle.
Coloring, Dividing & Rolling the Dough
Now the fun begins—turning your dough into those distinctive red and green swirls.
1. Divide the Dough
- Turn the dough onto a lightly floured surface or parchment.
- Divide it into two or three equal portions, depending on your design:
- Two-color swirl: one plain/white portion and one tinted portion
- Tri-color swirl: one white, one red, one green
If you’re using a kitchen scale, weigh the dough and divide it evenly so your layers stack neatly.
2. Tint with Gel Food Coloring
For each portion you want colored:
- Knead in a small amount of gel food coloring:
- Start with a toothpick amount and add more gradually
- Knead just until the color is evenly distributed
- Avoid overworking the dough—too much handling can make it warm and sticky.
Tip: If your hands are picking up color, slip on food-safe gloves or knead the color in using a small piece of parchment between your fingers and the dough.
3. Roll into Even Rectangles
Working with one portion at a time:
- Place dough between two sheets of parchment paper.
- Roll into a thin, even rectangle—roughly ¼ inch (about 6 mm) thick.
- Aim for rectangles of similar size so layers stack easily.
- Slide each rolled sheet onto a baking sheet and chill briefly (10–15 minutes) so it firms up.
Chilling here makes the next stacking step MUCH easier and cleaner.
Building the Spiral: Stacking, Rolling & Chilling
This is where your Christmas Pinwheel Cookies really take shape.
1. Stack the Dough Layers
- Peel the top parchment off each chilled dough sheet.
- Place one sheet (e.g., white) on the counter, then carefully lay the second sheet (e.g., red) on top, aligning edges as closely as possible.
- If using a third color (green), stack it last.
- Use a rolling pin to lightly roll over the stacked dough to:
- Help layers adhere
- Flatten any air pockets
Trim the edges with a sharp knife or bench scraper to create a neat rectangle—this gives you cleaner spirals.
2. Roll into a Tight Log
- Starting from a long edge, use the parchment to gently roll the stacked dough into a log.
- As you roll, lightly tug the parchment back so it doesn’t get trapped.
- Use your fingers to press and tighten the roll as you go, but avoid squashing it.
- Once rolled, gently roll the log back and forth to even out its thickness.
A tight roll is key to beautiful, distinct spirals in your pinwheel cookies.
3. Chill Thoroughly
- Wrap the finished dough log tightly in plastic wrap.
- Chill in the refrigerator for at least 2 hours, or until very firm.
- For even cleaner slices, you can briefly freeze the log (about 30 minutes) before slicing.
Chilling prevents spreading and helps the spiral hold its shape in the oven.
Baking Your Christmas Pinwheel Cookies
With your dough logs nice and firm, you’re ready to bake.
1. Preheat and Prep
- Preheat your oven to about 175–180°C / 350–360°F (check your usual sugar-cookie temperature).
- Line baking sheets with parchment paper or silicone baking mats.
2. Slice the Cookies
- Unwrap the chilled dough log.
- Using a sharp knife, slice into rounds about ¼ inch (6 mm) thick.
- If the dough cracks slightly, press it back together with your fingers.
- Arrange slices on prepared baking sheets, leaving a bit of space between cookies.
For sprinkle-coated edges, roll the chilled log in sprinkles or sanding sugar before slicing.
3. Bake Until Just Set
- Bake the cookies until:
- Edges look set
- Tops are no longer shiny
- They’re still pale—avoid heavy browning to keep colors bright
The exact time will depend on your oven and cookie size, but most Christmas Pinwheel Cookies bake in around 9–12 minutes.
Allow cookies to cool on the baking sheet for a couple of minutes, then transfer them to a wire rack to cool completely.
Decorating Ideas & Presentation Tips
Christmas Pinwheel Cookies already look impressive, but a few simple touches can take them from pretty to unforgettable.
Sprinkle-Coated Edges
For an instant, “party” look:
- Roll the chilled dough log in:
- Nonpareils
- Christmas sprinkles
- Sanding sugar or sparkling sugar
- Press gently so they adhere, then slice as usual.
This gives each cookie a colorful, crunchy border that stands out on a holiday tray. (King Arthur Baking)
Simple Glaze or Drizzle
If you prefer a slightly more decorated look without hiding the spiral:
- Whisk together powdered sugar, milk or cream alternative, and vanilla or peppermint extract to make a simple glaze.
- Drizzle over cooled cookies in a zigzag pattern.
- While the glaze is still wet, you can sprinkle a few nonpareils or edible glitter on top.
Keep the drizzle thin and minimal so you still see the swirl underneath.
Color Themes & Styling Ideas
You can tailor Christmas Pinwheel Cookies to any celebration:
- Classic Christmas: Red + green + white sprinkles
- Candy-Cane Style: Red and white spiral with peppermint flavor
- Winter Wonderland: Pale blue and white spirals with sparkling sugar
- New Year’s: White and gold spirals with metallic sprinkles
On a dessert table or cookie platter, try:
- Arranging pinwheels in concentric circles
- Alternating them with other cookies like thumbprints, shortbread, or frosted cut-outs
- Piling them into clear jars or glass stands for height and color

Make-Ahead, Storage & Freezing Guide
One of the best parts of Christmas Pinwheel Cookies is how well they fit into a busy holiday schedule. You can prep the dough well in advance and bake as needed.
Chilling and Freezing the Dough Logs
- Refrigerator:
- Wrap dough logs tightly in plastic wrap.
- Store in the fridge for up to 2–3 days before slicing and baking.
- Freezer:
- Wrap logs in plastic wrap, then in foil or a freezer bag.
- Freeze for several weeks.
- For best results, let the log soften in the fridge until firm but sliceable, then cut into rounds and bake.
Storing Baked Cookies
Once your Christmas Pinwheel Cookies are baked and cooled:
- Place them in an airtight container at room temperature.
- Layer with parchment paper to keep them from sticking together or rubbing off color.
- Store away from strong odors (like certain spices), which can affect flavor.
They stay at their best for several days, making them ideal for cookie exchanges and gifting.
Shipping & Gifting Tips
If you’re mailing or gifting your pinwheel cookies:
- Choose a sturdy container like a tin or rigid box.
- Cushion with tissue paper or crumpled parchment below and above the cookies.
- Pack cookies snugly so they don’t rattle around.
Because pinwheels are relatively flat and not heavily frosted, they travel quite well.
Troubleshooting Common Pinwheel Cookie Problems
Even experienced bakers run into the occasional cookie issue. Here’s how to handle the most common ones with Christmas Pinwheel Cookies.
“My Cookies Spread Too Much”
If your cookies spread and lose their spiral shape:
- The dough may have been too warm.
- The butter ratio may be slightly high, or there’s not quite enough flour.
Fixes:
- Chill the dough log longer—overnight if possible.
- Chill sliced cookies on the baking sheet for 10–15 minutes before baking.
- Make sure you measured flour accurately (spoon and level, or weigh it).
“My Spirals Look Messy or Uneven”
If the swirl looks tilted, lopsided, or irregular:
- The rectangles might be uneven in thickness.
- The layers may not have been aligned well before rolling.
Fixes:
- Use a ruler to roll dough to a consistent thickness.
- Trim edges into a neat rectangle before rolling.
- Roll slowly, tightening the log gently as you go.
“The Dough Keeps Cracking When I Roll It”
Cracks usually happen when dough is too cold or slightly dry.
Fixes:
- Let the dough sit at room temperature briefly until just pliable.
- If very dry, knead a tiny amount of softened butter into the dough.
- Patch small cracks with your fingers as you roll.
“My Colors Bled or Look Dull”
If the red and green seem muddy or pale:
- Too much liquid food coloring can soften the dough.
- Over-baking can dull the colors.
Fixes:
- Use gel food coloring instead of liquid.
- Add color gradually; it intensifies as you knead.
- Bake just until set, removing cookies before they brown heavily.
Serving Ideas & Holiday Gifting Inspiration
Christmas Pinwheel Cookies are incredibly versatile. Here are ways to serve and share them.
On a Holiday Cookie Tray
Combine your pinwheel cookies with:
- Frosted sugar cookies
- Chocolate crinkle cookies
- Shortbread or snowball cookies
- Brownie bites or fudge squares
Arrange them in sections or rings to highlight the colorful swirls. Use small labels or place cards so guests know what’s what.
Cookie Exchanges & Parties
These cookies are ideal for exchanges because:
- They travel well
- They stand out visually
- They’re easy to portion out
Package them in:
- Clear cellophane bags tied with ribbon
- Small bakery boxes
- Holiday tins lined with parchment
Include a little tag with the name “Christmas Pinwheel Cookies” and a short note about flavor (vanilla, peppermint, etc.).
Edible Gifts
For charming homemade gifts:
- Fill a mason jar or tin with a stack of pinwheels.
- Add a ribbon and a handwritten recipe card.
- Pair with:
- A jar of hot cocoa mix
- A small bag of coffee or tea
- A festive mug
It’s a thoughtful, personal gift that feels special but doesn’t require elaborate packaging.
FAQs About Christmas Pinwheel Cookies
Here are answers to common questions home bakers ask about Christmas Pinwheel Cookies.
1. What Are Christmas Pinwheel Cookies Made Of?
They’re made from a basic butter or sugar-cookie dough: butter, sugar, egg, flour, baking powder, salt, vanilla, and sometimes an extra extract like almond or peppermint. The festive look comes from gel food coloring added to different portions of the dough, which are stacked and rolled to form a spiral.
2. Can I Use Store-Bought Dough for Pinwheel Cookies?
Yes. Many bakers use pre-made sugar-cookie dough as a shortcut:
- Let the dough soften slightly.
- Divide it, tint with gel food coloring, and roll into thin sheets.
- Stack, roll into a log, chill, then slice and bake.
3. How Do I Keep Pinwheel Cookies from Spreading Too Much?
To minimize spreading:
- Chill dough logs thoroughly before slicing.
- Chill sliced cookies on the baking sheet before baking.
- Make sure you’re not using very warm dough or overly greased pans.
- Measure flour accurately so the dough isn’t too soft. (King Arthur Baking)
4. How Long Do Christmas Pinwheel Cookies Stay Fresh?
Stored in an airtight container at room temperature, Christmas Pinwheel Cookies keep well for several days. They’re at their best in the first few days, which makes them perfect for holiday gatherings and gift giving.
Final Thoughts
Christmas Pinwheel Cookies are the kind of treat that makes people stop and say, “Wow, did you really make these?” The truth is, once you understand how to roll, chill, and slice the dough, they’re pleasantly straightforward—yet the result looks wonderfully impressive.