Introduction
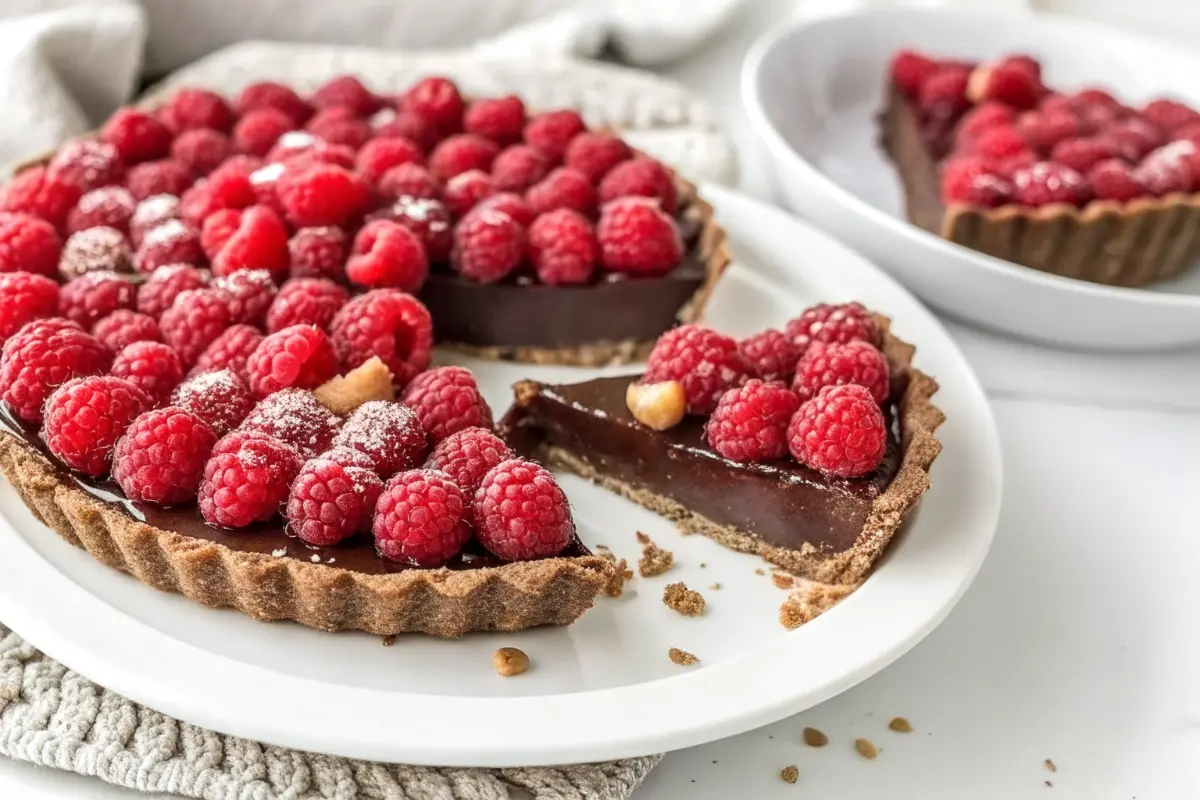
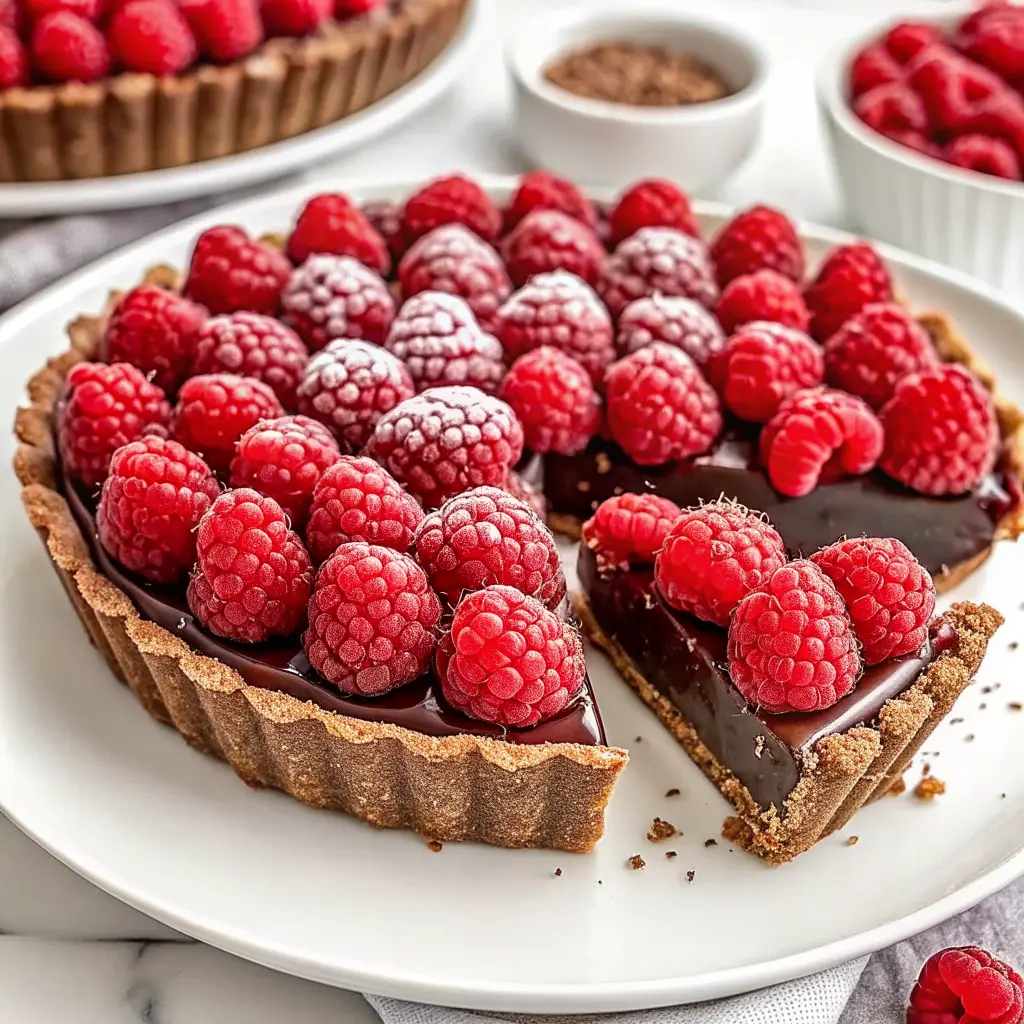
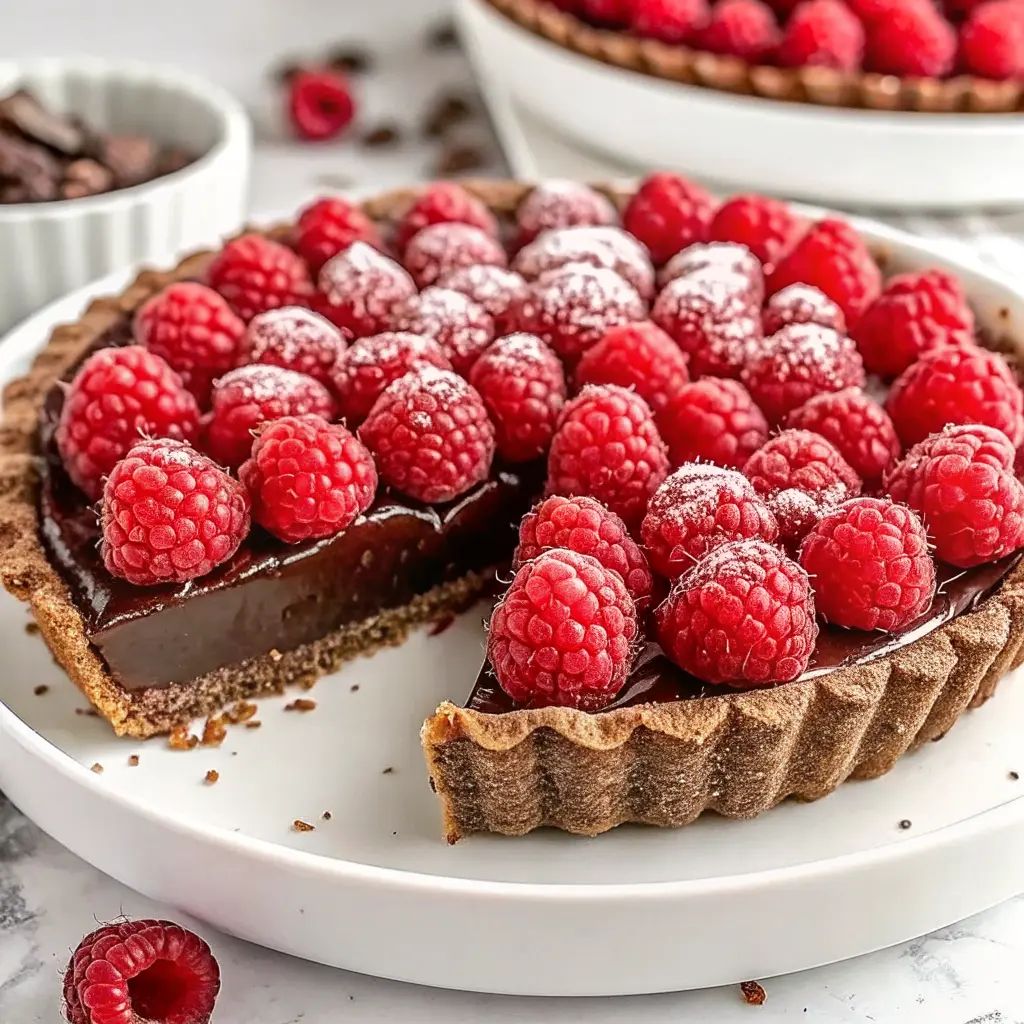
There’s something instantly impressive about a No-Bake Chocolate Raspberry Tart Recipe—the glossy chocolate top, the crisp cookie crust, and that pop of fresh raspberries that makes every slice look bakery-worthy. The best part? You don’t need an oven, fancy techniques, or hours of hands-on time to pull it off. This tart comes together with a simple press-in crust and a smooth chocolate ganache filling that sets up beautifully in the fridge.
Why You’ll Love This No-Bake Chocolate Raspberry Tart
- No oven required — perfect when you want an easy win.
- Elegant but beginner-friendly — the steps are simple and repeatable.
- Make-ahead friendly — chill it, slice it, serve it.
- Big flavor contrast — rich chocolate ganache + bright raspberries + crisp crust.
Ingredients for No-Bake Chocolate Raspberry Tart
For the Chocolate Cookie Crust
- 28–32 chocolate sandwich cookies (about 300–350g), filling included
- 6 tbsp (85g) unsalted butter, melted
- Pinch of salt (optional, but great with chocolate)
Crust notes
- Using sandwich cookies creates a sturdy, sweet, deeply chocolatey base.
- If your crumbs look dry, add 1 extra tablespoon of melted butter.
For the Chocolate Ganache Filling
- 10 oz (280g) good-quality semisweet or bittersweet chocolate, finely chopped
- 1 1/4 cups (300ml) heavy cream
- 1 tsp vanilla extract (optional, but lovely)
- Pinch of salt (optional)
Chocolate tips
- Choose chocolate you genuinely like eating—flavor matters here.
- Finely chopping helps it melt smoothly when the hot cream hits it.
For the Raspberry Topping
- 2–3 cups fresh raspberries (enough to cover the top)
- Optional finishing touches:
- Chocolate shavings or curls
- Cocoa powder dusting
- Flaky salt (tiny pinch)
Tools You’ll Need
- 9-inch tart pan with removable bottom (best for clean slices)
- Food processor (or zip-top bag + rolling pin)
- Small saucepan (or microwave-safe jug for heating cream)
- Heatproof bowl + spatula/whisk
- Measuring cups/spoons
- Offset spatula (helpful for smoothing)
Step-by-Step: How to Make a No-Bake Chocolate Raspberry Tart
Step 1: Make the Cookie Crust
- Crush the cookies into fine crumbs (food processor is easiest).
- Pour crumbs into a bowl and add melted butter.
- Mix until the crumbs look like wet sand and hold together when pressed.
- Press firmly into the tart pan:
- Start with the sides (use fingers to build an even wall)
- Then pack the bottom (use a flat-bottom cup for a tight, smooth base)
- Chill the crust:
- Fridge: 20–30 minutes
- Freezer: 10–15 minutes (quick option)
Crust pro tip
- Pressing firmly is what gives you clean slices later. Don’t rush this part.
Step 2: Make the Chocolate Ganache Filling
This method is simple, but the small details matter.
- Put finely chopped chocolate in a heatproof bowl.
- Heat the heavy cream in a small saucepan until it’s steaming and just beginning to simmer (not boiling).
- Pour hot cream over the chocolate.
- Let it sit 2–3 minutes untouched.
- Stir gently from the center outward until glossy and smooth.
- Stir in vanilla and a pinch of salt if using.
If your ganache looks separated
- Keep stirring slowly—many times it comes back together.
- If needed, warm it very gently (a few seconds at a time) and stir again.
Step 3: Assemble the Tart
- Pour the ganache into the chilled crust.
- Smooth the top with an offset spatula (or the back of a spoon).
- Tap the pan gently on the counter to release air bubbles.
Step 4: Chill Until Set
- Refrigerate 4–6 hours until firm.
- Overnight chill = the easiest, cleanest slicing.
Step 5: Add Raspberries and Decorate
Right before serving (or a few hours before), decorate the top:
- Arrange raspberries in rings, lines, or a loose pile in the center.
- Add chocolate curls or a light cocoa dust if you want extra drama.
How to Get Clean Slices (No Mess, No Smudges)
Use these simple tricks for bakery-style slices:
- Warm a knife under hot water, then wipe it dry.
- Slice in one confident motion.
- Wipe the blade between cuts.
Troubleshooting: Fix Common Tart Problems
“My crust crumbles when I slice.”
- Crumbs were too coarse → process a bit finer next time.
- Not enough butter → add 1 tbsp more melted butter.
- Not pressed firmly → compact more with a flat-bottom cup.
“My ganache didn’t set.”
- It likely needs more time—chill longer.
- Chocolate-to-cream balance may be too soft if the chocolate was low in cocoa or chopped too large.
- Make sure you use heavy cream (not a thinner cream).
“My ganache looks grainy.”
- Chocolate overheated or was disturbed too soon.
- Next time: rest 2–3 minutes before stirring, and stir gently.
Delicious Variations (Same Tart, New Vibes)
Crust Variations
Try any of these press-in crust options:
- Chocolate graham crackers + butter
- Cocoa shortbread cookies + butter
- Digestive biscuits + 1–2 tbsp cocoa powder
- Nutty crust: almond flour + cocoa + coconut oil (press-in style)
Flavor boost ideas
- Add a pinch of espresso powder to the crust crumbs
- Mix in a tablespoon of finely chopped toasted nuts
Filling Variations
Make the center your own:
- Darker chocolate: Use bittersweet for a bolder bite
- Extra glossy finish: add 1 tbsp butter at the end (stir in when smooth)
- Raspberry swirl: drop spoonfuls of raspberry jam on top and gently swirl with a toothpick
- Salted finish: add a tiny pinch of flaky salt on top
Topping Variations
Not just raspberries:
- Strawberries (halved)
- Blackberries
- Mixed berries
- A berry “wreath” border with a chocolate-shaving center
Make-Ahead, Storage, and Freezing
Make-Ahead Tips
- Make the tart 1 day ahead and keep it chilled.
- Add raspberries closer to serving for the freshest look.
How to Store the Tart
- Cover and refrigerate.
- Best enjoyed within 2–3 days for the nicest texture and prettiest topping.
How to Store Raspberries So They Look Great
If your raspberries are delicate, this guide on Simple tips for keeping berries fresh shares practical storage steps like sorting, layering with paper towels, and rinsing only right before using.
Can You Freeze It?
Yes—best results:
- Freeze the tart without fresh raspberries on top.
- Wrap well and freeze up to 1 month.
- Thaw overnight in the fridge.
- Decorate with fresh raspberries after thawing.
FAQs: No-Bake Chocolate Raspberry Tart Recipe
How long does a no-bake chocolate tart need to set?
Most versions need 4–6 hours in the refrigerator to become firm enough for clean slices. Overnight is even better if you want perfect edges.
Can I use frozen raspberries instead of fresh?
You can, but frozen raspberries can release moisture as they thaw. If using frozen:
- Thaw first
- Pat dry gently
- Use them in the center (not edge-to-edge) for the neatest look
Why is my ganache not setting firm?
Common reasons:
- Not chilled long enough
- Chocolate-to-cream ratio too soft
- Used thin cream instead of heavy cream
Chill longer first—often time is the fix.
What chocolate works best for ganache filling?
Semisweet and bittersweet are the most reliable for a rich, balanced filling. Choose chocolate that tastes good on its own.
Can I make this tart ahead of time for a party?
Absolutely. Make it the day before, keep chilled, and decorate closer to serving for the best presentation.
Final Thoughts
This no-bake chocolate raspberry tart recipe is one of those desserts that earns compliments every single time—because it’s glossy, dramatic, and surprisingly simple. If you try it, add your own twist (a swirl, a different crust, extra berries) and make it yours.
Print
Irresistible No-Bake Chocolate Raspberry Tart Recipe
- Total Time: PT3H20M
- Yield: 8 slices 1x
- Diet: Vegetarian
Description
This No-Bake Chocolate Raspberry Tart is an elegant, indulgent dessert featuring a crisp chocolate cookie crust, a silky smooth chocolate ganache filling, and a bright layer of fresh raspberries.
Ingredients
For the Chocolate Crust
- 2 cups chocolate cookie crumbs (Oreos or chocolate graham crackers, filling removed)
- ½ cup unsalted butter, melted
For the Chocolate Ganache Filling
- 1 ½ cups heavy cream
- 10 oz semi-sweet or dark chocolate, finely chopped
- 2 tbsp butter (for extra shine)
- 1 tsp vanilla extract
For the Raspberry Layer
- 2–3 cups fresh raspberries
- Optional: 2 tbsp raspberry jam, warmed (for glaze)
Optional Garnishes
- Powdered sugar
- Chocolate shavings
- Fresh mint leaves
Instructions
1. Make the Crust
- In a bowl, mix chocolate cookie crumbs with melted butter until fully combined.
- Press firmly into the bottom and sides of a 9-inch tart pan.
- Chill in the refrigerator for 20–30 minutes until set.
2. Prepare the Chocolate Ganache
- Heat heavy cream in a saucepan until just beginning to simmer (do not boil).
- Pour hot cream over chopped chocolate and butter in a heatproof bowl.
- Let sit 2 minutes, then stir until smooth and glossy.
- Stir in vanilla extract.
3. Assemble the Tart
- Pour ganache into the chilled crust.
- Smooth the top with a spatula.
- Arrange fresh raspberries evenly on top, gently pressing them into the ganache.
- Brush raspberries with warmed jam for a glossy finish (optional).
4. Chill
- Refrigerate for 3–4 hours, or until fully set.
5. Serve
- Remove from the tart pan carefully.
- Slice with a warm knife for clean cuts.
Notes
- Use high-quality chocolate for the best flavor and texture.
- Swap raspberries for strawberries or mixed berries if desired.
- For a firmer filling, chill overnight.
- Prep Time: PT20M
- Category: Desserts
- Method: No-Bake
- Cuisine: American
Nutrition
- Serving Size: 1 slice
- Calories: 420 kcal
- Sugar: 24g
- Sodium: 190mg
- Fat: 30g
- Saturated Fat: 18g
- Unsaturated Fat: 12g
- Trans Fat: 0g
- Carbohydrates: 38g
- Fiber: 3g
- Protein: 4g
- Cholesterol: 75mg