
Why You’ll Love This Biscoff Icebox Cake
This recipe hits the sweet spot between “effortless” and “wow-worthy.”
- No oven needed (seriously—no baking, no heat waves in your kitchen)
- Make-ahead friendly (it’s even better after an overnight chill)
- Perfect texture: cookies soften into tender layers while the cream stays fluffy
- Crowd-pleaser flavor: that signature caramelized spiced cookie taste shines through
- Customizable: cheesecake-style, coffee-kissed, chocolate-drizzled… you choose
What Is an Icebox Cake?
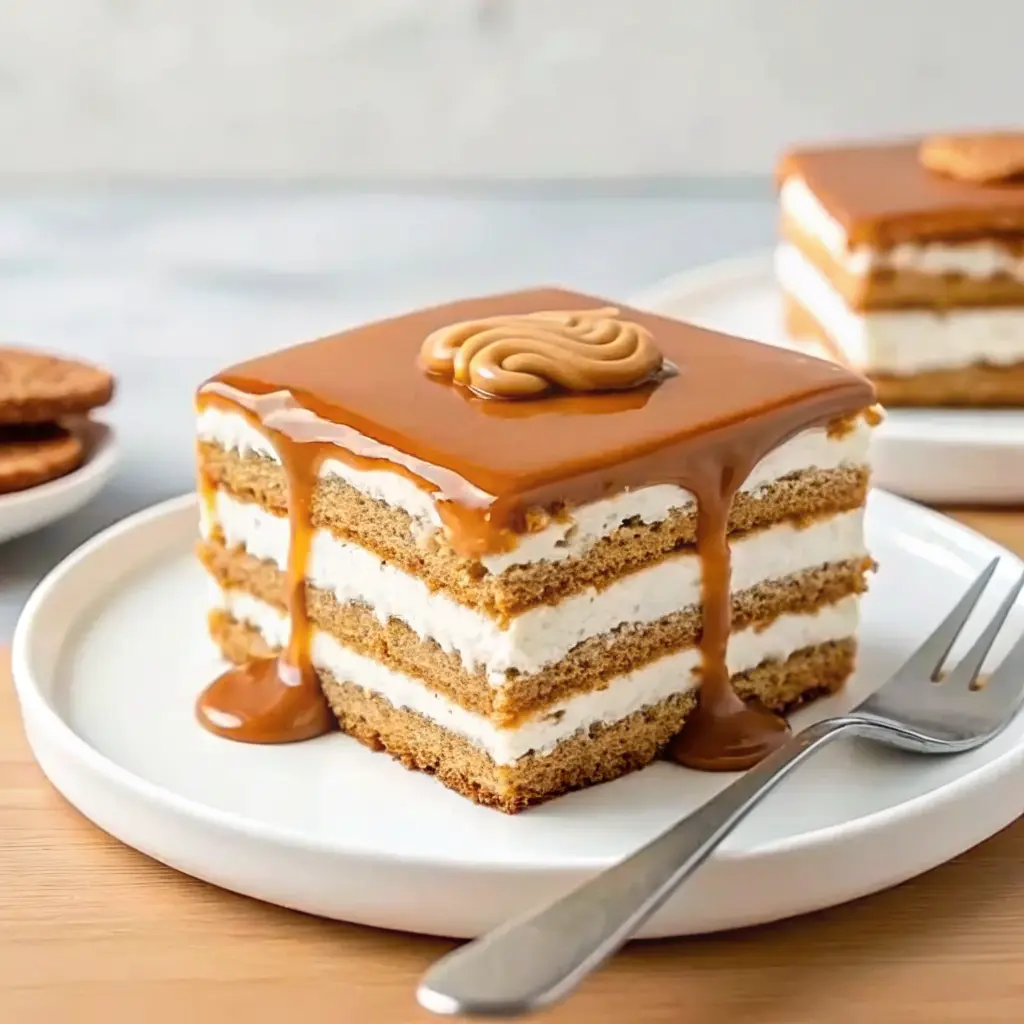
An icebox cake is a layered dessert traditionally made by stacking crisp cookies (or wafers) with a creamy filling, then chilling it long enough that the cookies soften into cake-like layers. The fridge does all the work—time turns crunch into tenderness.
With a Biscoff Icebox Cake, the “cookie” layer is Biscoff biscuits, and the filling is typically a whipped cream mixture enriched with Biscoff spread for that cozy, sweet-spice flavor. why it’s called an icebox cake
Ingredients for Biscoff Icebox Cake
Below are the core ingredients, plus a few optional add-ins that help you make it your own.
Core Ingredients
- Lotus Biscoff cookies (the classic choice for that signature flavor)
- Biscoff spread / cookie butter (smooth works best for mixing)
- Heavy whipping cream (for fluffy, stable volume)
- Powdered sugar (blends smoothly into whipped cream)
- Vanilla extract (brings warmth and balance)
- A pinch of salt (optional, but it makes the flavor pop)
Optional (But Delicious) Add-Ins
Choose one direction (or mix and match carefully):
- Cream cheese (for a cheesecake-style filling)
- Mascarpone (for a richer, silkier cream)
- Sweetened condensed milk (for a shortcut, creamy body)
- Espresso or strong coffee (for a tiramisu-inspired twist)
- Chocolate drizzle (because Biscoff + chocolate is always a good idea)
Best Pan Options (And What They Change)
You can make Biscoff Icebox Cake in several shapes. Pick what fits your vibe:
- Loaf pan (9×5-inch)
- Tall layers, pretty slices, easy to lift out with parchment
- Square pan (8×8 or 9×9)
- Great for neat portions and thicker layers
- 9×13 baking dish
- Best for parties and potlucks (more servings, less fuss)
Pro tip: If you want a clean lift-out “cake,” line your pan with parchment and leave a little overhang.
How to Make Biscoff Icebox Cake (Step-by-Step)
This method is simple: whip, spread, stack, chill. The fridge does the transformation.
Step 1: Prep Your Pan (5 minutes)
- Line your pan with parchment paper (especially for loaf pans).
- Leave overhang on the sides so you can lift it out later.
- Set aside.
Step 2: Whip the Cream Base (5–7 minutes)
In a mixing bowl, add:
- cold heavy whipping cream
- powdered sugar
- vanilla extract
Whip until you reach stiff peaks:
- the cream should hold its shape
- it should look fluffy and smooth (not grainy)
Step 3: Add the Cookie Butter Flavor (2 minutes)
Spoon Biscoff spread into the whipped cream and gently mix until:
- streak-free
- thick but spreadable
Important: Don’t overmix. You want the cream airy, not deflated.
Step 4: Build the Layers (10 minutes)
Now the fun part—assembly.
Layering order:
- Cookies (single layer, snug fit)
- Biscoff cream (spread evenly to edges)
- Repeat until you reach the top
Tips for a tidy build
- Break cookies to fill gaps (like puzzle pieces).
- Use an offset spatula or the back of a spoon for smooth layers.
- Aim for 3–5 layers, depending on pan depth.
Step 5: Finish the Top (5 minutes)
Top with a final layer of cream (not cookies), then add a little flair:
- crushed Biscoff cookie crumbs
- drizzled cookie butter
- piped whipped swirls (optional)
Step 6: Chill Until Sliceable (Minimum 8 hours)
Cover and refrigerate:
- Minimum: 8 hours (good)
- Best: overnight (great)
- Dreamy texture: 12–24 hours (excellent)
That chilling time is when the cookies soften into that cake-like layer.
How to Make a Cheesecake-Style Biscoff Icebox Cake
Want a thicker, tangier filling that cuts like a dream? Add cream cheese.
Cheesecake-Style Filling Method
- Beat softened cream cheese until smooth.
- Add Biscoff spread and mix until combined.
- In a separate bowl, whip the cream to stiff peaks.
- Fold whipped cream into the Biscoff-cream cheese mixture in 2–3 additions.
Why it works:
- cream cheese adds structure
- slices look cleaner
- the flavor feels more “cheesecake-like” without baking
Easy Variations (Pick Your Favorite)
1) Espresso Biscoff Icebox Cake
For a coffeehouse vibe:
- Dip cookies quickly in cooled espresso (a fast dunk—don’t soak)
- Layer as usual
Result: deeper flavor and a slightly darker, more complex finish.
2) Chocolate Drizzle Version
- Drizzle melted chocolate over the top
- Or add a thin chocolate layer between cream layers
Tip: Keep it light—too much chocolate can overpower the cookie butter flavor.
3) Banana Layer Twist
- Add thin banana slices between cookie and cream layers (every other layer works best)
Result: a sweet, creamy, comforting dessert with a classic pairing.
4) Mini Jar Biscoff Icebox Cakes
Make individual servings:
- crumble cookies into jars
- add cream
- repeat layers
- chill
Toppings That Make It Look Bakery-Pretty
Here are topping ideas that photograph beautifully and taste even better:
- Warm cookie butter drizzle
- microwave Biscoff spread for 10–15 seconds until pourable
- Crushed Biscoff crumb “sand”
- sprinkle generously around the edges
- Cookie halves on top
- instant visual cue of the flavor
- Whipped cream rosettes
- simple piping = big impact
- Chocolate curls or shavings
- elegant finish without effort
Serving Tips (Clean Slices, No Mess)
To serve like a pro:
- Chill the cake thoroughly first.
- Lift out (if parchment-lined) and place on a cutting board.
- Use a sharp knife and wipe between slices.
Hot-knife trick (works great):
- Dip the knife in hot water
- wipe dry
- slice
- repeat for clean edges
Serve slices:
- on small dessert plates
- with extra crumbs sprinkled on top
- with coffee or espresso on the side
Make-Ahead and Storage
One of the best parts of Biscoff Icebox Cake is how well it fits into a busy schedule.
Make-Ahead
- Make it the day before you want to serve.
- Overnight chilling improves the texture and makes slicing easier.
Storage (Refrigerator)
- Cover tightly with plastic wrap or a lid.
- Keep chilled until serving.
- For best texture, enjoy within a few days (it’s usually gone long before then).
Freezing (Optional)
Freezing can work, but results vary depending on your filling.
- If you want a firmer slice, freeze for 30–60 minutes before cutting.
- For long freezing, wrap tightly to avoid freezer flavors.
Tip: If you plan to freeze longer, a cream-cheese version often holds shape better.
Troubleshooting: Fixes for Common Icebox Cake Issues
“My filling is runny.”
Possible causes:
- cream wasn’t cold
- under-whipped cream
- overmixed after adding cookie butter
Fix:
- Chill the mixture for 15–20 minutes, then gently re-whip (if needed).
- Next time, stop whipping when you hit stiff peaks and keep everything cold.
“My cake won’t slice cleanly.”
Common reasons:
- not chilled long enough
- layers too thick and soft
Fix:
- Chill longer (overnight is your friend).
- Pop it in the freezer for 30 minutes before slicing.
“My cookies turned too soft.”
This can happen if:
- cookies were dipped too long in coffee
- the cake sat much longer than needed
Fix:
- If dipping, do a quick dunk—no soaking.
- Aim to serve within a reasonable chilling window (overnight to next day is ideal).
“The flavor tastes a little flat.”
Fix it fast:
- add a pinch of salt to the cream
- use vanilla extract
- finish with a cookie butter drizzle and crumbs on top
FAQs About Biscoff Icebox Cake
How long does Biscoff Icebox Cake need to set?
Plan for at least 8 hours, but overnight is best. The longer chill helps the cookies soften perfectly and the layers firm up for slicing.
Can I make Biscoff Icebox Cake ahead of time?
Yes—this is a top-tier make-ahead dessert. Assemble it the day before and keep it chilled until serving.
Do I need cream cheese, or can I use only whipped cream?
You can absolutely use only whipped cream. Cream cheese just adds structure and a cheesecake-like vibe. Both are delicious—choose based on the texture you want.
Can I use whipped topping instead of homemade whipped cream?
Yes. If you’re short on time, whipped topping can work. The texture will be a bit different, but the cake will still set and slice.
Can I use something other than Biscoff cookies?
You can swap in other crisp cookies, but the flavor will change. If you want the signature taste, stick with Lotus Biscoff cookies or another speculoos-style biscuit.
Conclusion
Biscoff Icebox Cake is the kind of dessert that feels fancy but couldn’t be easier—just layer Lotus Biscoff cookies with fluffy cookie butter cream, let the fridge work its magic, and slice into soft, cake-like layers. It’s perfect for make-ahead entertaining, potlucks, holidays, or anytime you want a no-bake treat that looks impressive with minimal effort.
Easy Biscoff Icebox Cake
- Total Time: PT6H00M
- Yield: 12 servings 1x
- Diet: Vegetarian
Description
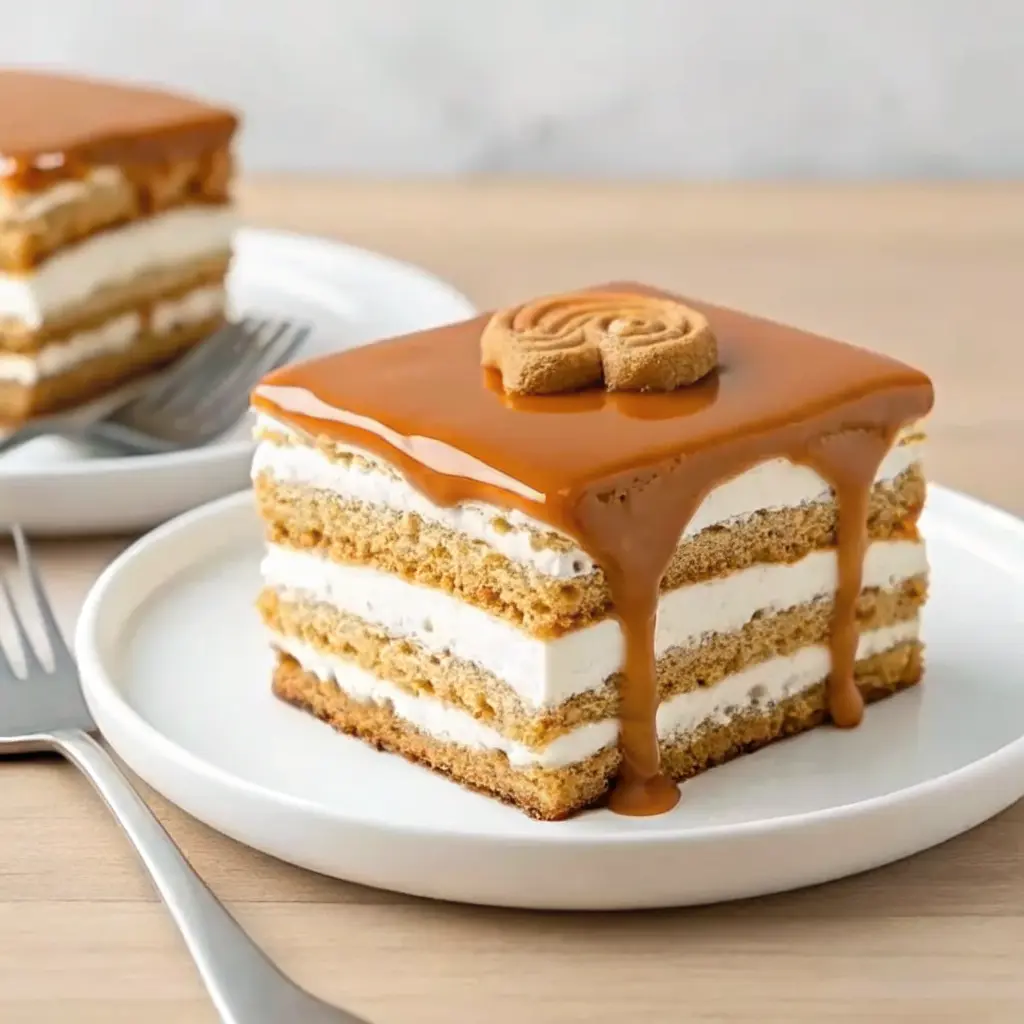
This Biscoff Icebox Cake is a dreamy no-bake dessert layered with spiced Biscoff cookies, fluffy whipped cream, and creamy Biscoff spread. As it chills, the cookies soften into a cake-like texture, creating a rich, indulgent treat with warm caramelized spice in every bite.
Ingredients
For the Cake Layers
- 2 packages (about 8 oz each) Biscoff cookies
- 2 cups heavy whipping cream, cold
- ¼ cup powdered sugar
- 1 tsp vanilla extract
- ¾ cup Biscoff spread (smooth)
Optional Garnishes
- Crushed Biscoff cookies
- Melted Biscoff spread (for drizzle)
- Chocolate shavings
Instructions
1. Make the Whipped Cream
- In a chilled bowl, beat heavy cream until soft peaks form.
- Add powdered sugar and vanilla.
- Beat until medium-stiff peaks form.
2. Prepare the Biscoff Cream
- Gently fold ½ cup Biscoff spread into the whipped cream until swirled and smooth.
- Warm remaining Biscoff spread slightly so it’s drizzle-able.
3. Assemble the Icebox Cake
- Spread a thin layer of whipped cream in the bottom of an 8×8-inch dish.
- Add a single layer of Biscoff cookies.
- Spread a layer of Biscoff cream on top.
- Drizzle lightly with warmed Biscoff spread.
- Repeat layers until ingredients are used, finishing with cream on top.
4. Chill
- Cover and refrigerate at least 6 hours, preferably overnight.
5. Serve
- Garnish with crushed cookies or extra drizzle.
- Slice and serve chilled.
Notes
- Overnight chilling gives the best cake-like texture.
- For extra richness, add a thin layer of mascarpone mixed into the cream.
- Use an offset spatula for clean layers.
- Prep Time: PT20M
- Category: Desserts
- Method: No-Bake
- Cuisine: American
Nutrition
- Serving Size: 1 slice
- Calories: 410kcal
- Sugar: 22g
- Sodium: 210mg
- Fat: 28g
- Saturated Fat: 17g
- Unsaturated Fat: 11g
- Trans Fat: 0g
- Carbohydrates: 36g
- Fiber: 1g
- Protein: 4g
- Cholesterol: 85mg