
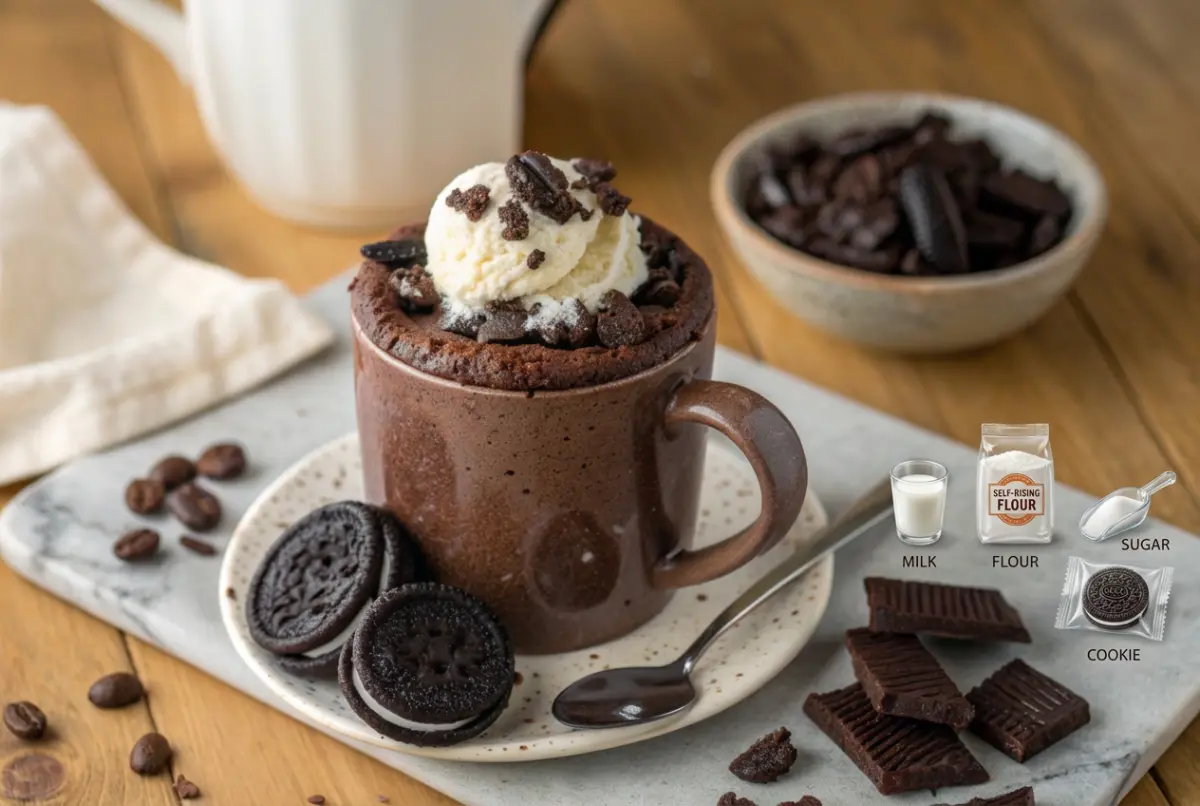
The 4-Ingredient Oreo Mug Cake
Why You’ll Love This 4-Ingredient Oreo Mug Cake
There are plenty of reasons this recipe deserves a spot in your collection of quick desserts.
It uses only four ingredients
The ingredient list is wonderfully short:
- Oreos
- Milk
- All-purpose flour
- Baking powder
That’s it.
You can make the basic cake without adding anything else. Of course, toppings are always welcome, but they are completely optional.
It is incredibly quick
Traditional cakes require mixing bowls, preparation, baking, cooling, and cleanup. This mug cake skips almost all of that.
Once your ingredients are measured, the batter takes only a couple of minutes to prepare. After that, the microwave does the work.
It makes one convenient serving
A mug cake is designed around a single serving, which means you do not need to bake an entire cake when you only want a small dessert.
It’s especially handy for:
- A quick after-dinner treat
- A late-night chocolate craving
- An easy weekend dessert
- A simple recipe for beginners
- A last-minute sweet treat
There is almost no cleanup
Because the batter is mixed directly in the mug, there is no large mixing bowl to wash afterward.
All you need is:
- One microwave-safe mug
- One fork or spoon
- A few measuring spoons
It tastes like cookies and cream
The Oreos are the star of the recipe. Once crushed and mixed with milk, their chocolate cookie flavor spreads throughout the batter.
The result is a warm cake with a familiar cookies-and-cream flavor that pairs beautifully with whipped cream, ice cream, chocolate sauce, or extra crushed Oreos.
What Is an Oreo Mug Cake?
An Oreo mug cake is a small cake prepared in a mug and cooked in the microwave instead of a conventional oven.
The idea became popular because Oreos can be transformed into a quick cake-like dessert with surprisingly little preparation. Some versions use only crushed Oreos and milk, while others add flour or a leavening ingredient to create a more cake-like texture.
This four-ingredient version takes the simple Oreo-and-milk idea and adds all-purpose flour and baking powder. The flour provides additional structure, while the baking powder helps create lift.
The result is different from a traditional layer cake. A mug cake is meant to be quick, warm, and eaten shortly after cooking.
It is also wonderfully customizable.
You can change the Oreo flavor, add chocolate chips, finish it with ice cream, or drizzle the top with chocolate sauce.
Ingredients for the 4-Ingredient Oreo Mug Cake
The simplicity of this recipe starts with four basic ingredients.
1. Oreos
Oreos provide the main flavor, sweetness, and chocolate-cookie character.
For the classic version, use regular Oreo cookies. You can crush them directly in the mug, making this recipe especially convenient.
You can also experiment with different varieties later. Mint, Golden, Peanut Butter, and Birthday Cake Oreos can all create a different flavor profile.
2. Milk
Milk softens the crushed cookies and creates the liquid base for the batter.
Whole milk works especially well, but you can also experiment with other varieties such as:
- 2% milk
- Skim milk
- Almond milk
- Oat milk
- Soy milk
Different milks may slightly change the final texture, so start with the same amount and adjust only if the batter seems unusually thick or thin.
3. All-Purpose Flour
Flour helps give the mug cake structure.
Because this is such a small recipe, accurate measuring matters. Too much flour can produce a heavy, dense cake, while too little may leave the cake lacking structure.
For the best results, measure the flour carefully rather than simply scooping a large amount directly from the flour container.
4. Baking Powder
Baking powder helps the batter rise as it cooks.
It is important not to confuse baking powder with baking soda. Although both are leavening ingredients, they work differently. Baking powder contains both the components needed for its leavening reaction, while baking soda requires an acidic ingredient to activate effectively. King Arthur Baking’s guide to baking powder and baking soda explains the distinction in more detail.
- 4 Oreo cookies
- 3 tablespoons milk
- 2 tablespoons all-purpose flour
- ¼ teaspoon baking powder
Optional Toppings
- Crushed Oreo cookies
- Whipped cream
- Vanilla ice cream
- Chocolate sauce
- Caramel sauce
- Chocolate chips
Equipment You’ll Need
You don’t need any special baking equipment.
Gather:
- 1 microwave-safe mug
- 1 fork or spoon
- Measuring spoons
- Microwave
Choose a mug that gives the cake some room to rise. A mug that is too small can allow the batter to overflow during cooking.
Most importantly, use a mug specifically suitable for microwave use. The FDA recommends microwave-safe cookware and advises following the manufacturer’s instructions for your particular appliance.
How to Make the 4-Ingredient Oreo Mug Cake
Step 1: Add the Oreos to the mug
Place the Oreo cookies directly into your microwave-safe mug.
You can break them into smaller pieces first. This makes them easier to crush and combine with the milk.
Step 2: Add the milk
Pour the milk over the Oreos.
Let the cookies sit in the milk briefly. This gives them a chance to soften.
Step 3: Crush the cookies
Using a fork, mash the Oreos into the milk.
Keep mixing until the cookies are broken down and the mixture resembles a thick chocolate batter.
You don’t necessarily need to create an absolutely smooth mixture. A few tiny cookie pieces can add pleasant texture throughout the cake.
However, avoid leaving several large chunks because they can make the batter cook unevenly.
Step 4: Add the flour
Add the measured all-purpose flour.
Stir gently until it begins to disappear into the Oreo mixture.
Scrape around the bottom and sides of the mug with your fork to make sure there are no pockets of dry flour.
Step 5: Add the baking powder
Add the baking powder and stir again.
Mix just until everything is incorporated.
There is no reason to vigorously beat the batter. Once the ingredients are combined, stop mixing.
Step 6: Check the batter
Before microwaving, look at the consistency.
The batter should be thick but spoonable.
If you notice dry flour around the sides or bottom of the mug, continue stirring gently until it is incorporated.
Step 7: Microwave the mug cake
Place the mug in the microwave.
Start with approximately 1 minute of cooking time.
Because microwaves vary considerably in power, cooking time can vary from one appliance to another.
After the first minute, check the cake.
If the center is still clearly wet, continue cooking in short intervals, such as 10 seconds at a time.
Step 8: Let it rest
Once the top looks mostly set, carefully remove the mug from the microwave.
Let the cake rest for a short time before eating.
Remember that the mug itself can become very hot.
Step 9: Add your favorite toppings
Now comes the fun part.
Try:
- Whipped cream
- Vanilla ice cream
- Crushed Oreos
- Chocolate sauce
- Caramel sauce
- Chocolate chips
- Peanut butter drizzle
- Chocolate shavings
For the ultimate cookies-and-cream presentation, add a small handful of crushed Oreo pieces over the top.
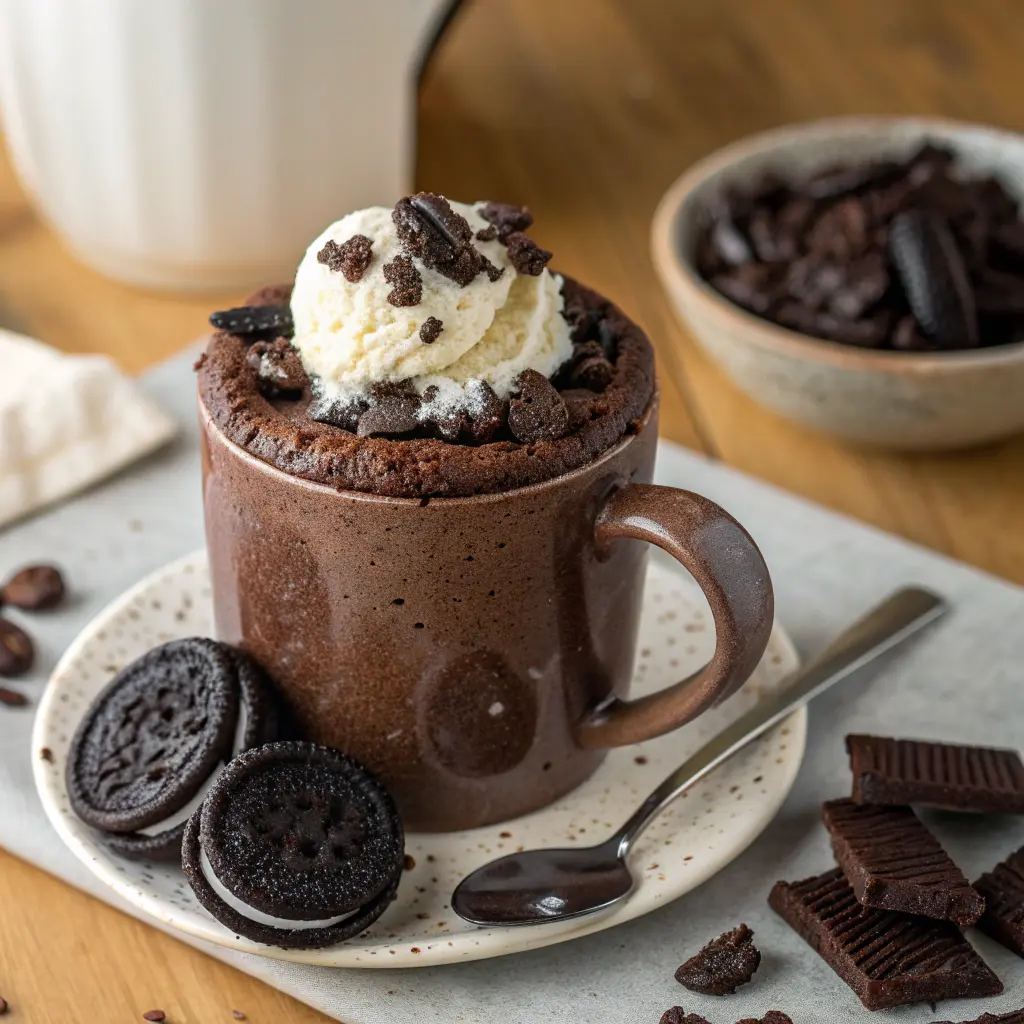
How to Tell When Your Oreo Mug Cake Is Done
Knowing when to stop microwaving is one of the most important parts of making a good mug cake.
You don’t want to leave it in the microwave longer than necessary.
Look for these signs:
- The top should look mostly set.
- The center can remain slightly soft.
- There should not be a pool of liquid batter.
- The cake should have risen somewhat.
- The edges should look cooked rather than wet.
A slightly soft center is fine. In fact, it can make the cake more enjoyable.
Expert Tips for the Best Oreo Mug Cake
A few small details can make a major difference.
Use the right mug
Choose a mug with enough space for the batter to rise.
Avoid filling it nearly to the top.
A little extra room makes the cooking process much easier.
Crush the Oreos well
Large pieces can create an uneven texture.
Use a fork and crush the cookies thoroughly before moving on to the flour and baking powder.
Measure the flour carefully
This is a small recipe, so even a little extra flour can make a noticeable difference.
Level your measuring spoon or cup rather than using a heaping amount.
Don’t overmix
Once the flour and baking powder are incorporated, stop stirring.
Overworking the batter is unnecessary.
Start checking early
Microwave power varies.
One microwave may cook the cake faster than another, so treat the initial cooking time as a starting point rather than an absolute rule.
Use short additional cooking intervals
If the cake needs more time, add it gradually.
Ten seconds can make a noticeable difference in a small cake.
Leave some room at the top
The batter can rise while cooking.
A mug that is too small can lead to an overflow and a messy microwave.
Let it rest briefly
The cake is extremely hot immediately after cooking.
A short rest also gives the texture a chance to settle before you add your toppings.
Why Does My Oreo Mug Cake Turn Out Rubbery?
A rubbery mug cake is one of the most common problems with microwave desserts.
Fortunately, it is usually easy to prevent.
The most common reason is overcooking
Microwaves cook quickly.
Leaving a small mug cake in the microwave for too long can remove too much moisture and produce a firm, chewy texture.
Instead of adding a large amount of extra cooking time, use short intervals.
You may have added too much flour
Flour gives the cake structure, but too much can make the batter heavy.
Measure carefully and avoid packing flour into your measuring cup.
Your batter may have been too dry
Milk helps create the batter and soften the crushed cookies.
If the mixture looks unusually thick before cooking, double-check your measurements.
You may have overmixed
There’s no need to beat the batter for a long time.
Once everything is incorporated, stop.
How to prevent a rubbery mug cake
Keep these simple rules in mind:
- Measure ingredients accurately.
- Don’t add excessive flour.
- Don’t overmix.
- Don’t overcook.
- Check the cake early.
- Use short microwave intervals.
The goal is a cake that is cooked through but still soft.
Fun Oreo Mug Cake Variations
Once you’ve mastered the classic version, it’s easy to create new combinations.
Double Chocolate Oreo Mug Cake
Add a few chocolate chips to the batter before microwaving.
For an extra chocolate finish, add more chocolate chips immediately after cooking.
Mint Oreo Mug Cake
Use Mint Oreos instead of classic Oreos.
Top with whipped cream and a few crushed mint cookies.
Peanut Butter Oreo Mug Cake
Add a small spoonful of peanut butter to the finished cake.
You can also drizzle melted peanut butter over the top.
Golden Oreo Mug Cake
Swap regular Oreos for Golden Oreos.
Finish with vanilla ice cream and crushed Golden Oreos.
Birthday Cake Oreo Mug Cake
Use Birthday Cake Oreos and add colorful sprinkles on top.
This version is particularly fun for celebrations.
Extra-Chocolate Version
Add chocolate chips to the batter and finish the mug cake with chocolate sauce.
For an impressive presentation, add a scoop of vanilla ice cream while the cake is still warm.
Best Toppings for an Oreo Mug Cake
A warm Oreo mug cake is delicious on its own, but toppings can turn it into a more exciting dessert.
Here are some favorites:
- Vanilla ice cream
- Whipped cream
- Crushed Oreos
- Chocolate sauce
- Caramel sauce
- Chocolate chips
- White chocolate chips
- Chocolate shavings
- Peanut butter drizzle
- Sprinkles
My favorite combination
For a classic cookies-and-cream dessert, try:
Warm Oreo mug cake + vanilla ice cream + crushed Oreos + chocolate drizzle.
The contrast between the warm cake and cool ice cream makes every bite especially enjoyable.
What to Serve With an Oreo Mug Cake
Because this dessert is rich and chocolatey, simple pairings work beautifully.
Try serving your mug cake with:
- A cold glass of milk
- Vanilla ice cream
- Whipped cream
- Coffee
- Hot chocolate
- Fresh berries
For a casual dessert night, simply serve the cake directly in the mug with a spoon.
For a more polished presentation, add ice cream, crushed Oreos, and chocolate sauce.
How to Store an Oreo Mug Cake
Mug cakes are designed to be eaten fresh.
The texture is usually best shortly after cooking, while the cake is still warm and soft.
If you have leftovers
If you don’t finish the mug cake, cover it and refrigerate it for short-term storage.
When you’re ready to eat it again, reheat it gently.
Use short microwave intervals rather than reheating it for a long period.
Can you freeze it?
You can experiment with freezing a mug cake, but there is usually little reason to do so.
The main advantage of this recipe is that it takes only a few minutes to prepare.
For the best texture and easiest experience, make a fresh mug cake whenever you want one.
Frequently Asked Questions About the 4-Ingredient Oreo Mug Cake
Can I make an Oreo mug cake with only 4 ingredients?
Yes. This recipe uses four core ingredients: Oreos, milk, all-purpose flour, and baking powder.
Optional toppings such as ice cream or chocolate sauce are not part of the four-ingredient base.
How long do you microwave an Oreo mug cake?
Start with approximately 1 minute.
The exact time depends on your microwave, so check the cake after the initial cooking time. If it needs more time, continue in short intervals.
Why is my Oreo mug cake rubbery?
The most common reason is overcooking.
Microwaves can cook small cakes very quickly. Too much cooking time can make the cake firm and chewy.
Too much flour or excessive mixing can also contribute to a dense texture.
Can I make an Oreo mug cake without baking powder?
You can, but the texture will generally be denser.
Baking powder is included to help the cake rise and create a lighter crumb. Baking powder and baking soda are not interchangeable without adjusting the rest of the recipe.
Can I use almond milk in an Oreo mug cake?
Yes.
Almond milk can be used as an alternative to regular milk. Oat milk and soy milk are also options to experiment with.
Conclusion
The 4-Ingredient Oreo Mug Cake is the perfect solution when you want a quick, easy, and delicious dessert without making an entire cake. With just Oreos, milk, all-purpose flour, and baking powder, you can create a warm cookies-and-cream treat in just a few minutes.
Print
The 4-Ingredient Oreo Mug Cake – Easy, Quick & Delicious
- Total Time: PT03M
- Yield: 1 mug cake 1x
Description
This 4-Ingredient Oreo Mug Cake is a quick and easy microwave dessert made with Oreos, milk, all-purpose flour, and baking powder. Ready in just a few minutes, this soft and chocolatey cookies-and-cream mug cake is perfect for a simple single-serving treat.
Ingredients
- 4 Oreo cookies
- 3 tablespoons milk
- 2 tablespoons all-purpose flour
- ¼ teaspoon baking powder
Optional Toppings
- Crushed Oreo cookies
- Whipped cream
- Vanilla ice cream
- Chocolate sauce
- Caramel sauce
- Chocolate chips
Instructions
Step 1: Add the Oreos to the mug
Place the Oreo cookies directly into your microwave-safe mug.
You can break them into smaller pieces first. This makes them easier to crush and combine with the milk.
Step 2: Add the milk
Pour the milk over the Oreos.
Let the cookies sit in the milk briefly. This gives them a chance to soften.
Step 3: Crush the cookies
Using a fork, mash the Oreos into the milk.
Keep mixing until the cookies are broken down and the mixture resembles a thick chocolate batter.
You don’t necessarily need to create an absolutely smooth mixture. A few tiny cookie pieces can add pleasant texture throughout the cake.
However, avoid leaving several large chunks because they can make the batter cook unevenly.
Step 4: Add the flour
Add the measured all-purpose flour.
Stir gently until it begins to disappear into the Oreo mixture.
Scrape around the bottom and sides of the mug with your fork to make sure there are no pockets of dry flour.
Step 5: Add the baking powder
Add the baking powder and stir again.
Mix just until everything is incorporated.
There is no reason to vigorously beat the batter. Once the ingredients are combined, stop mixing.
Step 6: Check the batter
Before microwaving, look at the consistency.
The batter should be thick but spoonable.
If you notice dry flour around the sides or bottom of the mug, continue stirring gently until it is incorporated.
Step 7: Microwave the mug cake
Place the mug in the microwave.
Start with approximately 1 minute of cooking time.
Because microwaves vary considerably in power, cooking time can vary from one appliance to another.
After the first minute, check the cake.
If the center is still clearly wet, continue cooking in short intervals, such as 10 seconds at a time.
Step 8: Let it rest
Once the top looks mostly set, carefully remove the mug from the microwave.
Let the cake rest for a short time before eating.
Remember that the mug itself can become very hot.
Step 9: Add your favorite toppings
Now comes the fun part.
Try:
- Whipped cream
- Vanilla ice cream
- Crushed Oreos
- Chocolate sauce
- Caramel sauce
- Chocolate chips
- Peanut butter drizzle
- Chocolate shavings
- Prep Time: PT02M
- Cook Time: PT01M
- Category: Dessert
- Method: Microwave
- Cuisine: American
Nutrition
- Serving Size: 1 mug cake
- Calories: 320 Kcal
- Sugar: 22 g
- Sodium: 250 mg
- Fat: 12 g
- Saturated Fat: 5 g
- Unsaturated Fat: 6 g
- Trans Fat: 0 g
- Carbohydrates: 48 g
- Fiber: 2 g
- Protein: 5 g
- Cholesterol: 5 mg