
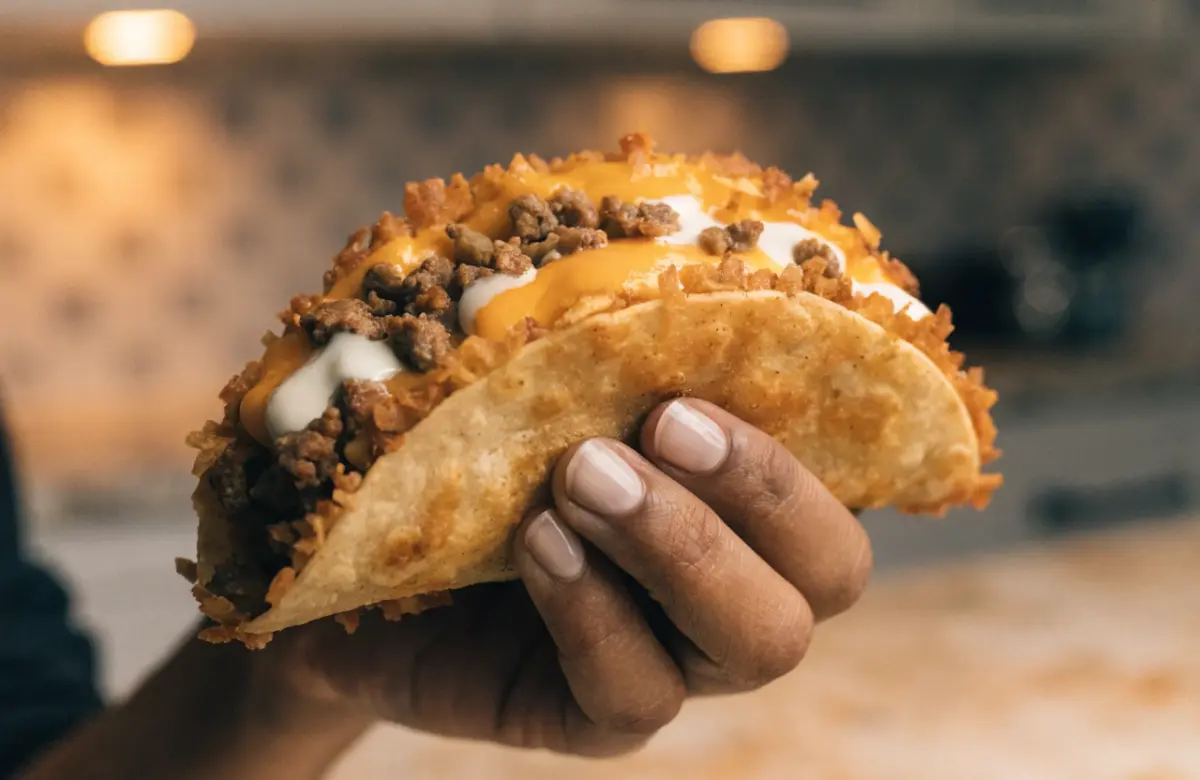
What Is a Homemade Cheesy Gordita Crunch Taco?
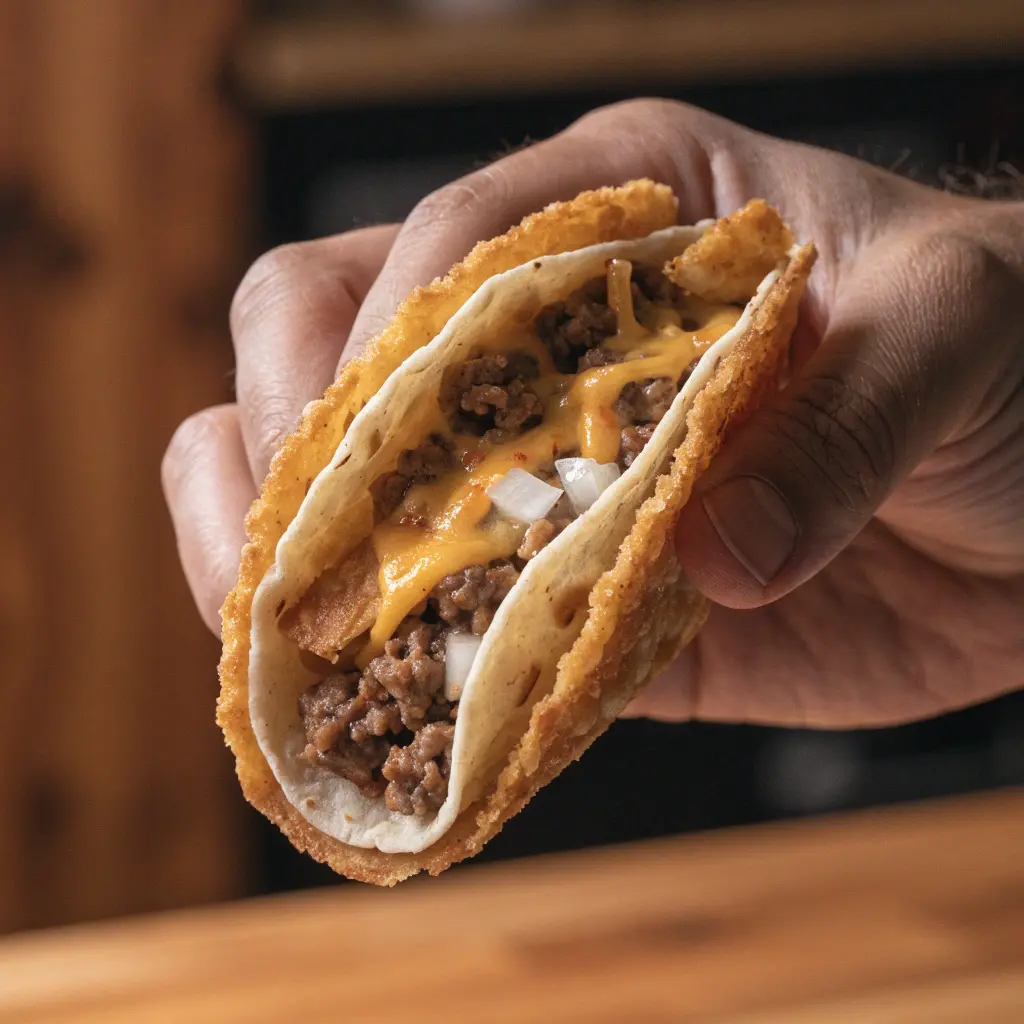
A Cheesy Gordita Crunch is essentially a taco with two shells working together. A soft flour tortilla forms the outside, while a crisp corn taco shell sits inside. Melted cheese goes between the two layers, creating a delicious barrier that helps connect them.
The traditional filling is usually seasoned ground beef, followed by lettuce, shredded cheese, tomatoes, and a creamy or spicy sauce. The result is a taco that delivers several textures in every bite.
You get:
- A soft flour tortilla on the outside
- A layer of melted cheese
- A crispy hard taco shell
- Juicy, seasoned taco meat
- Cool, crunchy lettuce
- Fresh tomatoes
- Shredded cheese
- Creamy spicy sauce
The appeal is really about contrast. A regular crunchy taco gives you a crisp shell from the first bite to the last. A soft taco gives you a tender tortilla. A cheesy gordita crunch taco combines both experiences.
Why You’ll Love This Homemade Cheesy Gordita Crunch
There are plenty of reasons to make this taco at home instead of settling for a basic taco night.
- Crispy and soft at the same time
- Loaded with melted cheese
- Easy to customize
- Great for family taco night
- Simple ingredients
- Easy to make in batches
- Works with beef, chicken, turkey, beans, or plant-based fillings
- The sauce can be made mild or spicy
- You can prepare several components ahead
- Perfect for Taco Tuesday
The biggest advantage of making it yourself is control. You can use extra cheese, add more jalapeños, make the sauce hotter, or pile on fresh toppings. You can also make smaller tacos for kids or larger ones when you’re especially hungry.
Ingredients for Homemade Cheesy Gordita Crunch
The ingredient list is straightforward, but each component has a specific job. The flour tortilla provides the soft exterior, the cheese helps connect the two shells, and the crunchy taco shell gives the taco its signature texture.
For the Seasoned Taco Beef
You’ll need:
- 1 pound ground beef
- 1 packet taco seasoning or homemade taco seasoning
- 1/3 cup water
- Salt, if needed
- Black pepper, if desired
For a richer taco filling, choose ground beef with enough fat to keep the meat juicy. Very lean beef can work, but it may need a little extra moisture during cooking.
For the Cheesy Tortilla Layer
Use:
- 8 small flour tortillas
- 1 1/2 to 2 cups shredded cheddar cheese or Mexican cheese blend
Freshly shredded cheese works especially well because it melts smoothly and can help create the layer that holds the soft tortilla and crunchy shell together.
Cheddar gives you a familiar taco flavor, while Monterey Jack melts beautifully. A Mexican cheese blend is convenient and gives you a combination of flavor and meltability.
For the Crunchy Taco Shell
You’ll need:
- 8 hard corn taco shells
Choose sturdy shells rather than extremely thin ones. The shell needs to support the filling while remaining crunchy.
For the Toppings
Prepare:
- 2 cups finely shredded iceberg lettuce
- 1 cup shredded cheddar cheese
- 1 medium tomato, diced
- Sour cream
- Sliced jalapeños
- Fresh cilantro, optional
- Hot sauce, optional
You don’t need to use every topping. The basic combination of lettuce, cheese, and tomato already works beautifully.
For the Spicy Ranch Sauce
For a quick homemade sauce, combine:
- 1/2 cup ranch dressing
- 1/3 cup sour cream
- 1 teaspoon ranch seasoning
- 1 to 2 teaspoons hot sauce
- 1/4 teaspoon garlic powder
- A pinch of cayenne pepper, optional
Mix everything until smooth. Taste and adjust the hot sauce before assembling the tacos.
Ingredient Substitutions and Variations
One reason this homemade cheesy gordita crunch recipe works so well is that almost every layer can be customized.
Ground Beef Substitutions
Instead of ground beef, try:
- Ground chicken
- Ground turkey
- Shredded chicken
- Black beans
- Refried beans
- Seasoned lentils
- Plant-based ground meat
Ground beef gives the taco the classic savory flavor, but chicken creates a lighter-tasting version while beans make an excellent meatless alternative.
Tortilla Substitutions
If you don’t have small flour tortillas, you can experiment with:
- Small flatbreads
- Pita-style flatbreads
- Whole-wheat tortillas
- Gluten-free flour tortillas
The important thing is that the tortilla should be flexible enough to fold around the crunchy taco shell.
Cheese Substitutions
Good choices include:
- Cheddar
- Monterey Jack
- Pepper Jack
- Colby Jack
- Mexican cheese blend
For extra flavor, use pepper Jack. For a classic result, cheddar or a Mexican blend is an easy choice.
Sauce Variations
You can also change the sauce completely.
Try:
- Spicy ranch
- Chipotle crema
- Taco sauce
- Salsa
- Sour cream mixed with hot sauce
- Jalapeño ranch
- Avocado crema
How to Make Homemade Cheesy Gordita Crunch Taco
The recipe comes together in several simple stages. The key is to prepare the taco meat and toppings first so the shells can be assembled quickly while the cheese is still warm and melted.
Step 1: Cook the Seasoned Ground Beef
Start by heating a large skillet over medium heat. Add the ground beef and break it apart with a wooden spoon or spatula.
Cook until the beef is browned and broken into small pieces. Stir frequently so you get evenly sized crumbles rather than large chunks.
Once the beef is cooked, drain excess grease if necessary.
Add the taco seasoning and water. Stir thoroughly and allow the mixture to simmer for several minutes.
The finished taco meat should be:
- Well seasoned
- Moist
- Fine and crumbly
- Easy to spoon into the taco shells
Avoid cooking the meat until it becomes dry and crumbly like breadcrumbs. A little moisture makes the final taco much more enjoyable.
Step 2: Make the Spicy Ranch Sauce
While the beef is simmering, make the sauce.
Add the ranch dressing, sour cream, ranch seasoning, hot sauce, and garlic powder to a small bowl.
Whisk until completely smooth.
Taste the sauce and adjust it according to your preference.
For a milder sauce, use less hot sauce. For a more intense version, add extra hot sauce and a small pinch of cayenne.
Place the sauce in the refrigerator while you prepare the rest of the ingredients.
Step 3: Prepare the Toppings
Shred the lettuce as finely as possible.
Dice the tomato into small pieces so that each bite gets a little tomato without making the taco difficult to eat.
Place the shredded cheese, lettuce, tomatoes, jalapeños, and sauce into separate bowls.
This simple preparation step makes assembly much easier.
Step 4: Warm the Crunchy Taco Shells
Warm the hard taco shells according to the package directions.
You don’t want them cold when you assemble the taco. A warm shell is easier to work with and gives you a better final texture.
Be careful not to overheat them. The goal is simply to warm and crisp them, not brown them excessively.
Step 5: Add Cheese to the Flour Tortillas
Lay the flour tortillas flat on a baking sheet.
Sprinkle a layer of shredded cheese across the center of each tortilla.
Don’t cover the entire tortilla with cheese. Focus on the area where the hard shell will sit.
Place the tortillas in a preheated oven for a few minutes, just until the cheese is melted.
You can also use an air fryer for this step if you prefer.
The cheese should be fully melted and slightly stretchy.
Step 6: Add the Crunchy Taco Shell
This is the most important part of the recipe.
Take one warm, cheese-covered flour tortilla and place a crunchy taco shell in the center.
Gently fold the flour tortilla around the outside of the hard shell.
The melted cheese should connect the two layers.
Don’t squeeze too hard. The crunchy shell can crack if you press aggressively.
Instead, gently shape the soft tortilla around the shell until it stays in place.
The final structure should look like a regular hard-shell taco wrapped in a soft tortilla.
Step 7: Fill the Taco With Seasoned Beef
Once the shells are connected, spoon the warm taco meat into the crunchy shell.
Use enough meat to create a substantial filling, but don’t pack it so tightly that the shell cracks.
A good starting point is approximately 2 to 3 tablespoons of meat per taco.
Spread the meat evenly from one end of the shell to the other.
Step 8: Add the Spicy Ranch
Drizzle the spicy ranch over the beef.
You can add a thin layer directly over the meat or squeeze a little sauce down the center of the taco.
Don’t add too much sauce at once. Excess moisture can soften the crunchy shell.
Step 9: Add Lettuce, Cheese, and Tomatoes
Finish each taco with:
- Shredded lettuce
- Extra shredded cheese
- Diced tomatoes
- Jalapeños, if desired
- Cilantro, if desired
Add another small drizzle of sauce if you like.
Serve the tacos immediately.
How to Make Cheesy Gordita Crunch in the Air Fryer
The air fryer is an excellent option when you’re making a smaller batch.
Preheat the air fryer according to your appliance’s instructions.
Place the flour tortillas in the basket and add shredded cheese to the center of each one. Heat until the cheese is melted.
Remove the tortillas carefully and place the warm crunchy taco shells in the center.
Fold the soft tortillas around the shells and allow them to set briefly.
You can then add the seasoned beef and toppings.
Air Fryer Tips
- Don’t overcrowd the basket.
- Keep an eye on the cheese because it can brown quickly.
- Use tortillas that fit comfortably inside the basket.
- Warm the taco shells separately if needed.
- Assemble the tacos as soon as the cheese melts.
- Serve immediately for the best crunch.
The air fryer is also useful for reheating the taco components, although freshly assembled tacos will always have the best texture.
How to Make Cheesy Gordita Crunch in the Oven
The oven is ideal when you’re making several tacos at once.
Preheat the oven and arrange the flour tortillas on a baking sheet.
Sprinkle cheese over the center of each tortilla.
Bake briefly until the cheese melts.
Remove the tortillas and immediately place the crunchy taco shells in the center.
Fold the tortillas around the shells while everything is still warm.
Once the shells are assembled, fill them with taco meat and toppings.
The oven method is especially convenient for family dinners because you can melt several tortillas simultaneously.
Homemade Cheesy Gordita Crunch Variations
Chicken Cheesy Gordita Crunch
Replace the ground beef with shredded or seasoned ground chicken.
Add taco seasoning, garlic, cumin, and a little chili powder for a flavorful filling.
Turkey Cheesy Gordita Crunch
Ground turkey works especially well when seasoned generously.
Cook it with taco seasoning and a little water so the filling stays moist.
Vegetarian Cheesy Gordita Crunch
For a meatless version, replace the beef with seasoned black beans or refried beans.
You can also use:
- Pinto beans
- Lentils
- Plant-based ground meat
- Seasoned mushrooms
- Roasted vegetables
Spicy Cheesy Gordita Crunch
If you enjoy heat, add:
- Jalapeños
- Cayenne pepper
- Chipotle powder
- Hot sauce
- Pepper Jack cheese
- Spicy salsa
You can increase the heat gradually instead of making the entire batch extremely spicy.
Loaded Cheesy Gordita Crunch
For a bigger taco, add:
- Guacamole
- Pico de gallo
- Avocado
- Extra cheese
- Pickled jalapeños
- Diced onions
- Cilantro
Just remember that additional wet toppings can soften the crunchy shell.
What to Serve With Cheesy Gordita Crunch Tacos
These tacos work well as the centerpiece of a larger taco-night spread.
Mexican-Inspired Side Dishes
Try serving them with:
- Mexican rice
- Refried beans
- Black beans
- Street corn
- Corn salad
- Tortilla chips
- Salsa
- Guacamole
Fresh Toppings and Sides
A fresh pico de gallo adds acidity and brightness.
Guacamole brings creamy texture, while salsa gives the meal another layer of spice.
You can also put all the toppings on the table and let everyone build their own tacos.
Drinks
For a complete taco-night menu, serve the tacos with:
- Limeade
- Agua fresca
- Iced tea
- Sparkling water with lime
- Fresh fruit drinks
How to Store Leftover Cheesy Gordita Crunch
Fully assembled tacos don’t store particularly well because the crunchy shells gradually absorb moisture.
Whenever possible, store the components separately.
Place cooked taco meat in an airtight container.
Keep lettuce and tomatoes in separate containers so they remain fresh and crisp.
Store the sauce separately as well.
The hard taco shells should remain sealed at room temperature according to their package instructions.
Cooked beef can generally be refrigerated for 3 to 4 days when stored properly.
For the best result, reassemble the tacos only when you’re ready to eat them.
Frequently Asked Questions
What Is a Cheesy Gordita Crunch Made Of?
A Cheesy Gordita Crunch is made with a soft flour tortilla, melted cheese, a crunchy corn taco shell, seasoned taco meat, lettuce, shredded cheese, tomatoes, and a creamy sauce. The two-shell construction is what gives the taco its signature texture.
What Is the Difference Between a Gordita and a Cheesy Gordita Crunch?
The main difference is the crunchy taco shell inside the soft outer tortilla.
A traditional gordita-style preparation centers around a thick, soft tortilla. The cheesy crunch version adds a hard taco shell and melted cheese, giving you both soft and crispy textures in the same taco.
Can I Make a Cheesy Gordita Crunch Without Beef?
Absolutely.
You can replace the ground beef with:
- Ground chicken
- Ground turkey
- Shredded chicken
- Black beans
- Refried beans
- Lentils
- Plant-based meat
Season the replacement filling generously so it has enough flavor to stand up to the cheese, sauce, and toppings.
What Kind of Cheese Is Best for a Cheesy Gordita Crunch?
Cheddar, Monterey Jack, Pepper Jack, and Mexican cheese blends all work well.
Cheddar gives the taco a classic flavor, while Monterey Jack melts smoothly. Pepper Jack is excellent if you want additional spice.
What Sauce Goes on a Cheesy Gordita Crunch?
A creamy spicy ranch-style sauce is an excellent homemade option.
Combine ranch dressing with sour cream, ranch seasoning, and hot sauce. You can also add garlic powder or cayenne.
Conclusion
Making a Homemade Cheesy Gordita Crunch Taco at home is a simple way to turn everyday taco ingredients into a fun, crave-worthy meal. The combination of a soft flour tortilla, melted cheese, crispy taco shell, seasoned beef, fresh lettuce, tomatoes, and creamy spicy ranch creates the perfect mix of textures and flavors.