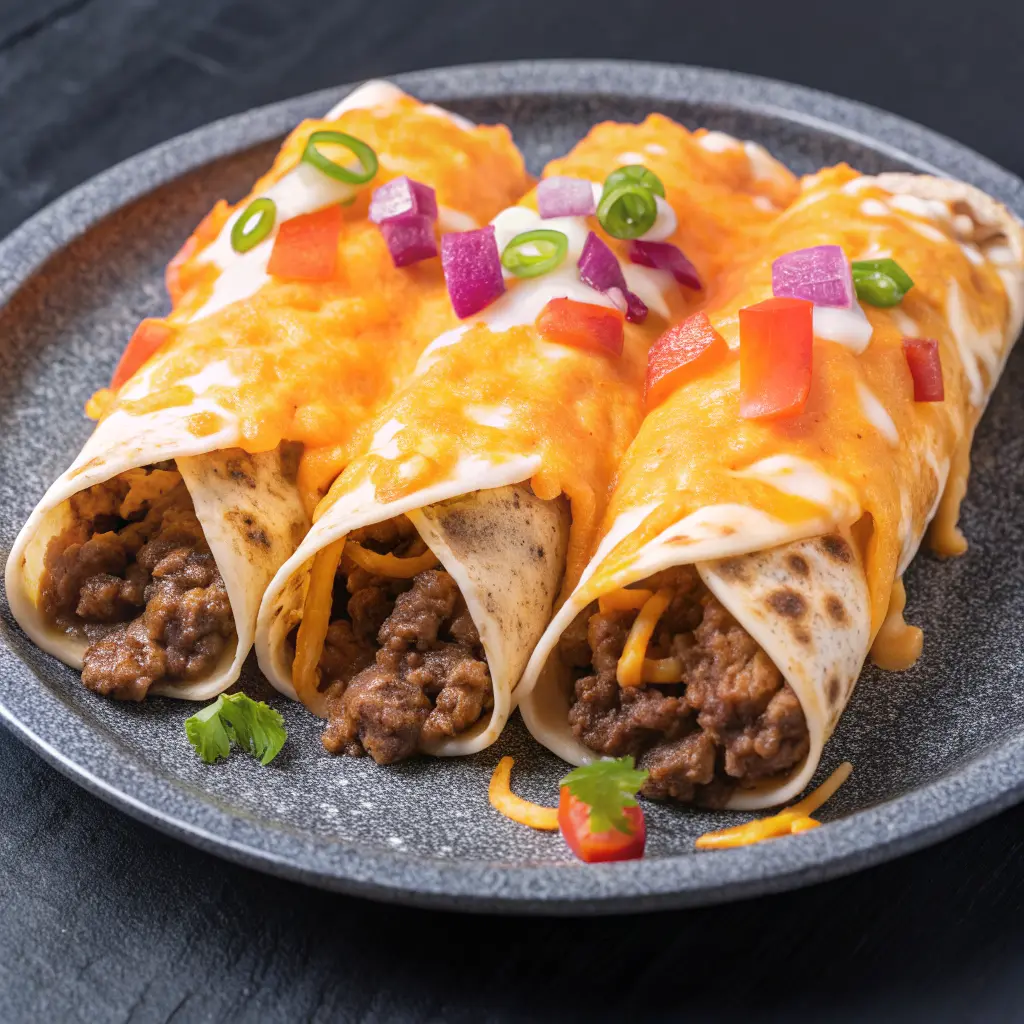
If you’re craving something warm, satisfying, and packed with bold flavor, Cheesy Beef Stuffed Tortilla Wraps are the perfect solution. This crowd-pleasing dish combines seasoned ground beef, melted cheese, and soft flour tortillas that are folded tightly and toasted until golden and crispy. The result is a handheld meal with a crunchy exterior and a rich, cheesy center that delivers comfort in every bite.
The Essential Ingredients for Perfect Cheesy Beef Stuffed Tortilla Wraps
To create restaurant-quality wraps at home, understanding each ingredient is crucial.
1. Ground Beef
The heart of the recipe is flavorful ground beef.
- 80/20 ground beef offers the best balance of flavor and moisture
- Leaner blends work well if drained properly
- Browning technique affects taste and texture
Pro Tip:
Cook the beef in a wide skillet to allow moisture to evaporate quickly. This helps concentrate flavor and prevents soggy wraps.
Seasoning Suggestions
For bold Tex-Mex flavor, use:
- Chili powder
- Cumin
- Garlic powder
- Smoked paprika
- Onion powder
- Salt and black pepper
You can also add:
- Finely diced onions
- Minced garlic
- Tomato paste for depth
2. Cheese – The Melt Factor
Cheese is what transforms a basic beef wrap into a cheesy masterpiece.
Best melting options:
- Sharp cheddar
- Monterey Jack
- Mexican cheese blend
- Pepper Jack for heat
For maximum melt:
- Grate your own cheese
- Avoid pre-shredded varieties with anti-caking agents
- Layer cheese both under and over the beef
The goal is that signature pull-apart stretch when you slice into your cheesy beef tortilla wrap.
3. Tortillas – The Structural Foundation
Flour tortillas are ideal for stuffed tortilla wraps because they:
- Fold easily without cracking
- Crisp beautifully in a skillet
- Hold heavy fillings
Look for:
- 8–10 inch large flour tortillas
- Fresh, pliable texture
- No dryness or cracking
Warming Tip:
Heat tortillas for 10–15 seconds in a dry skillet or microwave wrapped in a damp paper towel. This makes folding easier and prevents tearing.
Step-by-Step Guide to Making Cheesy Beef Stuffed Tortilla Wraps
Step 1: Brown the Beef Properly
- Heat a skillet over medium-high heat
- Add ground beef
- Break into crumbles
- Cook until no pink remains
- Drain excess grease
- Add seasoning and stir
Cook until:
- Moisture evaporates
- Beef becomes slightly caramelized
- Spices bloom and release aroma
This step is critical for deep flavor.
Step 2: Prepare the Wrap Station
Lay out:
- Warm tortillas
- Cooked seasoned beef
- Shredded cheese
- Optional add-ins
Optional additions:
- Diced tomatoes
- Jalapeños
- Sautéed peppers
- Black beans
- Sour cream
Keep fillings controlled — overstuffing leads to tearing.
Step 3: Assemble the Beef and Cheese Wraps
For proper folding:
- Place tortilla flat
- Add beef slightly below center
- Sprinkle generous cheese
- Fold bottom upward
- Fold sides inward
- Roll tightly
The wrap should feel secure and compact.
Step 4: Toast for Crispy Perfection
Heat a skillet with a small amount of oil.
- Place wrap seam-side down
- Cook 2–3 minutes per side
- Press gently with spatula
- Cook until golden brown
The exterior should be:
- Crisp
- Lightly blistered
- Firm but not hard
Slice diagonally for presentation.
Flavor Variations to Elevate Your Cheesy Beef Stuffed Tortilla Wraps
One of the best things about this recipe is versatility.
Spicy Version
- Add hot sauce to beef
- Use Pepper Jack cheese
- Include diced jalapeños
Smoky Southwest Version
- Add smoked paprika
- Mix in roasted corn
- Include chipotle seasoning
Loaded Fiesta Wrap
- Add seasoned rice
- Include black beans
- Top with fresh salsa
Creamy Version
- Mix cream cheese into beef
- Add queso sauce
- Finish with cilantro
Each variation keeps the base concept intact while offering unique twists.
Make-Ahead and Storage Tips
Cheesy beef tortilla wraps are ideal for meal prep.
Refrigeration
- Store assembled wraps in airtight container
- Keep up to 3 days
- Reheat in skillet for best texture
Freezing
- Wrap individually in foil
- Store in freezer-safe bag
- Freeze up to 2–3 months
To reheat:
- Bake from frozen at 375°F
- Or air fry until heated through
Avoid microwaving if you want crispy texture.
Serving Ideas for Cheesy Beef Stuffed Tortilla Wraps
Turn your wraps into a complete meal with these serving ideas:
- Mexican-style rice
- Refried beans
- Guacamole
- Pico de gallo
- Fresh salad
- Tortilla chips and salsa
For gatherings:
- Slice wraps into pinwheels
- Serve with dipping sauces
- Offer multiple flavor variations
They also pair well with casual weeknight dinners or party platters.
Common Mistakes to Avoid
Even simple recipes can go wrong. Avoid these pitfalls:
- Not draining beef properly
- Using cold tortillas
- Overfilling wraps
- Skipping the toasting step
- Using low-quality cheese
Frequently Asked Questions About Cheesy Beef Stuffed Tortilla Wraps
Can I freeze cheesy beef stuffed tortilla wraps?
Yes. Wrap individually and freeze. Reheat in oven or air fryer for best results.
How do I keep tortillas from getting soggy?
- Drain beef thoroughly
- Avoid overly wet fillings
- Toast wraps after assembling
Can I make these ahead of time?
Absolutely. Cook beef ahead and assemble just before serving, or assemble and reheat later.
What’s the best cheese for cheesy beef wraps?
Sharp cheddar and Monterey Jack provide the best melt and flavor combination.
Can I use corn tortillas instead?
Flour tortillas are recommended because they fold better and are less likely to crack.
Final Thoughts
If you want a reliable, flavorful, and endlessly adaptable dinner, Cheesy Beef Stuffed Tortilla Wraps are the perfect solution. They combine bold spices, rich cheese, and warm tortillas into a dish that feels indulgent yet easy enough for everyday cooking.