Chocolate Thumbprint Cookies
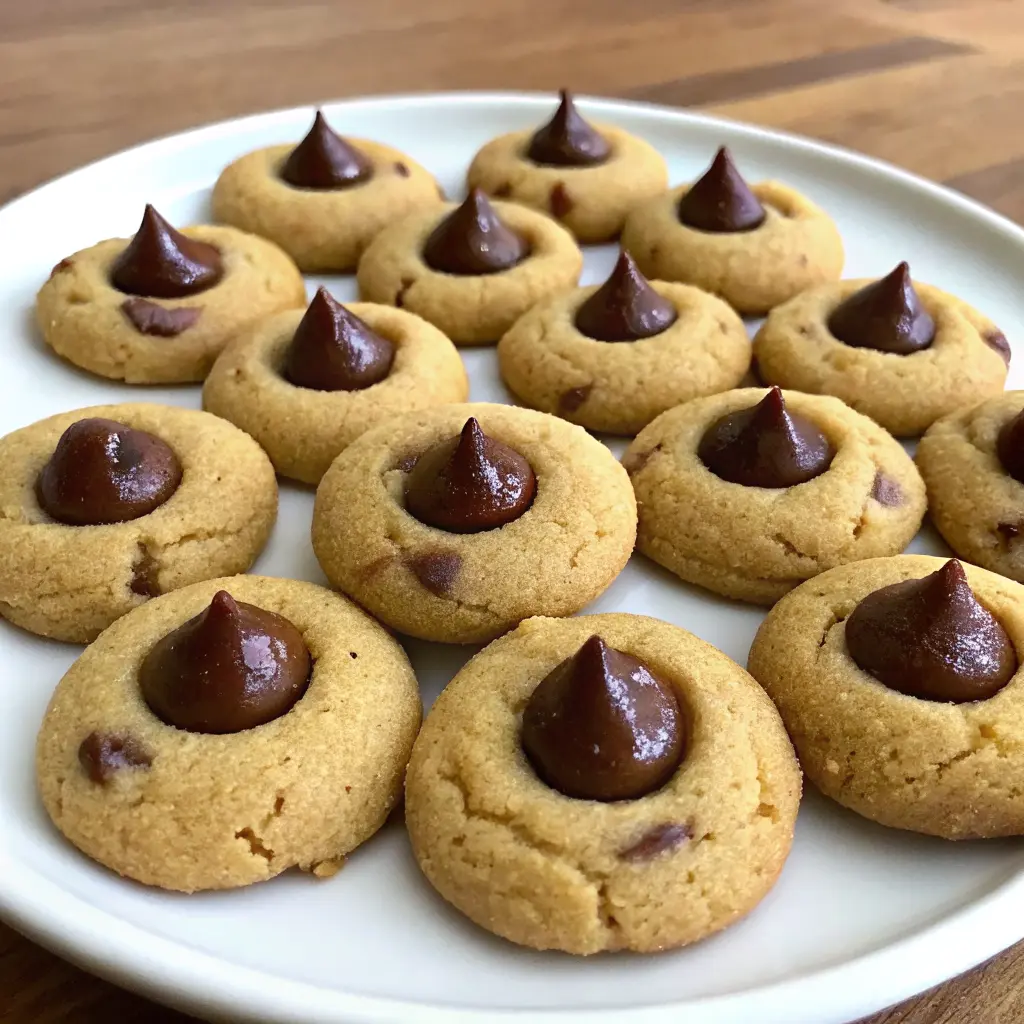
If you’re looking for a cookie that feels fancy but is secretly very easy, Chocolate Thumbprint Cookies are about to become your new signature bake. These little chocolate gems are rich, buttery, and deeply chocolaty, with a soft cookie base and a glossy pool of chocolate or other fillings in the center. They look elegant on a dessert tray, yet they’re simple enough for a casual weekend baking session.
What Are Chocolate Thumbprint Cookies?
Chocolate Thumbprint Cookies are classic thumbprint cookies with a chocolate twist. Traditional thumbprint cookies are made from a simple, buttery dough that’s rolled into balls, indented in the center, baked, and then filled with something delicious—often jam, chocolate, or caramel.
In this chocolaty version:
- The dough itself is usually chocolate-based, thanks to the addition of cocoa powder.
- The center is often filled with chocolate ganache, Nutella, caramel, or jam.
- The cookies are bite-sized, with a tender crumb and a decadent, truffle-like filling.
They’re especially popular:
- On holiday cookie trays
- For cookie exchanges
- As edible gifts packaged in tins or boxes
- For birthdays, parties, and everyday treats
Why You’ll Love These Chocolate Thumbprint Cookies
There are plenty of reasons why Chocolate Thumbprint Cookies earn a permanent spot in so many baking rotations:
- Rich chocolate flavor
- Cocoa in the dough plus a luscious chocolate filling makes every bite taste like a mini chocolate dessert.
- Gorgeous presentation
- The shiny center, smooth edges, and optional toppings (like crushed nuts or sprinkles) make them look bakery-worthy.
- Customizable fillings
- You can stick to chocolate ganache or branch out into jam, caramel, Nutella, or flavored chocolate (like peppermint or orange).
- Perfect for gifting
- Their small size and sturdy texture make them ideal for packaging and gifting.
- Great make-ahead option
- The dough can be made ahead and chilled or frozen, and the baked cookies store well in airtight containers.
Key Ingredients for Perfect Chocolate Thumbprint Cookies
A great Chocolate Thumbprint Cookies recipe doesn’t need a long ingredient list. It’s all about choosing the right basics and using them well.
Core Cookie Dough Ingredients
Here’s what goes into the cookie base and why each ingredient matters:
- Butter (unsalted, room temperature)
- Butter is responsible for that classic, rich, melt-in-your-mouth texture. Using unsalted butter lets you control the salt level more precisely.
- Sugar
- Most recipes use granulated sugar, though some incorporate a bit of brown sugar or powdered sugar.
- Granulated sugar helps the cookies spread just enough and gives a light, crisp edge.
- Brown sugar adds a slightly deeper flavor and a bit more chew.
- Egg yolks
- Egg yolks contribute richness and help bind the dough without making it cakey.
- They also add a lovely color and soft texture.
- All-purpose flour
- Flour provides structure. Measuring it correctly (ideally by weight, or by spooning and leveling it into the cup) helps prevent dry, crumbly cookies.
- Cocoa powder
- Cocoa is the star of the show here. You can use either natural or Dutch-process cocoa, but Dutch-process gives an especially deep, dark chocolate color and flavor.
- Salt
- A pinch of salt sharpens the chocolate flavor and keeps the cookies from tasting flat.
- Vanilla extract
- Vanilla may seem simple, but it rounds out the flavor and pairs beautifully with chocolate.
Chocolate Ganache & Other Fillings
The traditional filling for Chocolate Thumbprint Cookies is a smooth, glossy chocolate ganache. Ganache is usually:
- Heavy cream + chopped chocolate
- Warm cream is poured over finely chopped chocolate, allowed to sit, and then stirred until smooth.
Other delicious fillings include:
- Nutella or hazelnut spread
- Caramel or salted caramel
- Fruit jam or preserves (raspberry, strawberry, cherry, apricot)
- Peanut butter or other nut butters
- Flavored chocolate (peppermint, orange, coffee)
Optional Toppings & Flavor Boosters
Once your cookies are filled, you can customize them with all kinds of finishing touches:
- Finely chopped nuts (hazelnuts, pecans, almonds)
- Festive sprinkles
- Flaky sea salt
- Drizzles of white chocolate or caramel
- Crushed candy canes for a peppermint version
- Espresso powder in the dough for a mocha note
These accents help make your Chocolate Thumbprint Cookies stand out visually and flavor-wise.
Tools & Equipment You’ll Need
You don’t need anything fancy to make Chocolate Thumbprint Cookies. Basic baking tools will do the job perfectly:
- Mixing bowls – one large for the dough, one medium for the ganache.
- Hand mixer or stand mixer – to cream the butter and sugar properly.
- Measuring cups and spoons – or, even better, a kitchen scale.
- Baking sheets – light-colored sheets help prevent over-browning.
- Parchment paper or silicone baking mats – for easy release and even baking.
- Cookie scoop – to portion cookies evenly.
- Small spoon or measuring spoon – to press the center indentation if you don’t want to use your thumb.
- Wire cooling racks – to cool the cookies before filling them.
Step-by-Step: How to Make Chocolate Thumbprint Cookies
Let’s walk through the process step by step so you can bake Chocolate Thumbprint Cookies with confidence.
Step 1 – Make the Dough
- Cream the butter and sugar
- Add room-temperature butter and sugar to a bowl.
- Beat until light and fluffy, which usually takes a few minutes.
- This step incorporates air and helps create a tender, slightly soft cookie.
- Add the egg yolks and vanilla
- Mix in the egg yolks one at a time, followed by vanilla extract.
- Scrape down the sides of the bowl to make sure everything is well combined.
- Combine dry ingredients
- In a separate bowl, whisk together flour, cocoa powder, and salt.
- Add the dry mixture to the butter mixture in two or three additions, mixing on low until just combined.
- Avoid over-mixing
- Mix only until the flour disappears. Over-mixing can make the cookies tough and dense instead of soft and tender.
Step 2 – Chill (If Needed) & Preheat the Oven
- Some doughs are soft and benefit from chilling for 20–30 minutes to prevent excessive spreading.
- Other recipes are designed as “no-chill,” especially if the dough is already fairly firm.
- While the dough chills (or as soon as it’s finished if no chill is needed), preheat your oven, usually to around 175–180°C (350–355°F), depending on your recipe.
Step 3 – Shape the Thumbprint Cookies
- Portion the dough
- Use a small cookie scoop or a tablespoon to portion out even balls of dough.
- Roll each portion between your hands to create smooth, round balls.
- Add coatings (optional)
- For extra texture or flavor, roll the dough balls in:
- Granulated sugar
- Finely chopped nuts
- Colored sprinkles
- For extra texture or flavor, roll the dough balls in:
- Make the indentation
- Place the dough balls on a lined baking sheet with a little room between them.
- Gently press your thumb, knuckle, or the back of a small measuring spoon into the center of each ball to create a well.
- Press just deep enough to form a space for filling, but not so deep that the bottom of the cookie cracks.
Step 4 – Bake to Soft, Fudgy Perfection
- Bake the cookies until the edges are set and the tops look matte but not dry.
- The cookies should retain their shape and not spread into flat discs.
- Once out of the oven, you can gently re-press the centers with the same tool you used before if they puffed up while baking.
- Let the cookies cool on the baking sheet for a few minutes, then transfer them to a wire rack to cool completely.
Step 5 – Make the Chocolate Ganache
- Heat the cream
- Warm heavy cream in a small saucepan or in the microwave until it’s steaming but not boiling.
- Combine with chocolate
- Pour the hot cream over finely chopped chocolate in a heat-safe bowl.
- Let it sit for a minute or two to melt the chocolate.
- Stir until smooth
- Gently stir from the center outward until the mixture becomes thick, shiny, and fully combined.
- Adjust consistency
- If it’s too thin, add a bit more chocolate.
- If it’s too thick, stir in a spoonful of warm cream.
Let the ganache cool slightly until it’s spoonable but still fluid.
Step 6 – Fill & Decorate
- Once the cookies are completely cool, spoon or pipe a small amount of ganache into each indentation.
- Decorate while the ganache is still soft:
- Sprinkle with flaky sea salt.
- Add a few crushed nuts or sprinkles.
- Press in a small candy, mini chocolate chip, or decorative topper.
- Let the ganache set at room temperature until it’s firm to the touch.
Flavor Variations & Creative Filling Ideas
One of the best things about Chocolate Thumbprint Cookies is how customizable they are. Once you’ve mastered the base recipe, you can start experimenting.
Double Chocolate Thumbprint Cookies
If you’re baking for serious chocolate lovers:
- Use Dutch-process cocoa in the dough for deep flavor and color.
- Fill with a dark chocolate ganache for a rich, intense center.
- Top with mini chocolate chips or a drizzle of white chocolate for contrast.
Chocolate Thumbprints with Nutella
Nutella (or any hazelnut chocolate spread) makes a quick and delicious filling:
- Fill warm or cooled cookies with Nutella straight from the jar.
- Top with chopped hazelnuts to echo the flavor.
- This version is especially fun for kids and casual gatherings.
Chocolate Thumbprints with Jam
Chocolate and fruit are a classic match:
- Bake the cookies with empty wells, then fill with jam once cool.
- Try raspberry, strawberry, cherry, or apricot jam.
- The sweetness and slight tartness of the jam balance the richness of the chocolate.
Peppermint Holiday Chocolate Thumbprints
For a festive spin:
- Add a little peppermint extract to the ganache.
- Sprinkle the tops with crushed candy canes or peppermint candies.
- Drizzle melted white chocolate in thin lines over the tops to make them look extra seasonal.
Caramel & Turtle-Style Thumbprints
If you love the combination of chocolate, caramel, and nuts:
- Fill the centers with soft caramel or caramel sauce.
- Sprinkle with chopped pecans or walnuts.
- Finish with a tiny pinch of flaky salt for a turtle-inspired cookie.
Make-Ahead, Freezing & Storage Guide
A big advantage of Chocolate Thumbprint Cookies is that they fit neatly into a busy schedule. You can prepare parts ahead of time and assemble later.
Storing Baked Chocolate Thumbprint Cookies
- Once the cookies are completely cooled and filled, store them in an airtight container at room temperature.
- If you’re layering them, place a sheet of parchment paper between layers to prevent sticking or smudging.
- They stay pleasant in texture for several days if stored away from heat and direct sunlight.
Freezing Dough vs Baked Cookies
You have two options:
- Freezing the dough
- Shape the dough into balls and place them on a baking sheet.
- Freeze until solid, then transfer to a freezer bag or container.
- When ready to bake, let them sit a few minutes at room temperature, make the indentation, and bake, adding a minute or two to the baking time if needed.
- Freezing baked cookies
- Bake and cool the cookies without filling them.
- Freeze in a single layer, then transfer to a container or freezer bag.
- Thaw at room temperature and add the filling later for the freshest result.
Gifting & Packaging Tips
For gift-giving:
- Arrange cookies in decorative tins, cardboard bakery boxes, or glass jars.
- Use parchment paper or cupcake liners to separate layers.
- If you’re shipping, choose a sturdy box, wrap cookies tightly, and consider chilling them first to help the filling stay firm.
Serving Ideas & Pairings
Chocolate Thumbprint Cookies fit nicely into almost any sweet spread:
- On a dessert tray with other cookies like sugar cookies, gingerbread, or shortbread.
- On a holiday cookie board, along with truffles, brownies, and bark.
- With hot drinks, such as:
- Hot chocolate
- Coffee or espresso
- Black tea or chai
FAQs About Chocolate Thumbprint Cookies
What’s the secret to soft, tender Chocolate Thumbprint Cookies?
The secret is a combination of:
- Cream the butter and sugar until light and fluffy.
- Measure the flour carefully so you don’t add too much.
- Avoid over-mixing the dough once the flour is added.
- Bake just until the edges are set, then let the cookies finish on the hot tray for a minute before cooling fully on racks.
Should you fill thumbprint cookies before or after baking?
For Chocolate Thumbprint Cookies, it’s usually best to bake first and fill after:
- Baking with the chocolate filling inside can sometimes cause it to dry out, darken, or lose its glossy finish.
- Filling after baking keeps the ganache smooth and shiny, and allows you to adjust the thickness and amount more easily.
Can I make Chocolate Thumbprint Cookies without chilling the dough?
Yes, some recipes are designed as no-chill and hold their shape just fine. If your dough feels very firm and not sticky, you may not need chilling. However:
- If the dough is soft and sticky, or if your kitchen is warm, chilling the dough for 20–30 minutes makes shaping easier and helps prevent excess spreading.
How long do Chocolate Thumbprint Cookies stay fresh?
When stored properly in an airtight container at room temperature, Chocolate Thumbprint Cookies stay pleasantly fresh for several days. If you want to keep them longer, you can freeze the cookies (preferably unfilled) and add the ganache or other fillings just before serving.
Conclusion
Chocolate Thumbprint Cookies are proof that a small cookie can deliver big flavor. With a cocoa-rich dough, a silky chocolate (or jam, or caramel) center, and endless possibilities for toppings and decorations, they’re the kind of treat that feels special every time you bake them.