Introduction to Creamy Coconut Cake
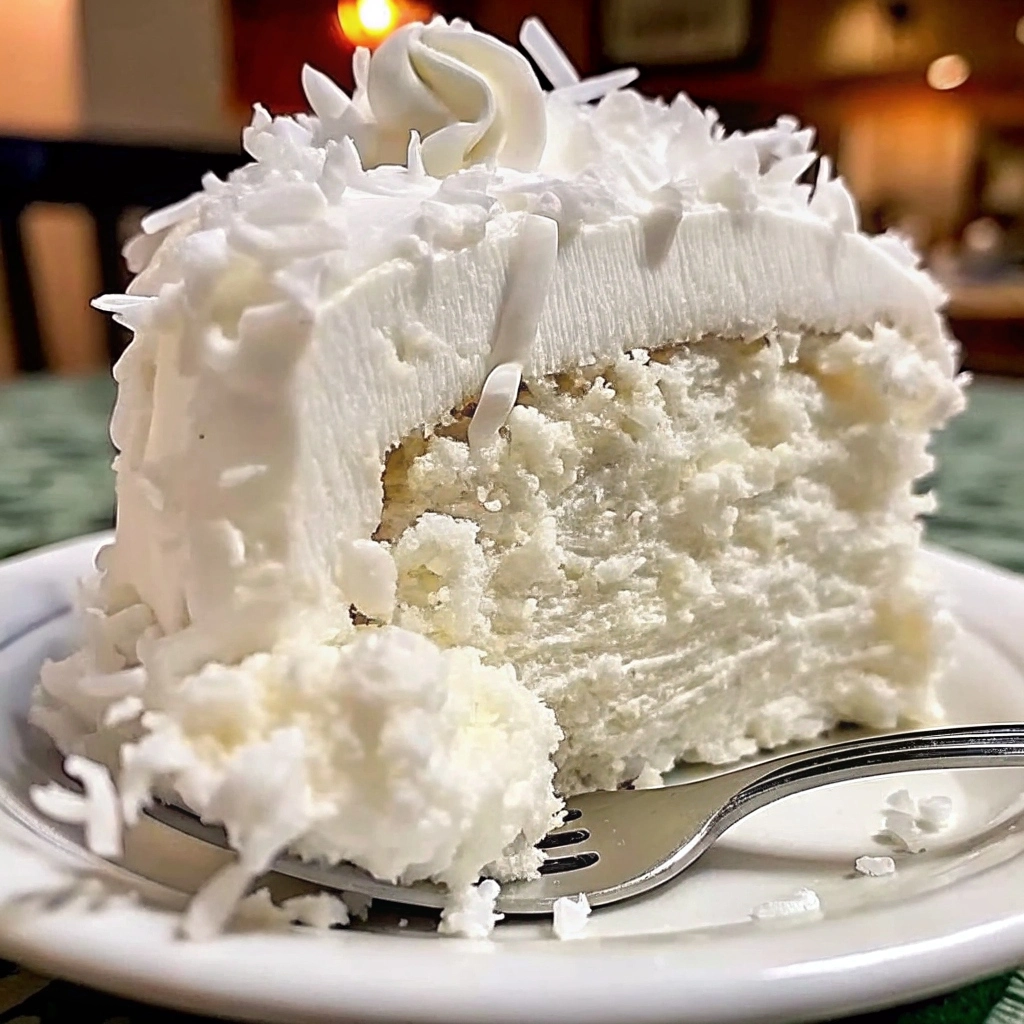
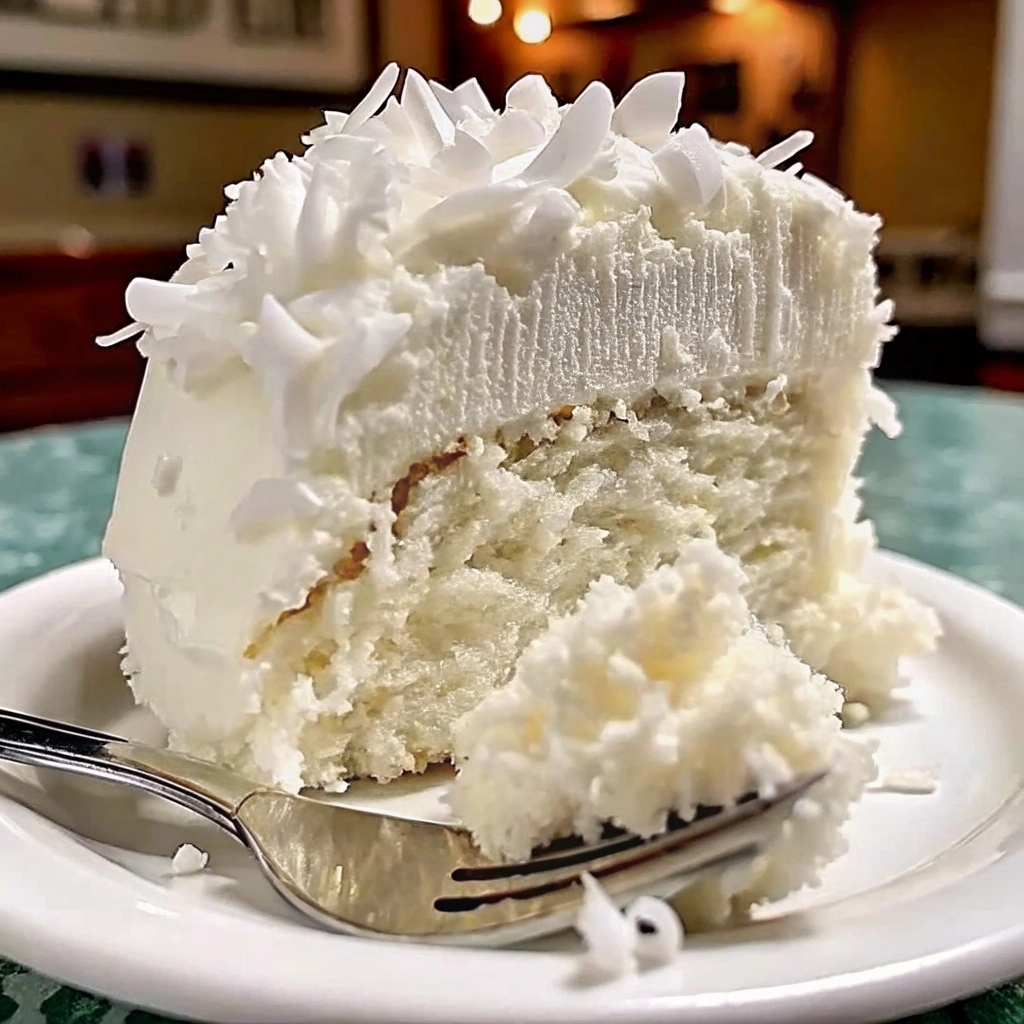
Creamy Coconut Cake stands apart from classic coconut cakes by its extra-moist crumb and luscious coconut-infused layers. Unlike a standard layer cake, this version soaks up rich coconut liquids, resulting in a tender bite that practically melts in your mouth.
Why You’ll Love This Cake
What makes Creamy Coconut Cake irresistible?
- Triple-coconut delight: coconut milk, cream of coconut, and shredded coconut layers
- Silky texture: The cake soaks up syrup or liquid, resulting in a tender crumb
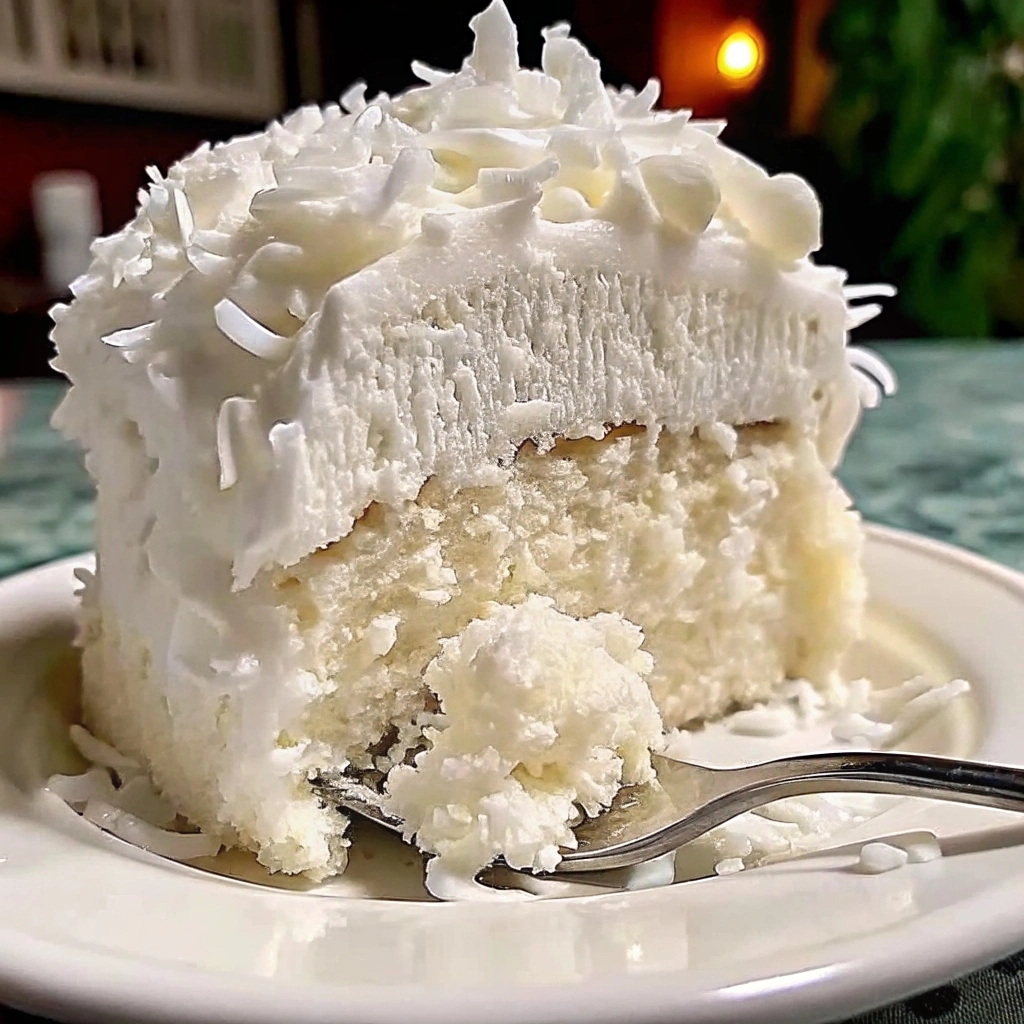
- Visual appeal: pure white frosting and toasted flakes make a stunning centerpiece
Essential Ingredients & Substitutions
A successful Creamy Coconut Cake hinges on selecting the right ingredients—and knowing when to swap for dietary needs or flavor twists.
Cake Base Components
- All-Purpose Flour
- Provides structure and a tender crumb.
- Substitution: Use a 1:1 gluten-free flour blend for a GF version.
- Granulated Sugar
- Sweetens and contributes to a light crust.
- Swap: Coconut sugar for a deeper caramel nuance.
- Eggs
- Aids in rise and moisture retention.
- Vegan Swap: Flax “eggs” (1 Tbsp ground flaxseed + 3 Tbsp water per egg).
- Butter or Neutral Oil
- Adds richness and tenderness.
- Dairy-Free: Coconut oil at a 1:1 ratio yields extra coconut aroma.
Coconut Infusion Ingredients
- Cream of Coconut
- The cornerstone of “creamy” texture—thicker and sweeter than coconut milk.
- Substitute: Sweetened condensed milk + a drop of coconut extract.
- Full-Fat Coconut Milk
- Balances syrup viscosity and infuses robust coconut flavor.
- Light Option: Light coconut milk reduces richness but may require extra flavoring.
- Sweetened Shredded Coconut
- Stir into the batter for bursts of chew and sprinkle on top for garnish.
- Toasted vs. Untoasted: Toasted brings a nutty crunch; untoasted retains pure white color.
Flavor Enhancers
- Pure Coconut Extract
- Intensifies coconut aroma—use sparingly (¼ tsp per batch).
- Vanilla Extract
- Rounds out sweetness with familiar warmth.
- Rum or Coconut Liqueur(optional)
- Brushed onto layers for an adult twist.
By assembling these ingredients—and knowing your swaps—the foundation of your cake is set. Next, let’s talk equipment.
Variations & Add-Ins
Customize to fit any theme:
- Tropical Swirls
- Fold in crushed pineapple or mango puree.
- Zest a lime into the batter for a citrus pop.
- Nutty Accents
- Stir in chopped macadamias, almonds, or pecans.
- Boozy Boost
- Brush cake layers with rum or coconut liqueur.
- Special Diets
- Use a certified gluten-free blend or vegan swaps for eggs and butter.
Equipment & Prep Tips
Prep hack: Bring eggs and dairy to room temperature before mixing
Bakeware: 9×13″ pan or two 8″ round layer pans
Mixers: stand mixer preferred; hand mixer works in a pinch
Tools: rubber spatula, cooling rack, piping bag (optional)
Preparing the Cake Batter
The foundation of a soft, delicate crumb lies in precise mixing techniques:
- Creaming Butter & Sugar
- Beat softened butter (or coconut oil) with sugar on medium speed for 3–5 minutes until the mixture looks pale and fluffy. This traps air bubbles, giving the cake lift.
- Pro Tip: Scrape down the bowl sides halfway through to ensure all butter is aerated evenly.
- Incorporating Eggs
- Add eggs one at a time, beating until just combined after each addition. Overbeat and you risk a coarse crumb.
- If using flax eggs, whisk them separately until gelatinous before folding in.
- Alternating Dry & Wet Ingredients
- With the mixer on low, add one-third of the sifted flour-baking powder mixture, then half of the coconut milk. Repeat, ending with dry ingredients.
- This method prevents overdevelopment of gluten, keeping your cake tender.
- Folding in Shredded Coconut
- Gently fold in half of the shredded coconut to the batter using a spatula—maintain airiness by folding, not stirring.
- Final Texture Check
- The batter should be thick enough to coat a spatula but loose enough to spread easily in the pan.
Pour evenly into your prepared pans, smoothing the tops with a spatula to ensure uniform rising.
Baking & Cooling Techniques
Proper oven technique and cooling prevent dry edges and dense centers:
- Oven Preheat & Rack Position
- Preheat to 350°F (175 °C). Center the rack to ensure even heat distribution.
- Bake Time & Doneness Test
- Bake 25–30 minutes for 8″ rounds, or 30–35 minutes for a 9×13″ pan.
- Insert a toothpick in the center: it should emerge with a few moist crumbs but no raw batter.
- Avoiding Overbaking
- Remove the cake when just set—the carryover heat will finish cooking as it cools.
- Cooling Protocol
- Let cakes rest in pans on a wire rack for 10 minutes.
- Run a thin knife around the pan edges, then invert onto the rack to cool completely.
- Cooling fully is crucial before applying any coconut infusion or frosting to prevent melting.
Once cooled, your layers are primed for that signature coconut soak.
Infusion & Soaking Methods
This is where Creamy Coconut Cake distinguishes itself—infusing each layer with luscious coconut liquids.
- Poke-Cake Technique
- Use a sturdy skewer or the handle of a wooden spoon to create evenly spaced holes (about ½″ apart) across the top of each layer.
- Mix equal parts cream of coconut and full-fat coconut milk in a measuring cup. Slowly pour the mixture over the cake, letting it seep into the holes.
- Brushing Method
- For a lighter touch, use a pastry brush to gently coat the surface with coconut syrup. This offers more control and prevents oversaturation.
- Timing Tips
- Infuse while the cake is slightly warm—this helps the liquid penetrate deeper.
- Allow cakes to rest on a rack over a lined pan for 10 minutes to catch any drips.
- Managing Excess Liquid
- If pooling occurs, lightly tilt the rack to drain off surplus syrup. You want moistness without a soggy base.
- Flavor Variations
- For a citrus note, add a teaspoon of lime zest to the coconut mixture.
- To incorporate rum, replace ¼ cup of coconut milk with coconut rum for a festive adult version.
Now that each layer is bursting with coconut essence, let’s build your frosting.
Frosting Options
A stable, creamy frosting enhances and balances the cake’s texture. Choose one based on your skill level and desired sweetness:
1. Whipped Coconut Topping
- Ingredients:
- 2 cups heavy whipping cream
- ½ cup cream of coconut
- 1 tsp pure coconut extract
- Method:
- Chill bowl and whisk in the freezer for 10 minutes.
- Whip cream on medium-high until soft peaks form.
- Gradually add cream of coconut and extract, whipping to stiff peaks.
- Texture: Light, cloud-like, perfect for a no-bake frosting.
2. Cream-Cheese Coconut Frosting
- Ingredients:
- 8 oz cream cheese, softened
- ½ cup unsalted butter, softened
- 1 ½ cups powdered sugar
- ¼ cup cream of coconut
- Method:
- Beat cream cheese and butter on medium speed until smooth.
- Add powdered sugar gradually, then cream of coconut; beat until fluffy.
- Texture: Tangy contrast to sweetness; ideal for offsetting richness.
3. Coconut Buttercream
- Ingredients:
- 1 cup unsalted butter, softened
- 3–4 cups powdered sugar
- ¼ cup coconut milk
- 1 tsp coconut extract
- Method:
- Cream butter until pale.
- Slowly add powdered sugar, alternating with coconut milk.
- Finish with extract; whip until light and spreadable.
- Texture: Stable for detailed piping and decorative borders.
Assembling & Layering the Cake
With your layers infused and frosting ready, assembly becomes a creative process:
- Layer Preparation
- If needed, level each cake top with a serrated knife for flat stacking.
- Place the first layer on a cake board or plate—it anchors the build.
- Crumb Coat
- Apply a thin “crumb coat” of frosting all over the cake.
- Chill for 15–20 minutes until set; this seals crumbs, preventing them from marring the final coat.
- Final Frosting
- Use an offset spatula or bench scraper to spread a smooth, even layer of frosting.
- For a perfectly smooth finish, dip your spatula in hot water, shake off excess, and swipe to smooth.
- Layer Stacking Tips
- Apply an even frosting layer (½″–¾″) between tiers to provide stability.
- Rotate the turntable as you frost to maintain consistent thickness.
- Decorative Borders
- Fit a piping bag with your favorite tip (e.g., star or round) and pipe shell or rosette borders along the top and bottom edges for a polished look.
Once assembled, move on to the pièce de résistance—garnish.
Garnish & Presentation Ideas
The final flourish sets your cake apart:
- Toasted Coconut Flakes
- Spread a thin layer on a baking sheet.
- Toast at 325°F (160 °C) for 3–5 minutes, stirring every minute until golden.
- Cool before sprinkling generously on sides and top.
- Fresh Fruit Accents
- Arrange thin pineapple slices, lime wheels, or edible flowers for color contrast.
- Drizzles & Sauces
- Lightly drizzle a complementary fruit coulis (mango or passionfruit) in a spider-web pattern on the cake stand.
- Edible Glitter or Gold Leaf(optional)
- For special occasions, add edible shimmer or tiny gold leaf fragments for a luxe touch.
Arrange your cake on a clean, white platter to let the frosting and garnishes shine. Now, let’s explore serving ideas.
Serving Suggestions & Pairings
Complement your Creamy Coconut Cake with thoughtful beverage and dessert pairings:
- Beverages
- Coffee: A strong espresso or dark roast cuts through sweetness.
- Tea: Jasmine or green tea highlights coconut’s floral notes.
- Mocktail: A virgin piña colada (pineapple juice, coconut cream, lime) doubles down on tropical vibes.
- Cocktail: A coconut margarita featuring silver tequila and coconut water offers a festive twist.
- Accompaniments
- Fruit Coulis: Serve mango or passionfruit coulis on the side for guests to drizzle.
- Berries: Fresh raspberries or blueberries add a tart contrast.
- Mint Sprigs: A touch of mint brightens each slice.

Storage, Make-Ahead & Freezing
Planning ensures stress-free entertaining:
- Make-Ahead Layers
- After baking, cool layers completely.
- Wrap tightly in plastic wrap, then foil; freeze up to 1 month.
- Infusion & Frosting Later
- Thaw in the refrigerator overnight.
- Infuse and frost on the day of serving for peak texture.
- Fully Assembled Cake
- Store in the refrigerator, covered, up to 3–4 days.
- Bring to room temperature 30 minutes before slicing for optimal softness.
- Reheating Tip
- For a just-baked feel, warm slices in a 300°F oven for 3–4 minutes.
Avoid storing at room temperature for more than a few hours, as the frosting may soften too much.
FAQs
- How do I prevent the cake from getting too soggy?
- Drain excess syrup and allow layers to rest on a rack.
- Can I use light coconut milk?
- Yes, though the flavor will be milder, consider adding extra extract.
- What’s the best way to toast coconut flakes?
- Spread in a single layer on a baking sheet; bake at 325°F, stirring every 2 minutes until golden.
- How far ahead can I prepare?
- Bake and freeze layers up to 1 month ahead; frost on the day of serving.
- Can I double the recipe?
- Absolutely—adjust bakeware size or bake in batches.
Conclusion
Congratulations—you’re now equipped to bake a Creamy Coconut Cake that dazzles in both flavor and presentation. From mastering the poke-cake infusion to perfecting your coconut frosting, each step is designed for success. Feel free to experiment with fruit swirls, nutty add-ins, or boozy finishes to make this recipe uniquely yours. Share your tropical creation with friends, tag your photos with #CreamyCoconutCake, and relish every moist, creamy slice of paradise!
1 thought on “Irresistible Creamy Coconut Cake Recipe | Moist Layers & Tropical Frosting”