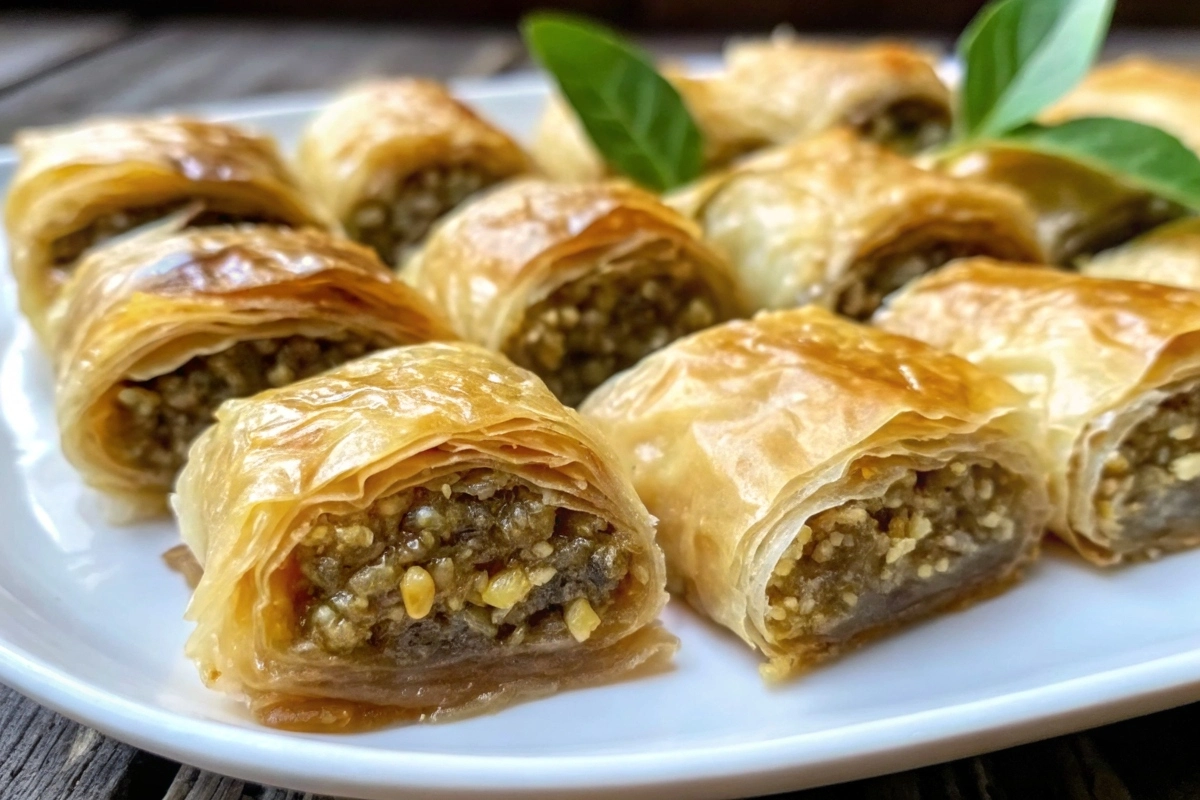
What Is Rolled Baklava?
Unlike the traditional diamond-cut, layered variety, Easiest Rolled Baklava transforms sheets of phyllo dough and nut filling into tight, elegant cylinders. Each roll contains:
- Uniform Layers of butter-brushed phyllo for consistent crispness
- A concentrated strip of spiced nuts for maximum flavor
- A spiral shape that’s easy to portion and serve
This format is ideal when you want:
- Perfectly even baking, every time
- A simple cutting method—no careful slicing into shapes
- A beautiful presentation, with each roll resembling a swirl of pastry art
For background on baklava’s rich heritage, check out this comprehensive History of Baklava.
Quick History of Baklava
Baklava traces its roots back to the palaces of the Ottoman Empire, where royal kitchens pioneered layered pastries infused with nuts and drenched in syrup. Over centuries, as the Ottoman realm expanded across the Middle East, North Africa, and Eastern Europe, baklava evolved with local twists:
- Greece: Known for triangular pieces and pistachio-heavy fillings
- Turkey: Birthplace of saragli, the original rolled baklava
- Arab World: Introduced rose water and orange blossom syrup
The shift from layered sheets to rolled cylinders likely began as a practical innovation—rolls bake more evenly, and cutting is as simple as slicing a log. Today’s easiest rolled baklava distills these centuries of culinary evolution into a streamlined, foolproof method.
Advantages of the Rolled Format
Choosing the rolled style over traditional layering offers several key benefits:
- Uniform Baking
Rolls heat evenly from edge to center—no undercooked middles. - Speedy Assembly
One long strip of phyllo becomes multiple bite-sized segments in minutes. - Effortless Slicing
No pattern-cutting required; a sharp knife and ruler produce identical pieces. - Elegant Presentation
Spirals naturally showcase the contrasting layers of dough and filling. - Portion Control
Guests can serve themselves exactly one or two rolls, minimizing waste.
If you’ve ever wrestled with cutting perfect diamonds or feared tearing fragile pastry, rolled baklava is your solution. The consistent shape also makes it ideal for gifting or high-volume events.
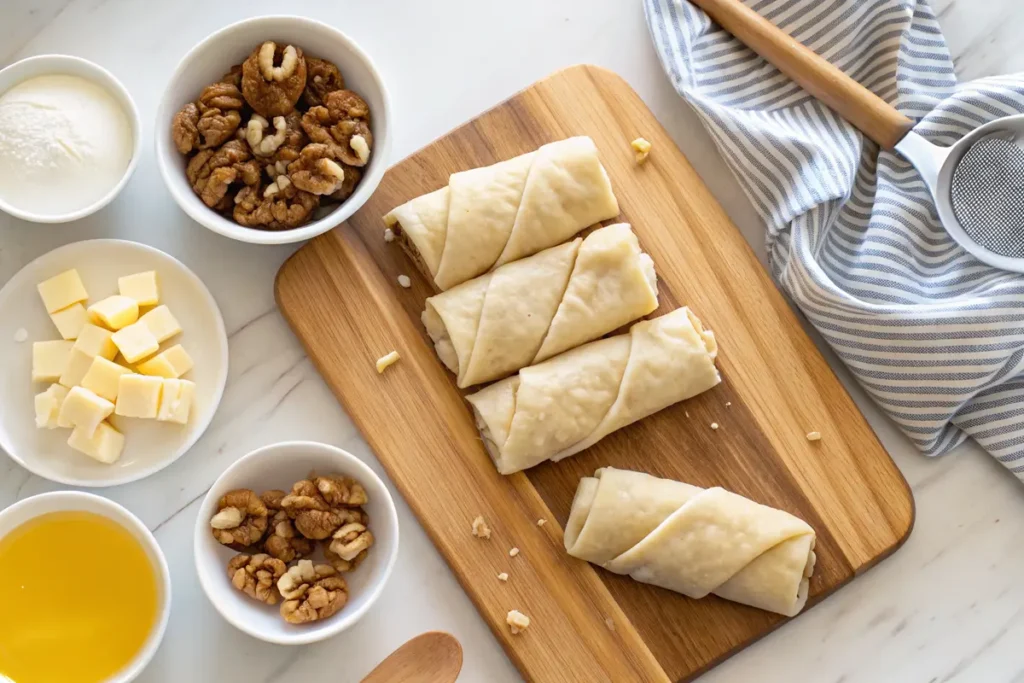
Core Ingredients Breakdown
Every spectacular batch of the easiest rolled baklava stands on five foundation ingredients:
- Phyllo Dough
- Opt for commercially available, ultra-thin sheets labeled “ready to use.”
- Avoid brands that advertise “home-baking” phyllo; they tend to be thicker and less crisp.
- Nuts
- Walnuts: earthy flavor and tender texture
- Pistachios: vibrant color and rich taste
- Almonds: mild sweetness for balance
- Mix and match to create a signature filling.
- Sweet Syrup
- Sugar & Water: classic simple syrup base
- Lemon Juice: brightens sweetness and prevents crystallization
- Honey: adds complexity—optional but recommended
- Butter or Oil
- Clarified Butter: yields ultra-crisp, glossy layers
- Neutral Oil: canola or vegetable oil for dairy-free options
- Spices & Flavorings
- Ground Cinnamon: warm, aromatic backbone
- Cardamom: exotic, floral undertones
- Orange Zest: a bright citrus note
- Rose Water or Orange Blossom Water: in syrup for authentic aroma
Tip: Assemble all measured ingredients before starting—mise en place keeps your workflow smooth and prevents dried-out phyllo mishaps.
Essential Tools & Workspace Setup
A well-organized workstation is vital when working with delicate phyllo and spilled syrup:
- Baking Pan: 9×13-inch metal or glass—dark pans brown faster
- Pastry Brush: wide-bristle for even butter application
- Sharp Knife or Skewer: for slicing and shaping rolls
- Damp Kitchen Towel: draped over unused phyllo sheets
- Mixing Bowls: one for nuts, one for syrup
- Measuring Cups & Spoons: accuracy matters
Setup Workflow:
- Lay out one sheet of phyllo on the counter.
- Cover remaining sheets completely with a damp towel.
- Place melted butter, nut filling, and tools within arm’s reach.
This arrangement minimizes the risk of tears and drying out, key to achieving picture-perfect rolls.
Handling Phyllo Dough Like a Pro
Phyllo dough can intimidate even seasoned bakers. Follow these best practices:
- Proper Thawing
- Transfer frozen phyllo to the refrigerator 24 hours before use.
- Once thawed, let sheets rest at room temperature (60–90 minutes) before unwrapping.
- Maintaining Humidity
- Keep unused sheets under a slightly damp towel.
- Avoid direct contact with water—just enough moisture to prevent cracking.
- Layering Techniques
- Brush each sheet with melted butter or oil—this seals and crisps layers.
- Alternate brushing direction (horizontal vs. vertical strokes) for even coverage.
- Patchwork Repairs
- Minor tears can be fixed with small phyllo scraps and a dab of butter.
- Avoid over-handling—too much manipulation cools the butter and causes sticking.
- Speed & Confidence
- Work quickly but deliberately—phyllo dries out if exposed to air for too long.
- If a sheet starts becoming rigid, cover it immediately and resume when all layers are assembled.
By mastering these techniques, you’ll move from apprehension to phyllo-handling pro in no time, ensuring every roll is flawless.
Preparing the Nut Filling
A balanced, flavorful nut filling elevates rolled baklava from good to unforgettable. Here’s how to nail it:
- Choosing & Processing Nuts
- Chop: Use a sharp knife or pulse briefly in a food processor for a rustic texture.
- Grind: For a uniform, paste-like filling, process longer—but avoid turning into butter.
- Ratio: Aim for a 3:1 nut-to-sugar volume ratio.
- Spice Balancing
- Cinnamon: ½ to 1 teaspoon per cup of nuts for warmth.
- Cardamom: ¼ teaspoon adds exotic flair.
- Salt: A pinch balances sweetness and enhances aroma.
- Flavor Enhancers
- Orange Zest: 1 teaspoon brightens the mixture.
- Honey Drizzle: 1–2 tablespoons helps bind the filling.
- Rose or Orange Blossom Water: ½ teaspoon for floral complexity.
- Mixing & Texture
- Combine ingredients in a bowl and stir until evenly distributed.
- Test consistency: filling should hold shape but not be pasty.
- Resting the Filling
- Let the filling sit 10–15 minutes at room temperature—this melds spices and moisture.
- Keep covered to prevent drying.
With this foundational filling, every spiral of rolled baklava bursts with balanced sweetness and spice, ensuring each bite delights the palate.
Step-by-Step Assembly Guide
Follow these detailed steps to assemble your easiest rolled baklava:
- Prepare Work Surface
- Clear a large, clean countertop.
- Lay out one sheet of phyllo; cover the remaining with a damp towel.
- Butter the First Sheet
- Using a pastry brush, apply a thin layer of melted butter or oil across the entire sheet.
- Ensure even coverage—missed spots lead to uneven crisping.
- Layer Multiple Sheets
- Stack 4–6 sheets, brushing each with butter before adding the next.
- More layers = flakier rolls; fewer layers = quicker bake.
- Add Nut Filling
- Using a small spoon or piping bag, spread a 1½-inch strip of filling along one long edge.
- Leave a ½-inch free border to seal the roll.
- Rolling Technique
- Position a thin skewer or rolling pin at the edge of the filling strip.
- Gently roll the phyllo around the tool, keeping it snug but not tearing.
- Once rolled, slide off the skewer and tighten by hand if needed.
- Trim & Slice
- Trim uneven ends for a clean look.
- Slice the log into 1½-inch segments using a sharp knife.
- Arrange Rolls in Pan
- Place each segment upright, spiral side up, snugly in the prepared pan.
- Aim for minimal gaps; rolls should support one another.
- Repeat Assembly
- Continue with the remaining phyllo and filling until the pan is full (24–30 rolls).
- Brush the top layer of rolls with butter to promote a golden color.
- Final Visual Check
- Ensure all rolls are standing straight and evenly spaced.
- Wipe any stray filling from the pan edges for clean presentation.
- Optional Finishing Touch
- Sprinkle a pinch of finely chopped pistachios over the top for color contrast.
This methodical assembly guarantees consistent size, shape, and buttery layers—key hallmarks of perfect rolled baklava.
Baking for Perfect Crispness
To achieve the trademark golden crunch:
- Preheat Oven
Set to 350°F (175 °C) on bake mode. Position the rack in the center. - Bake Duration
30–35 minutes until tops are deep golden and edges crisp. - Rotation & Monitoring
Rotate the pan halfway through for even browning.
Avoid opening the door too often—steam loss can soften layers. - Doneness Cues
- Rolls should be puffed and firm to the touch.
- Edges will lift slightly from the pan.
- The bottom should be delicately golden when you lift a roll.
- Troubleshooting
If rolls brown too quickly on top, tent loosely with foil for the final 10 minutes.
For under-baked centers, extend baking in 3-minute increments.
A perfectly baked batch emerges with crisp spirals that echo with each bite—a hallmark of expert technique.
Preparing & Applying the Syrup
The honey syrup ties everything together:
- Make Simple Syrup
- Combine in a saucepan:
- 1 cup granulated sugar
- ½ cup water
- Juice of ½ lemon
- Bring to a gentle boil, stirring until sugar dissolves.
- Combine in a saucepan:
- Simmer & Flavor
- Reduce heat; simmer 5 minutes until slightly thickened.
- Stir in 2 tablespoons of honey and ½ teaspoon vanilla or rose water.
- Timing Is Crucial
- Pour hot syrup over hot baklava immediately after removing from the oven.
- Ensure syrup penetrates between rolls—use a spoon to guide it into gaps.
- Even Distribution
- Start at one corner, pour slowly in a steady stream.
- Move across the pan to cover all rolls uniformly.
- Rest Before Serving
- Allow 4–6 hours (or overnight) at room temperature.
- This rest yields balanced syrup absorption without soggy bottoms.
Proper syrup preparation and application ensure each spiral holds its sweet, aromatic essence, essential for unforgettable rolled baklava.
Cooling & Resting Protocol
Patience pays off:
- Initial Rest
Leave baklava uncovered for 30 minutes to let steam escape. - Extended Soak
Let stand at room temperature 4–6 hours or overnight.
This allows syrup to fully penetrate without compromising flakiness. - Covering for Storage
Once cooled, tent loosely with foil or lid—avoid airtight sealing until completely dry on top. - Serving Window
Best enjoyed within 24 hours of assembly for peak texture and flavor.
Skipping or rushing the rest period often leads to inconsistent texture, so resist temptation and let your rolled baklava mature to perfection.
Flavor Variations & Creative Twists
Elevate your basic, easiest rolled baklava with these inventive riffs:
- Chocolate-Drizzled Rolls
- Melt 2 ounces of dark or milk chocolate over a double boiler.
- Drizzle in a zigzag pattern; sprinkle sea salt for contrast.
- Citrus-Infused Syrup
- Replace lemon juice with fresh orange or lime.
- Add 1 teaspoon orange blossom water for floral notes.
- Nut Swaps & Blends
- Pistachio-Only: bright green spirals for special occasions.
- Mixed Nuts: equal parts almond, walnut, pistachio for depth.
- Hazelnuts: add toasty richness.
- Spiced Uptick
- Increase cardamom to ½ teaspoon for the punch.
- Add a pinch of ground ginger for warmth.
- Mini Bite-Size Portions
- Use only 3–4 phyllo layers; slice into 1-inch logs for cocktail parties.
- Savory-Sweet Fusion
- Incorporate finely chopped candied ginger or crystallized ginger.
- Top with edible rose petals or crushed freeze-dried berries.
- Vegan & Alternative Fats
- Swap butter for refined coconut oil or vegan margarine.
- Use agave nectar in place of honey in the syrup.
- Gluten-Free Exploration
- Experiment with specialty gluten-free phyllo—note texture may differ.
These variations keep your rolled baklava repertoire fresh and exciting, ready for any season, crowd, or culinary mood.
Make-Ahead, Storage & Reheating
Storage Guidelines
- Room Temperature: Airtight container, up to 5 days.
- Refrigeration: Not recommended—moisture can soften crisp layers.
- Freezing:
- Freeze rolls on a tray for 1 hour.
- Transfer to freezer bag—up to 1 month.
Reheating Tips
- Preheat oven to 300°F (150 °C).
- Warm rolls 5–7 minutes to revive crispness.
- Avoid the microwave, it will render the pastry soggy.
Labeling
- Mark the date and contents to track freshness.
With these strategies, you can bake in advance for events and always present crispy, syrupy spirals on demand.
Frequently Asked Questions
- Can I use frozen phyllo straight from the freezer?
No—always thaw in fridge 24 hours, then rest at room temperature for 60–90 minutes. This prevents cracks and tearing. - How long does rolled baklava keep at room temperature?
Up to 5 days in an airtight container. For longer storage, freeze individual rolls. - What’s the secret to tight, even rolls?
- Use a slender rod (skewer/rolling pin) as a guide.
- Keep the nut filling in a narrow, consistent strip.
- Roll slowly and firmly, avoiding gaps.
- Can I make vegan or gluten-free versions?
- Vegan: swap butter for refined coconut oil or vegan margarine.
- Gluten-Free: Use specialty phyllo; results vary in flakiness.
- Why did my baklava turn out too dry?
Likely under-syruped—ensure you pour ample syrup over hot pastry and let it rest. - Is it safe to reheat baklava?
Yes—warm in a low oven (300 °F/150 °C) for 5–7 minutes to restore crispness. - Can I use a nonstick pan?
Yes, but reduce baking time by 3–5 minutes as nonstick surfaces brown faster.
Serving & Presentation Tips
- Garnish
- Lightly dust with powdered sugar.
- Sprinkle chopped pistachios or edible rose petals.
- Plating
- Use tiered trays for high-tea style service.
- Serve on small decorative plates with doilies.
- Pairings
- Strong Turkish coffee or cardamom-infused espresso.
- Mint tea with fresh sprigs for a refreshing contrast.
- Final Flourish
- Drizzle any leftover chocolate or syrup in artistic patterns.
- Present alongside small bowls of halved dates or figs.
Mindful presentation transforms simple rolls into an elegant dessert centerpiece.
Conclusion
Congratulations—you’ve mastered the art of the easiest rolled baklava, from handling delicate phyllo dough and crafting the perfect nut filling, to baking golden spirals and drenching them in luscious honey syrup. This streamlined approach honors centuries of pastry tradition while empowering home bakers of all skill levels.
Now it’s your turn: experiment with flavor variations, share your creations with friends and family, and refine your technique with each batch. Bookmark this guide, and return whenever you need a foolproof method for flaky, syrup-soaked perfection.
Print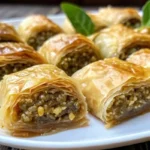
Easiest Rolled Baklava: Your Ultimate Guide to Flaky, Syrupy Rolls
- Total Time: 1 hour
- Yield: 24 pieces 1x
- Diet: Vegetarian
Description
This Easiest Rolled Baklava gives you all the classic Middle Eastern flavors—crisp, buttery layers of phyllo, sweet cinnamon-spiced nuts, and sticky honey syrup, without the fuss. Instead of stacking layers, the phyllo is rolled with the nut filling for a quick, elegant, and beginner-friendly version of this beloved dessert. Perfect for holidays, parties, or afternoon tea!
Ingredients
For the baklava:
- 1 package phyllo dough (16 oz), thawed
- 1 cup unsalted butter, melted
- 2 cups finely chopped walnuts or pistachios
- 1/4 cup granulated sugar
- 1 tsp ground cinnamon
For the syrup:
- 1 cup honey
- 1 cup sugar
- 3/4 cup water
- 1 tbsp lemon juice
- 1/2 tsp vanilla extract
Instructions
- Prepare the nut filling:
- In a bowl, combine chopped nuts, sugar, and cinnamon.
- Assemble the rolls:
- Preheat oven to 350°F (175°C).
- Brush one sheet of phyllo with melted butter, place another sheet on top, and brush again.
- Sprinkle 2–3 tablespoons of the nut mixture along one edge. Roll tightly into a log and place seam-side down in a greased baking dish. Repeat with remaining phyllo and filling.
- Bake:
- Brush the tops with melted butter and bake for 35–40 minutes until golden and crisp.
- Make the syrup:
- While baklava bakes, combine honey, sugar, water, and lemon juice in a saucepan. Simmer for 8–10 minutes until slightly thickened, then stir in vanilla.
- Finish:
- Pour hot syrup over warm baklava. Let cool completely before serving.
- Prep Time: 20 minutes
- Cook Time: 40 minutes
- Category: Desserts
- Method: Baked
- Cuisine: Middle Eastern
Nutrition
- Serving Size: 1 piece
- Calories: 170kcal
- Sugar: 12g
- Sodium: 60mg
- Fat: 10g
- Saturated Fat: 4g
- Trans Fat: 0g
- Carbohydrates: 19g
- Fiber: 1g
- Protein: 2g
- Cholesterol: 15mg
2 thoughts on “Easiest Rolled Baklava: Your Ultimate Guide to Flaky, Syrupy Rolls”