Introduction
When the sun is shining and the heat is on, few treats rival the simple pleasure of Ice Cream Sandwich Bars. These delightful frozen desserts combine the creamy, dreamy goodness of ice cream with the satisfying chew of a cookie or brownie base. Whether you prefer a classic chocolate-chip cookie hug for your vanilla ice cream or an inventive flavor mash-up, these bars are guaranteed to steal the show. In this guide, we’ll dive deep into what makes Ice Cream Sandwich Bars so irresistible and show you how to create, customize, and serve them like a pro.
What Are Ice Cream Sandwich Bars?
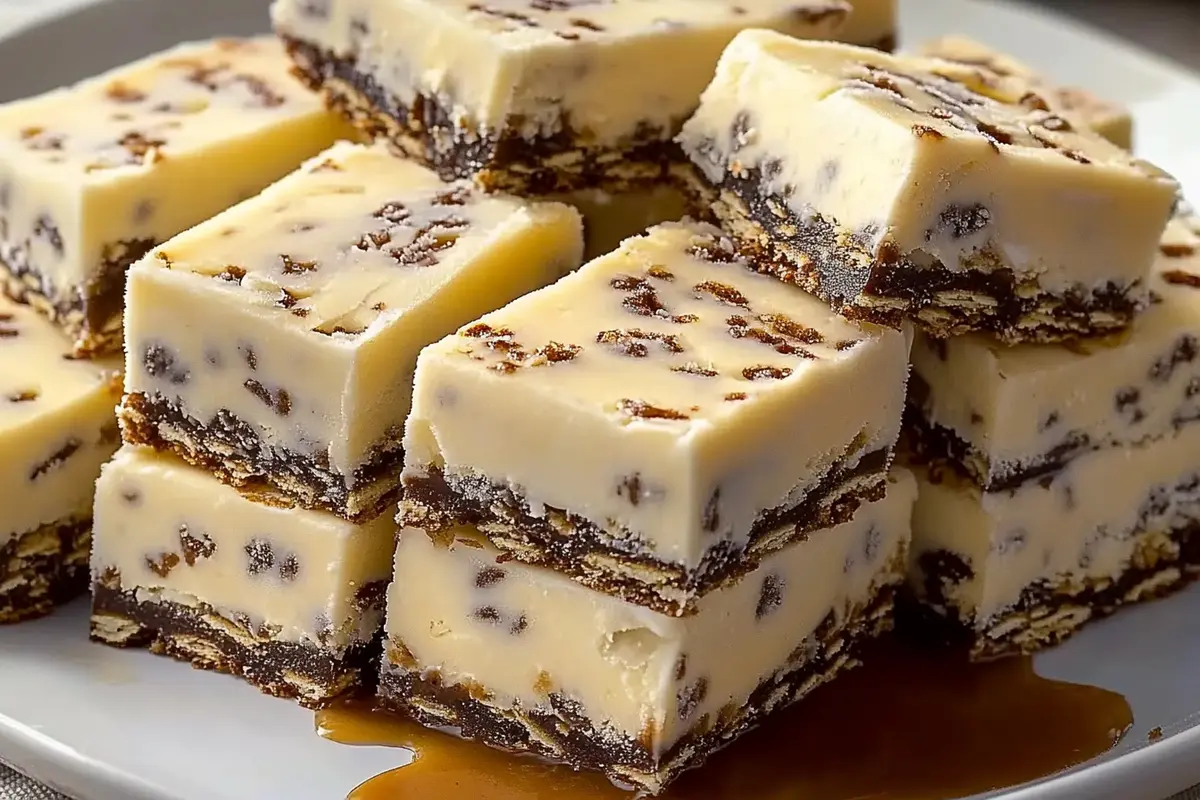
At its core, an Ice Cream Sandwich Bar is a frozen dessert consisting of two firm layers, often cookie bars, brownie slabs, or wafer cookies, sandwiching a layer of ice cream. Though the concept is straightforward, the variety is astonishing: from chewy blondie layers to tangy fruit-swirled ice creams, your imagination is the only limit. For a quick overview of how these treats evolved.
Part 1
Types and Variations
When it comes to Ice Cream Sandwich Bars, there’s no shortage of creative combinations. Below are some of the most popular styles you can try, each highlighting different textures and flavors:
- Classic Chocolate Chip Bars
- Cookie Base: Soft and chewy chocolate-chip cookie bars
- Ice Cream Filling: Creamy vanilla (no-churn or store-bought)
- Why It Works: The balance between sweet cookie dough and smooth vanilla ice cream is timeless.
- Funfetti Ice Cream Sandwich Bars
- Cookie Base: Funfetti cake-mix crumb bars, loaded with rainbow sprinkles
- Ice Cream Filling: Birthday-cake-flavored ice cream with extra sprinkles
- Why It Works: The festive colors and sweet vanilla frosting notes make it an ideal party treat.
- Tiramisu Brownie Ice Cream Sandwich Bars
- Brownie Base: Rich, fudgy chocolate brownies
- Ice Cream Filling: Mascarpone-infused no-churn ice cream with espresso swirls
- Why It Works: Combines dessert and dessert—brownies and tiramisu flavors in one bar.
- PB&J Ice Cream Sandwich Bars
- Cookie Base: Peanut-butter cookie bars
- Ice Cream Filling: Vanilla ice cream with a ribbon of raspberry jam
- Why It Works: Nostalgic PB&J taste with the cooling magic of frozen cream.
- S’mores Ice Cream Sandwich Bars
- Cookie Base: Graham cracker crust with mini marshmallows
- Ice Cream Filling: Toasted-marshmallow-flavored ice cream with chocolate chunks
- Why It Works: Brings campfire nostalgia into a convenient, handheld form.
- Blondie Chocolate Chip Bars
- Base: Dense, buttery blondies loaded with chocolate chips
- Ice Cream Filling: Vanilla ice cream studded with pecans or butterscotch bits
- Why It Works: Sweet, brown-butter flavor meets classic vanilla cream.
- Pecan Ice Cream Sandwich Bars
- Cookie Base: Pecan-studded toffee bars
- Ice Cream Filling: Butter-rum ice cream or praline swirl
- Why It Works: The crunchy pecans and rich toffee notes complement the cool cream.
- Freeze-Dried Ice Cream Sandwich Bars
- Base: Thin, crunchy wafer cookies
- Filling: Freeze-dried ice cream tablets, rehydrated slightly or eaten dry
- Why It Works: Perfect for on-the-go snacking, with a satisfying crunch and sweet bite.
Each variation features a different take on the bar layer and ice cream filling, inviting endless experimentation.
Ingredients and Variations
Understanding the ingredients behind Ice Cream Sandwich Bars helps you choose the right components for your desired texture and flavor profile. Below is a breakdown of common elements and how you can switch them up:
- Base Layers
- Cookie Bars: Use classic chocolate-chip dough, shortbread, or peanut-butter cookie dough for a chewy bond.
- Brownie Layers: Opt for fudgy brownies (from scratch or a boxed mix) to create a decadent chocolatey edge.
- Wafers: Perfect for a lighter, crunchier bite. Cocoa-flavored wafers are classic, but vanilla or strawberry options also exist.
- Ice Cream Fillings
- No-Churn vs. Store-Bought: No-churn recipes rely on heavy whipping cream and sweetened condensed milk. Store-bought ice cream offers convenience and a wide range of premade flavors.
- Classic Flavors: Vanilla, chocolate, and strawberry remain top picks. They provide a neutral backdrop for cookie textures.
- Flavor Combos: Coffee, caramel swirl, mint chocolate chip, chocolate fudge ripple, and fruit sorbets (e.g., mango or raspberry) can elevate your bars.
- Mix-Ins and Toppings
- Chips & Fruit: Chocolate chips, toffee bits, or fresh fruit chunks can be folded into the ice cream before layering.
- Sprinkles & Candies: Rainbow sprinkles, mini M&Ms, or crushed candy bars add visual appeal and a crunchy surprise.
- Drizzles: Warm fudge, caramel sauce, or fruit compote drizzled atop the assembled bars before freezing gives extra indulgence.
- Binding & Barrier Layers
- Barrier Techniques: To prevent sogginess, spread a thin layer of melted chocolate or frosting on the underside of the top cookie/brownie before adding ice cream. This seals out excess moisture.
- Firming Up: Flash-freeze the ice cream layer for 20–30 minutes before placing the top layer. This helps keep edges neat when cutting.
Choosing the right mix of base and filling determines whether your Ice Cream Sandwich Bar is chewy, fudgy, or crunchy, and whether the ice cream layer is silky or chunky.
Part 2
How to Make Homemade Ice Cream Sandwich Bars
Below, we’ll walk through a step-by-step recipe for Classic Chocolate Chip Bars. Afterward, we’ll highlight alternative recipes you can easily adapt.
Step-by-Step Recipe for Classic Chocolate Chip Bars
- Gather Ingredients
- 2 cups all-purpose flour
- 1 teaspoon baking soda
- ½ teaspoon salt
- 1 cup unsalted butter, softened
- ¾ cup granulated sugar
- ¾ cup packed brown sugar
- 2 large eggs
- 2 teaspoons vanilla extract
- 2 cups semisweet chocolate chips
- 1½ quarts vanilla ice cream (no-churn or store-bought)
- Prepare the Cookie Bar Layer
- Preheat oven to 350°F (175°C).
- In a medium bowl, whisk together flour, baking soda, and salt. Set aside.
- In a large mixing bowl, beat butter, granulated sugar, and brown sugar until creamy (about 2 minutes).
- Add eggs one at a time, beating well after each addition. Stir in vanilla.
- Gradually add flour mixture, mixing until just combined. Fold in chocolate chips with a rubber spatula.
- Line a 9×13-inch baking pan with parchment paper. Press half of the cookie dough evenly into the pan to form a uniform layer. Bake for 12–14 minutes or until edges are lightly golden. Let cool completely.
- Create the Ice Cream Layer
- If using no-churn ice cream, whip 2 cups of heavy whipping cream until stiff peaks form, then fold in 14 ounces of sweetened condensed milk and 2 teaspoons of vanilla extract. Freeze for 2 hours.
- If using store-bought ice cream, let it soften at room temperature for 5–10 minutes until scoopable but still firm.
- Assemble the Bars
- Remove cooled cookie base from pan (using parchment paper edges) and place on a baking sheet with sides.
- Spread a 1-inch layer of softened ice cream over the cookie base, smoothing with an offset spatula.
- Place the pan in the freezer for 20–30 minutes to firm up the ice cream.
- Meanwhile, take the remaining cookie dough, flatten it between two sheets of parchment paper into a 9×13-inch rectangle. Chill in the refrigerator for 15 minutes to firm up.
- Remove from fridge, peel off parchment, and carefully place the second cookie layer over the firm ice cream. Press gently to adhere.
- Freeze for at least 4 hours, or ideally overnight, to let everything set.
- Cutting and Serving
- Remove the entire pan from the freezer. Using a warm, sharp knife (dip in hot water, wipe dry), cut into 12–16 bars.
- If edges are uneven, trim them for a polished look. Return trimmed bars to freezer until ready to serve.
Alternative Recipes Overview
- Funfetti Bars
- Base: Funfetti cake-mix crumb bars (sprinkles folded into batter).
- Filling: Birthday-cake–flavored ice cream with extra rainbow sprinkles.
- Assembly: Follow similar steps—press the funfetti batter into a 9×13 pan, bake, cool, layer ice cream, top with more baked funfetti. Freeze and cut.
- Tiramisu Brownie Bars
- Base: Fudgy brownie layer infused with espresso powder.
- Filling: No-churn mascarpone ice cream (fold mascarpone cheese into whipped cream base, swirl espresso).
- Assembly: Bake brownies, freeze ice cream, and sandwich per classic instructions. Dust top with cocoa powder when serving.
- S’mores Bars
- Base: Graham cracker crust topped with mini marshmallows baked briefly under broiler for toasting.
- Filling: Marshmallow-flavored ice cream or vanilla ice cream with crushed Hershey’s chocolate.
- Assembly: Layer by placing graham-marshmallow layer, freezing ice cream in the center, topping with another graham layer, and freezing solid.
Tips and Tricks for Perfect Bars
Mastering Ice Cream Sandwich Bars often comes down to small details. Incorporate these tips to ensure your bars are as delightful as they are delicious:
- Preventing Sogginess
- Use a Barrier Layer: Spread a thin coating of melted chocolate or even a thin ribbon of peanut butter on the underside of the top layer. This seals out moisture and keeps the ice cream from soaking into the cookie or brownie.
- Flash-Freeze the Ice Cream Layer: After spreading the ice cream, freeze for 20–30 minutes before adding the top layer. A firm ice-cream layer resists sliding or warping when the second layer is placed on top.
- Optimal Freezing Techniques
- Temperature Matters: Keep your freezer at 0°F (–18°C) or lower. This ensures the ice cream remains firm and prevents crystal formation.
- Cover Tightly: Wrap the pan with plastic wrap directly against the ice cream surface to minimize ice crystals and freezer burn. Then cover with a layer of aluminum foil or place in an airtight container.
- Cutting Neatly
- Warm Knife Trick: Dip a sharp chef’s knife in hot water, wipe dry, then cut straight down in one motion. Repeat warming the knife between cuts to maintain smooth edges.
- Trim Edges for Uniformity: If your top layer is slightly off-size, use kitchen shears or a small knife to trim for even sides.
- Flavor Enhancements
- Add a Salted Edge: Sprinkle a pinch of flaky sea salt along the sides where ice cream meets cookie to heighten the sweet-savory contrast.
- Layered Drizzles: Drizzle caramel, hot fudge, or fruit compote over the ice cream layer before placing the top bar. This creates pockets of flavor and surprise.
- Make-Ahead and Batch Prep
- Assemble in Advance: You can fully assemble the bars and freeze for up to two weeks before serving. Remove 5–10 minutes prior to event for easy slicing.
- Label for Easy Rotation: Place wax paper between layers if stacking multiple pans in the freezer and label with date and flavor to avoid confusion.
Serving and Presentation Ideas
Elevate your Ice Cream Sandwich Bars from simple hand-held treats to show-stopping dessert displays with these serving ideas:
- Tiered Dessert Trays
- Arrange bars on multi-level cake stands or tiered trays. Place smaller, bite-size squares on top tiers and standard bars on bottom.
- Garnish tiers with fresh fruit (berries, sliced peaches, or orange segments), edible flowers, or mint sprigs for a pop of color.
- Plating Pairings
- Sauce Siblings: Serve bars with small ramekins of hot fudge sauce, caramel drizzle, or fruit coulis on the side for dipping or drizzling.
- Fresh Fruit Buffet: Offer a platter of sliced strawberries, kiwi, and pineapple alongside bars to add brightness and contrasting textures.
- Edible Garnishes: Top each bar with a spoonful of whipped cream or a dollop of marshmallow fluff for extra indulgence.
- Themed Party Displays
- Ice Cream Social: Create a build-your-own station where guests select their favorite base (brownie, cookie, waffle), ice cream flavor, and mix-ins. Provide cookie cutters to shape ice cream before layering.
- Picnic-Ready: Individually wrap each bar in parchment paper and tie with a ribbon or twine. Place in a wicker basket lined with a cool pack to keep them chilled outdoors.
- Creative Wrapping for Gifting
- Individual Wrapping: Use wax paper folded around each bar; secure with a custom sticker or label.
- Gift Boxes: Arrange a half dozen bars in a decorative box with parchment dividers. Include labels indicating flavor and date made.
Storage, Packaging, and Freezing
Proper storage ensures your Ice Cream Sandwich Bars stay fresh, firm, and ready to serve whenever cravings strike. Follow these guidelines for the best results:
- Long-Term Freezing
- Airtight Containers: Place bars in single layers inside freezer-safe, lidded containers. Separate layers with sheets of parchment or wax paper to prevent sticking.
- Label and Date: Write flavor and date on a piece of masking tape or freezer label to keep track of freshness. Bars typically remain ideal for up to 2 weeks, though they’re safe to eat for up to one month if well sealed.
- Short-Term Serving
- Room-Temp Holding Time: When served outdoors or at parties, bars can sit at room temperature for up to 10–15 minutes before they start to soften. Have a baking sheet or chilled platter ready to rest bars on so melting is contained.
- Refreezing Tips: If bars soften too much (e.g., children unwrap and forget about them), simply rewrap tightly and freeze again for at least 2 hours before recutting.
- Packaging for Gifting or Transport
- Individual Wrapping: Cut bars and wrap each in parchment or wax paper, folding ends like a candy wrapper. Keep extras in a resealable freezer bag.
- Portable Boxes: For selling or gifting, use shallow cardboard boxes lined with parchment and a small cool pack underneath to keep bars from melting. Tie with a ribbon or place a custom label on top.
- Avoiding Freezer Burn
- Eliminate Air Pockets: Push out as much air as possible when sealing freezer bags or containers.
- Freeze Flat: Lay wrapped bars flat on a cookie sheet in the freezer until solid, then stack vertically to save space.
Frequently Asked Questions (FAQs)
Q1: What exactly are Ice Cream Sandwich Bars?
A1: Ice Cream Sandwich Bars are frozen treats featuring two layers of solid dessert—commonly cookie bars, brownies, or wafers—encasing a layer of ice cream. They can be homemade or store-bought and come in countless flavor combinations.
Q2: How do I keep ice cream sandwich bars from becoming too hard to bite?
A2:
- Let bars sit at room temperature for 2–3 minutes before serving.
- Choose slightly softer ice cream or let firm ice cream soften for a few minutes before assembling.
- Add a thin barrier layer of melted chocolate or frosting under the top dessert layer to regulate freezing.
Q3: Can I make Ice Cream Sandwich Bars ahead of time?
A3: Absolutely. Once assembled, bars can be frozen for up to two weeks in an airtight container. If you need them further in advance, freeze fully, then wrap each bar individually in parchment and seal in a freezer bag—still fresh up to one month.
Q4: How long do homemade Ice Cream Sandwich Bars last in the freezer?
A4: Stored properly in airtight, well-sealed containers or freezer bags, homemade bars usually taste best within two weeks. They are safe beyond that if no freezer burn is present, but texture may degrade after a month.
Q5: What are some good flavor combinations?
A5: The sky’s the limit, but here are a few tried-and-true duós:
- Chocolate chip cookie bars + vanilla bean ice cream
- Fudgy brownie bars + espresso-ripple ice cream (tiramisu style)
- Graham cracker crust + marshmallow swirl ice cream (S’mores vibe)
- Peanut-butter cookie bars + strawberry jam–ripple ice cream (PB&J twist)
- Funfetti cake-bars + birthday-cake ice cream with extra sprinkles
Conclusion
Ice Cream Sandwich Bars are the epitome of summer indulgence—versatile, fun, and endlessly customizable. From classic chocolate chip creations to innovative tiramisu-inspired brownie bars, these treats bring joy in every bite. Whether you’re hosting a backyard barbecue, planning a birthday bash, or simply craving a cold treat on a hot day, homemade sandwich bars will never disappoint. So roll up your sleeves, choose your favorite flavors, and unleash your creativity.