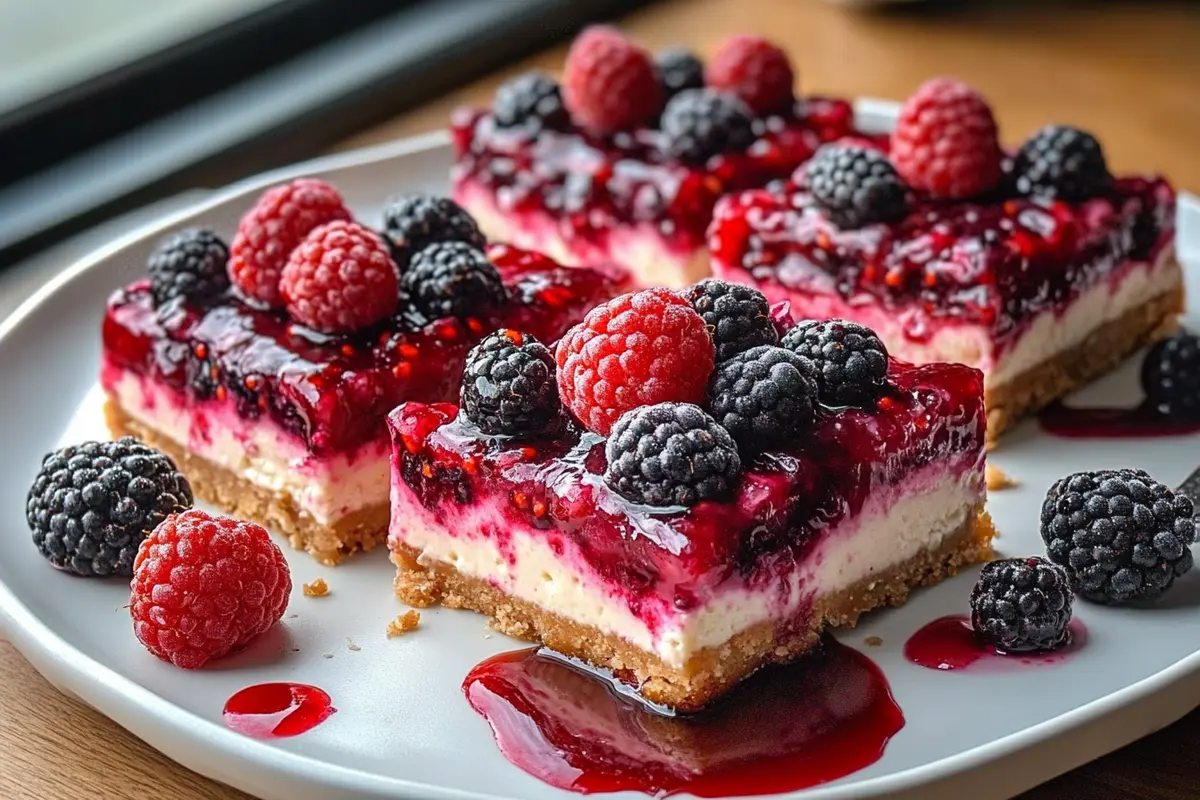
No-Bake Berry Cheesecake Bars are the ultimate make-ahead dessert for warm days, gatherings, and last-minute treats. Imagine a buttery, crunchy crust giving way to a luscious, creamy cheesecake filling, interrupted only by vibrant swirls of tangy-sweet berries. Whether you’re hosting a backyard barbecue or craving a cool indulgence, these bars deliver show-stopping flavor with zero oven time.
The Allure of No-Bake Berry Cheesecake Bars
- Zero Oven Time: Perfect for hot days when you don’t want to heat your home.
- Show-Stopping Presentation: Marbled berry swirls make every slice Instagram-worthy.
- Simple Prep: Just mix, layer, and chill—no complicated baking steps.
For a fascinating look at how cheesecake evolved from ancient custards to today’s creamy classics, explore the History of Cheesecake.
A Brief History of Cheesecake & the Rise of No-Bake Desserts
Origins of cheesecake date back to ancient Greece, where simple cheese-and-honey cakes fueled Olympic athletes. Over centuries, the recipe traveled to Rome, medieval Europe, and eventually American kitchens—each culture adding its own twist. The no-bake variation emerged in the 20th century as refrigeration technology improved, enabling desserts that set without heat. Today, no-bake cheesecake bars marry traditional flavor with modern convenience.
Discover the diversity of berries—from strawberries and raspberries to blackberries and blueberries—by visiting Types of Berries.
Ingredient Deep Dive
Understanding your ingredients ensures flawless results:
- Crust Components
- Graham crackers or digestive biscuits: finely crushed for a sturdy base
- Melted butter (or coconut oil): binds the crumbs and adds richness
- Optional pinch of cinnamon or sugar for extra flavor
- Creamy Cheesecake Filling
- Full-fat cream cheese at room temperature for silky texture
- Powdered sugar or agave nectar: smooth sweetness without grit
- Gelatin (or agar-agar for vegan) to set the filling firmly
- Heavy cream whipped to soft peaks: lightens the mixture and prevents cracks
- Berry Swirl & Topping
- Fresh or frozen berries: choose strawberries, raspberries, or a mixed blend
- Granulated sugar or berry jam: intensifies color and flavor in the swirl
- Fresh mint leaves or white chocolate shavings for garnish
Pro Tip: Let cream cheese soften fully to avoid lumps—and sift powdered sugar before folding in.
Essential Tools & Prep
- An 8×8-inch or 9×9-inch square pan lined with parchment paper
- Mixing bowls (one large for filling, one small for purée)
- Electric mixer or whisk for smooth texture
- Spatula for spreading layers
- Skewer or toothpick for marbling the berry swirl
- Sharp knife dipped in hot water for clean slicing

Step-by-Step Assembly
1. Making the Crust
- Crush the biscuits: Seal crumbs in a zip-top bag and bash with a rolling pin until fine.
- Combine with fat: Stir crumbs with melted butter until evenly coated.
- Press firmly: Transfer mixture to the lined pan and press with the back of a spoon or a flat-bottomed glass to create an even layer.
- Chill briefly: Refrigerate for 10–15 minutes to set before adding filling.
Packing the crust tightly prevents separation and ensures neat bars.
2. Prepping the Cheesecake Filling
- Beat cream cheese: In a large bowl, whip until smooth and free of lumps.
- Sweeten: Add powdered sugar gradually, mixing on low to prevent sugar clouds.
- Bloom gelatin: Sprinkle gelatin over cold water, let sit 5 minutes, then gently warm until dissolved.
- Combine: Slowly drizzle gelatin into the cream cheese mix while beating on low.
- Fold in cream: Gently fold whipped cream into the cheese mixture until homogeneous.
- Layer: Pour filling over the chilled crust and smooth the top with a spatula.
Work swiftly to keep the mixture cold and prevent breakage of air bubbles.
3. Creating the Berry Swirl
- Cook down berries: In a small saucepan, simmer berries with sugar until they release juices and soften.
- Purée & strain: Blend into a smooth purée; strain if you prefer no seeds.
- Dot & swirl: Spoon small dollops of purée across the filling. Drag a skewer through the dots in alternating directions to form a marbled pattern.
Aim for contrast: use darker berries (blackberries or blueberries) against the pale filling.
4. Chilling & Setting
- Refrigerate: Let the bars chill 4–6 hours or overnight for best results.
- Quick-set option: Freeze for 1 hour if you need to serve sooner—allow a brief thaw before slicing.
- Texture check: Fully set bars will hold clean edges and slice without crumbling.
Assembly Tips & Tricks
- Hot-knife trick: Dip your knife blade in hot water and wipe between cuts for pristine slices.
- Even layers: Use a ruler or offset spatula to gauge uniform thickness.
- Prevent bleeding: Chill the filling until slightly firm before adding berry purée.
Variations & Substitutions
- Berry Blends: Try triple-berry (strawberry, raspberry, blueberry) or single-variety for bold flavor.
- Crust Swaps: Vanilla wafers, chocolate grahams, or gluten-free cookies work beautifully.
- Dietary Options:
- Vegan: Coconut-based cream cheese, dairy-free butter, and agar-agar.
- Sugar-free: Erythritol or monk fruit sweeteners in place of sugar.
- Flavor Twists:
- Add lemon or orange zest for citrus notes.
- Swirl in chocolate ganache or salted caramel for decadence.
Experiment freely—these bars adapt easily to your pantry!
Troubleshooting Common Issues
- Soft Filling: Ensure gelatin is fully dissolved and slightly cooled before mixing.
- Soggy Crust: Bake no-bake crust for 5 minutes at 300°F (150°C) if you want extra dryness, or press more firmly.
- Bleeding Swirl: Chill filling until almost set before adding purée.
- Cracks on Surface: Avoid over-mixing whipped cream into the filling.
Storage, Freezing & Make-Ahead Tips
- Refrigerator: Store in an airtight container for up to 5 days—bars remain perfect for balanced slices.
- Freezing: Wrap tightly in plastic wrap and foil; freeze for up to 3 months. Thaw in refrigerator overnight.
- Make-Ahead: Assemble 24 hours before serving to save time on event day.
Serving & Presentation
- Garnish: Top each bar with fresh mint leaves, extra berries, or a dusting of powdered sugar.
- Plating: Drizzle berry coulis on the plate and place bars at a slight angle for elegance.
- Pairings: Serve alongside iced tea, sparkling lemonade, or a chilled rosé.

Frequently Asked Questions
- Can I use frozen berries instead of fresh?
Yes—thaw, drain excess liquid, then simmer with sugar before puréeing. - How long do these bars last in the fridge?
Up to 5 days in an airtight container. - Can I double the recipe for a larger pan?
Absolutely—adjust ingredient amounts and use a 9×13-inch pan. - What can I use instead of gelatin?
Agar-agar works for vegan bars; follow package instructions for setting. - Why is my crust dry or crumbly?
You may need more melted butter or firmer pressing when assembling. - How do I prevent the swirl from bleeding?
Chill the filling until slightly set before swirling in purée.
Conclusion
These no-bake berry cheesecake bars blend ease, beauty, and sensational flavor in every bite. From a buttery crust to a creamy filling and vibrant berry swirl, they’re tailor-made for summer celebrations and stress-free entertaining. Whip them up today, share your masterpiece on social media with #VelmaRecipes, and let the world see how simple elegance can taste. Happy chilling—and even happier indulging!
Print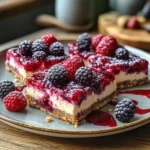
No-Bake Berry Cheesecake Bars
- Total Time: 6 hours 25 minutes
- Yield: 12 bars 1x
Description
These No-Bake Berry Cheesecake Bars feature a buttery graham cracker crust, a light and creamy cheesecake filling, and a vibrant berry topping. They’re refreshingly fruity, rich without being heavy, and incredibly simple to prepare, no oven required!
Ingredients
For the Crust
- 1½ cups graham cracker crumbs
- ⅓ cup melted unsalted butter
- 2 tablespoons sugar
- Pinch of salt
For the Cheesecake Layer
- 16 oz cream cheese, softened
- ½ cup powdered sugar
- 1 teaspoon vanilla extract
- 1 tablespoon lemon juice
- 1 cup heavy cream (cold), or 1 tub whipped topping
For the Berry Topping
- 2 cups mixed fresh berries (blueberries, raspberries, strawberries, blackberries)
- 2 tablespoons berry jam or preserves (melted slightly)
- 1 teaspoon lemon zest (optional)
Instructions
1. Make the Crust
- Line an 8×8-inch pan with parchment paper, leaving overhang.
- Mix graham cracker crumbs, melted butter, sugar, and salt in a bowl until evenly combined.
- Press into the bottom of the pan to form a firm, even layer.
- Chill in the fridge while you prepare the filling.
2. Make the Cheesecake Layer
- In a large bowl, beat cream cheese until smooth.
- Add powdered sugar, vanilla, and lemon juice. Mix until creamy.
- In a separate bowl, whip cold cream until stiff peaks form. Fold gently into the cream cheese mixture.
- Spread over the chilled crust and smooth the top.
3. Add the Berry Topping
- Gently toss berries with melted jam and lemon zest (if using).
- Spoon the berry mixture evenly over the cheesecake layer.
4. Chill to Set
- Cover and refrigerate for at least 4 hours (preferably overnight) until firm.
- Use the parchment overhang to lift out and slice into bars before serving.
Notes
- Berry Options: Use all one type of berry or mix your favorites
- Graham Swap: Try crushed vanilla wafers or chocolate cookies for the crust
- Vegan Option: Use dairy-free cream cheese and coconut whipped topping
- Add Crunch: Sprinkle with chopped nuts or granola before serving
- Prep Time: 25 minutes
- Cook Time: 6 hours
- Category: Dessert Recipes
- Method: Assembled
- Cuisine: American
Nutrition
- Calories: 290 kcal
- Sugar: 15 g
- Sodium: 150 mg
- Fat: 21 g
- Saturated Fat: 12 g
- Trans Fat: 0g
- Carbohydrates: 20 g
- Fiber: 1 g
- Protein: 3 g
1 thought on “Irresistible No-Bake Berry Cheesecake Bars for Effortless Summer Desserts”