Picture this: a snowy dessert table, mugs of steaming hot chocolate, and a tray of Polar Bear Paw Cookies so cute everyone hesitates before taking the first bite. These charming polar bear paw treats are simple to assemble, endlessly customizable, and guaranteed to steal the show at winter parties, bake sales, kids’ events, and cozy nights in.
To get that glossy white coating and smooth finish, it really helps to understand how to melt chocolate properly. For extra guidance, you can check a professional tempering and melting white chocolate guide.
What Are Polar Bear Paw Cookies?
Polar Bear Paw Cookies are playful, winter-inspired treats designed to look like a polar bear’s paw print. You start with a round base—usually a soft cookie or candy cluster—then build the paw design on top using chocolate, candy, and sometimes coconut “fur.”
Most versions follow one of two styles:
- Cookie-style paws
- Soft cookie base (chocolate, sugar, or shortbread).
- Frosted with white or off-white icing.
- Topped with:
- One larger chocolate or candy “pad”.
- Three to four smaller “toes”.
- Optional shredded coconut for a snowy effect.
- Candy-style paws
- Caramel and nut clusters or similar candy base.
- Dipped in white chocolate.
- Decorated with chocolate discs and chips as paw pads and toes.
Both are adorable. Both are simple. And both can be adapted to your flavor, color, and theme preferences.
Why You’ll Love These Polar Bear Paw Cookies
These winter paw print cookies are more than just cute:
- Beginner-friendly: No advanced piping skills required.
- Kid-approved activity: Easy assembly line for little hands.
- Customizable: Change the base, flavors, and candy shapes.
- Perfect for events: Cookie exchanges, classroom parties, winter birthdays, polar bear or Arctic themes.
- Visually striking: High-contrast design that photographs beautifully for social media and blogs.
Sprinkle in synonyms like polar bear paw print cookies, cute animal paw cookies, and winter wonderland cookie ideas naturally in your copy to boost search relevance without sounding forced.
Ingredient Breakdown: Building the Perfect Paw
Designing the perfect polar bear paw cookie is all about structure and contrast. Here’s how each component works.
1. Cookie Base Options
Choose one:
- Soft chocolate cookie
- Deep color makes the white and candy details pop.
- Pairs beautifully with peppermint, caramel, or coconut.
- Classic sugar cookie
- Neutral, buttery flavor.
- Clean canvas for frosting and decorations.
- Shortbread
- Tender crumb, elegant simplicity.
- Cake-mix cookie
- Quick, consistent, ideal for large batches.
- Store-bought cookies
- Ideal for last-minute projects or decorating with kids.
- Use plain round cookies, sandwich cookies, or chocolate-covered biscuits.
2. “Fur” & Frosting
For that snowy, cozy look:
- Vanilla buttercream
- Cream cheese-style frosting (if it fits your brand)
- Whipped frosting or marshmallow-style frosting
- White chocolate ganache or melted coating
- Optional:
- Shredded coconut for a snowy fur effect
- White sanding sugar for sparkle
3. Paw Pad & Toes
The “paw” is where the fun happens.
Great options for the center pad:
- Chocolate-covered peppermint patties
- Chocolate discs or wafers
- Mini sandwich cookies
- Large chocolate buttons
For the toes:
- Chocolate chips (flat side up for a neat look)
- Mini M&M’s or candy-coated chocolates
- Small chocolate pearls
- Mini marshmallows for a softer aesthetic
4. Flavor Boosters
Enhance your polar bear paw treats with:
- Vanilla extract
- Almond extract
- Peppermint extract
- Caramel drizzle
- Espresso powder (for grown-up versions)
- Sea salt flakes on chocolate-based versions.
Tools & Equipment Checklist
Before you start, gather:
- Mixing bowls
- Hand mixer or stand mixer
- Measuring cups and spoons
- Baking sheets + parchment paper or silicone mats
- Cooling racks
- Small offset spatula or butter knife
- Piping bag or zip-top bag (for neat frosting circles)
- Small bowls for organizing candies and toppings
Having everything ready turns decorating into a smooth, fun process.
Step-by-Step: Baking the Cookie Base
Here’s a simple from-scratch chocolate cookie base you can adapt.
- Prepare your oven
- Preheat to 175°C / 350°F.
- Line baking sheets with parchment or silicone mats.
- Cream butter and sugar
- Beat softened butter with granulated sugar and brown sugar until light and fluffy.
- Add eggs (or your chosen substitute) and vanilla; mix until smooth.
- Combine dry ingredients
- Whisk flour, cocoa (if using), baking powder or soda, and a pinch of salt.
- Fold into the wet mixture until just combined.
- Chill the dough
- Chill for 20–30 minutes.
- This helps your cookies bake thicker, giving a sturdy base for the paw design.
- Shape and bake
- Scoop dough into balls (about 1–1.5 tablespoons).
- Slightly flatten the tops for an easier decorating surface.
- Bake 8–11 minutes, until set at the edges but still soft in the center.
- Cool completely
- Transfer to a cooling rack.
- Only decorate once fully cool so your frosting and chocolate don’t slide off.
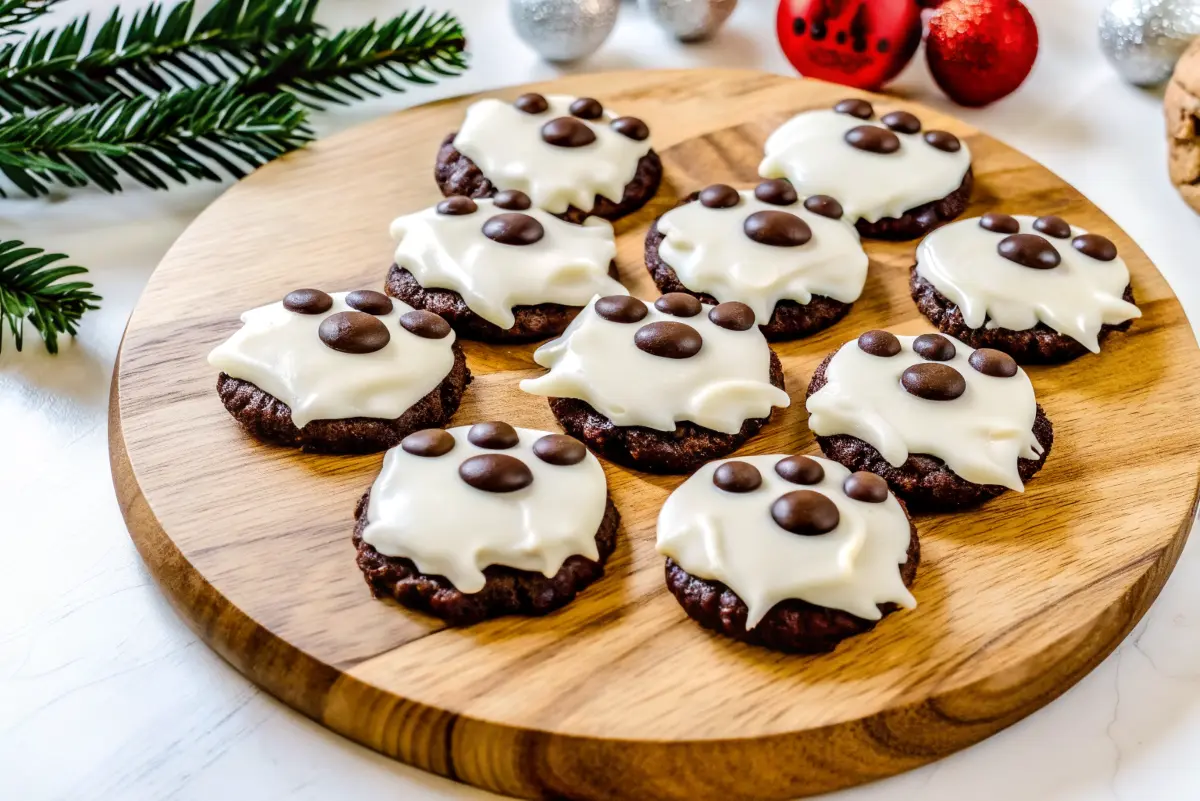
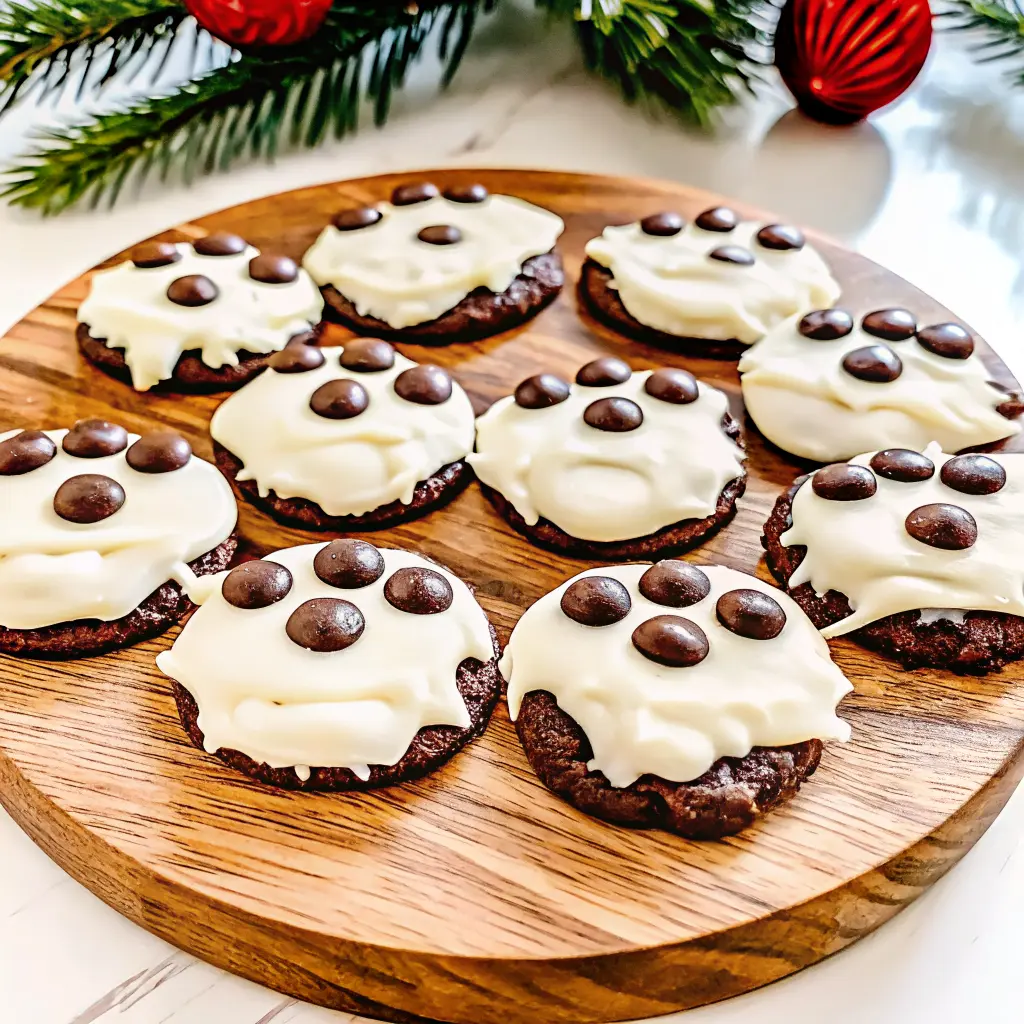
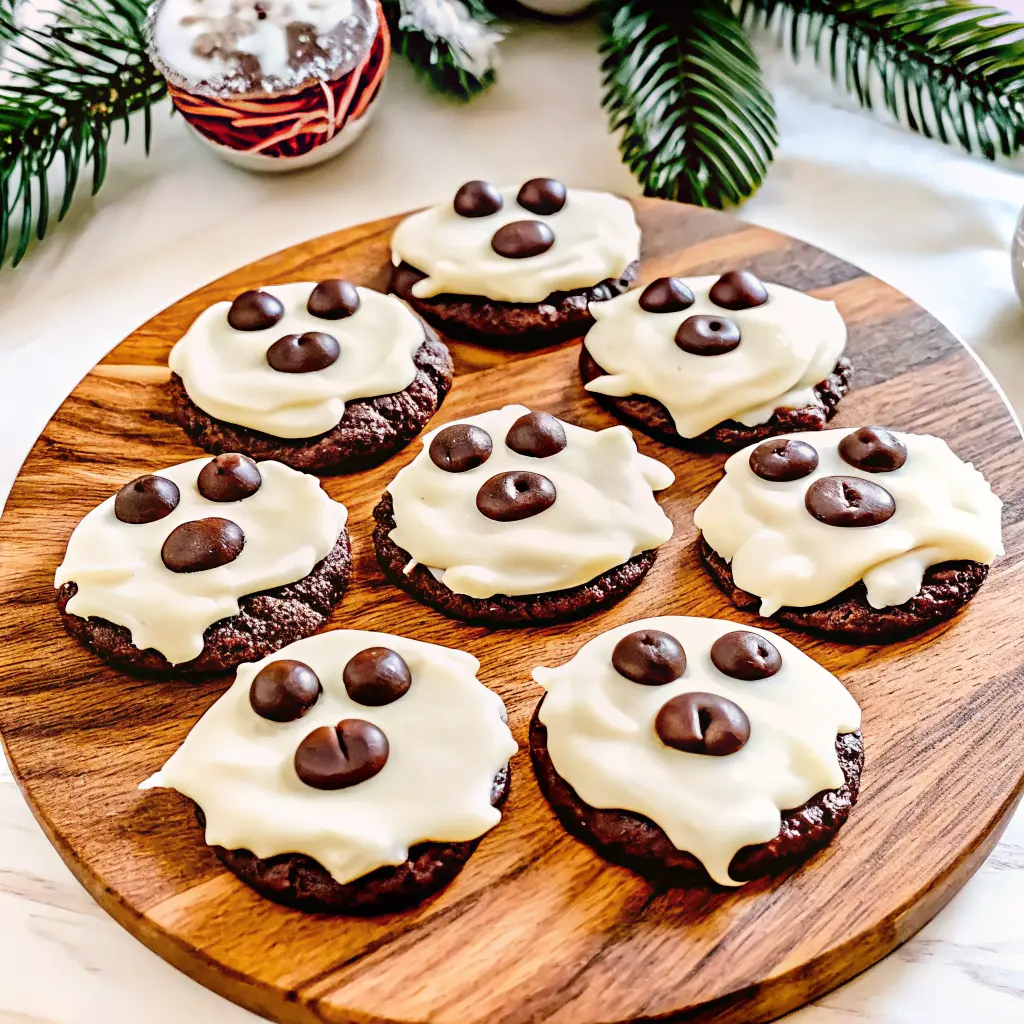
How to Decorate Polar Bear Paw Cookies
Now for the fun part: turning simple cookies into Polar Bear Paw Cookies that look professionally styled.
- Organize your toppings
- Place your choice:
- “Pad” candies (peppermint patties, chocolate discs, mini cookies)
- “Toes” (chocolate chips, minis, candies)
- in small bowls for quick assembly.
- Place your choice:
- Frost the base
- Spread or pipe a circle of white frosting on each cooled cookie:
- Leave a small border so frosting doesn’t spill over.
- Aim for a smooth, even layer—this is your snow.
- Spread or pipe a circle of white frosting on each cooled cookie:
- Place the paw pad
- Gently press one larger candy into the lower half of the frosted cookie.
- This is the main pad; keep it centered and straight.
- Add the toes
- Above the pad, arrange 3–4 smaller candies in a curve.
- Even spacing makes the design instantly recognizable as a paw.
- Add the “fur” (optional)
- Sprinkle shredded coconut around the paw (not over the candies) for a furry, snowy look.
- Press lightly so it adheres.
- Let them set
- Allow the cookies to sit at room temperature until the frosting firms slightly.
- If using melted chocolate instead of frosting, let it set until touch-dry before stacking or plating.
For a more advanced look, you can:
- Pipe a neat frosting circle instead of spreading.
- Outline the paw pad with melted chocolate.
- Use matching candy colors for a polished aesthetic.
Make-Ahead, Storage & Freezing
- Undecorated cookies
- Store in an airtight container at room temperature for a couple of days.
- Or freeze in layers with parchment; thaw completely before decorating.
- Decorated cookies
- Store in a single layer or between sheets of parchment so paw designs don’t smudge.
- Keep cool and dry, away from direct heat or sun to protect the chocolate and frosting.
- Candy-style paws
- These usually keep well in airtight containers.
- Arrange gently if stacked so pads and toes stay intact.
Serving Ideas & Winter Styling
Turn your Polar Bear Paw Cookies into the centerpiece of your winter spread:
- Create a winter wonderland dessert table:
- White platters, glass stands, and blue accents.
- Sprinkle coconut or powdered sugar as “snow.”
- Pair with:
- Hot chocolate bar with marshmallows and candy canes.
- Snowflake cookies, Arctic animal cupcakes, or simple white-dipped pretzels.
- Theme ideas:
- Polar bear or Arctic exploration party.
- Movie night with winter classics.
- Classroom celebrations or animal-awareness events.
Troubleshooting Guide
If something looks off, these quick fixes will help.
- Cookies spread too much
- Chill dough longer.
- Add a bit more flour if very soft.
- Ensure baking sheets are cool between batches.
- Candies sliding off
- Use a thicker frosting.
- Let the base set slightly, then press candies in.
- Avoid decorating warm cookies.
- White chocolate looks rough or lumpy
- Melt at low power and stir often.
- Don’t overheat.
- If using candy melts, follow package directions carefully.
- Paw design doesn’t look like a paw
- Use a reference photo.
- Keep pads centered and toes evenly spaced.
- Practice on parchment first with spare candy.
FAQs About Polar Bear Paw Cookies
1. How do I make Polar Bear Paw Cookies with simple ingredients?
Use a basic sugar or chocolate cookie recipe (or store-bought cookies), white frosting, one larger chocolate candy for the pad, and three or four smaller candies for the toes. Assemble while the frosting is soft so everything sticks neatly.
2. Can I use store-bought cookies as the base?
Yes. Plain round cookies, sandwich cookies, or chocolate-covered biscuits all work. This shortcut is perfect when you want cute polar bear paw treats fast.
3. What candies work best for the paw pads and toes?
Larger pads: peppermint patties, chocolate discs, or mini sandwich cookies. Toes: chocolate chips, mini M&M’s, candy-coated chocolates, or chocolate pearls.
4. How do I keep the chocolate or frosting from smudging?
Let cookies sit undisturbed until the frosting or melted coating sets. If your kitchen is warm, place the tray in a cooler spot so details firm up.
5. Can I make Polar Bear Paw Cookies ahead for a party?
Absolutely. Bake bases a day or two ahead, store airtight, then decorate the day of or the night before for the freshest look.
Conclusion
Polar Bear Paw Cookies bring together everything we love about winter baking: playful design, simple steps, and endless room for creativity. Try different bases, experiment with flavors like mint or caramel, and style a full Arctic dessert spread that guests will remember.
Print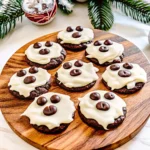
Irresistible Polar Bear Paw Cookies: Cute Winter Treats Everyone Will Love
- Total Time: PT45M
- Yield: 24 cookies 1x
- Diet: Vegetarian
Description
These Polar Bear Paw Cookies are irresistibly cute winter treats made with soft, chewy cookies topped with smooth chocolate, marshmallow “pads,” and coconut “fur.” Perfect for Christmas parties, kids’ baking days, or winter dessert platters — they’re as fun to make as they are to eat!
Ingredients
For the Cookies:
- ½ cup unsalted butter, softened
- ¾ cup granulated sugar
- 1 large egg
- 1 tsp vanilla extract
- 1 ½ cups all-purpose flour
- ½ tsp baking powder
- ¼ tsp salt
For Decoration:
- ½ cup melted white chocolate or almond bark
- 24 large marshmallows (cut in half)
- 72 chocolate chips (3 per cookie for “toes”)
- 1 cup shredded coconut (for “fur”)
Instructions
- Preheat and prep
- Preheat oven to 350°F (175°C) and line baking sheets with parchment paper.
- Make the dough
- Beat butter and sugar together until light and fluffy.
- Add egg and vanilla, then mix in flour, baking powder, and salt until combined.
- Shape and bake
- Scoop tablespoon-sized dough balls onto baking sheets.
- Flatten slightly with your palm and bake 9–10 minutes, until just set.
- Cool completely.
- Decorate the paws
- Dip tops of cooled cookies into melted white chocolate.
- Press a marshmallow half in the center (the “paw pad”) and arrange 3 chocolate chips above it for “toes.”
- Sprinkle coconut around the edges for a snowy effect.
- Set and serve
- Chill 15 minutes until chocolate firms. Store in an airtight container.
- Prep Time: PT20M
- Cook Time: PT25M
- Category: Desserts
- Method: Baked
- Cuisine: American
Nutrition
- Serving Size: 1 cookie
- Calories: 150 kcal
- Sugar: 12g
- Sodium: 60mg
- Fat: 8g
- Saturated Fat: 5g
- Unsaturated Fat: 3g
- Trans Fat: 0g
- Carbohydrates: 18g
- Fiber: 1g
- Protein: 1g
- Cholesterol: 20mg