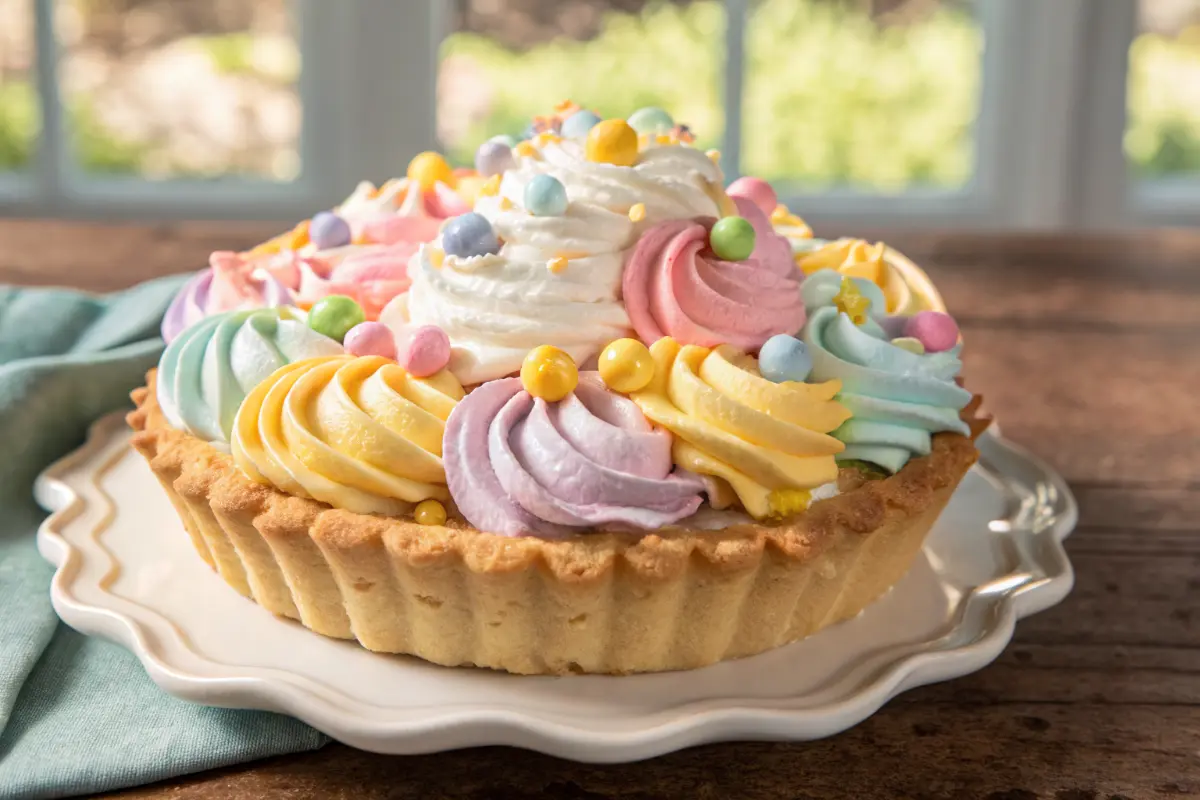
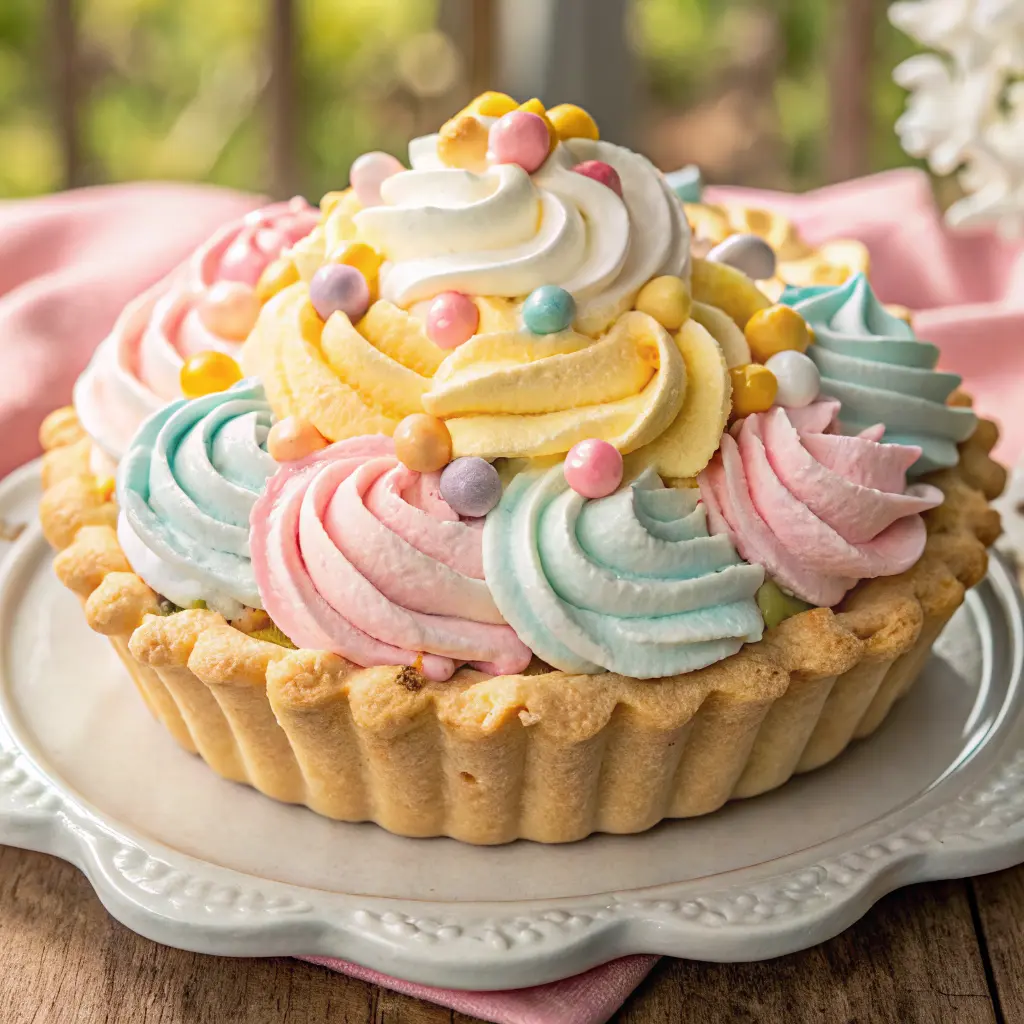
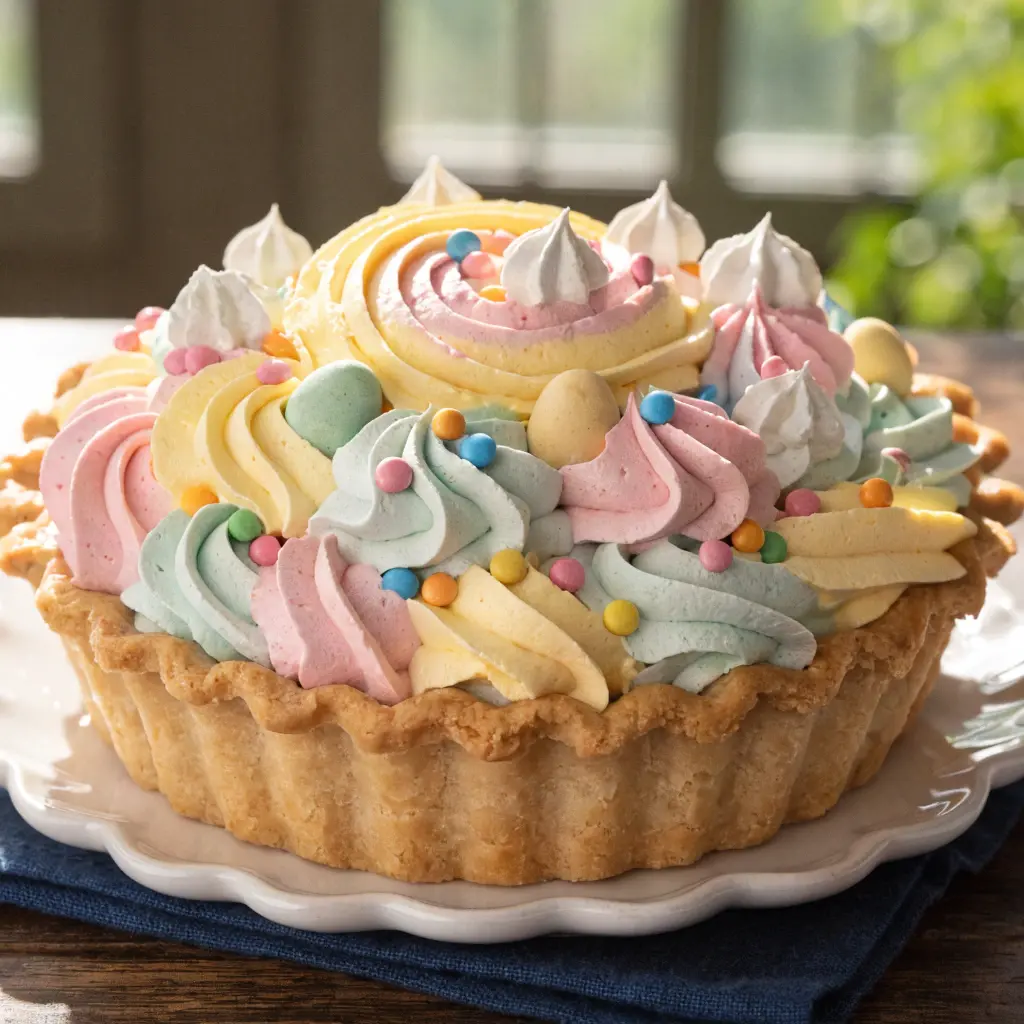
Why You’ll Love This No-Bake Easter Pastel Swirl Cream Pie
This pastel swirl pie is more than just pretty—it’s practical and delicious.
No Oven Needed
- Perfect for warm spring days
- No risk of overbaking or burning
- Ideal for beginners
Visually Stunning
- Soft pastel colors create a marbled effect
- Perfect for Easter tables and social sharing
- Customizable color combinations
Family-Friendly
- Kids can help with coloring and swirling
- Fun, creative process
- No complicated techniques
Make-Ahead Convenience
- Can be prepared a day in advance
- Saves time on busy holidays
What Is a Pastel Swirl Cream Pie?
A pastel swirl cream pie is a type of no-bake cheesecake pie that features:
- A smooth, creamy filling
- Multiple pastel-colored layers
- A marbled swirl design
- A chilled, firm texture
Unlike traditional baked pies, this no-bake cream pie relies on refrigeration to set. The swirl effect is created by gently combining colored portions of the filling, resulting in a soft, artistic pattern.
Ingredients You’ll Need for No-Bake Easter Pastel Swirl Cream Pie
Creating this easy Easter pie requires simple, accessible ingredients.
Crust Ingredients
- 1 ½ cups graham cracker crumbs
- 6 tablespoons melted butter
- 2 tablespoons granulated sugar
Learn more about crust basics here: how to create graham cracker crust
Cream Filling Ingredients
- 8 oz cream cheese (softened)
- 1 cup powdered sugar
- 1 teaspoon vanilla extract
- 1 cup whipped cream (or whipped topping)
- 1 cup sweetened condensed milk
Coloring Ingredients
- Gel food coloring in pastel shades:
- Pink
- Yellow
- Blue
- Purple
Toppings & Decoration (Optional)
- Whipped cream (for piping or spreading)
- Easter sprinkles
- Mini chocolate eggs or candy
- Edible glitter or colored sugar
Equipment Needed
Keep things simple with these tools:
- Mixing bowls
- Electric mixer or whisk
- Spatula
- 9-inch pie dish
- Toothpick or skewer (for swirling)
Step-by-Step Instructions
Follow this process to create the perfect no-bake pastel swirl pie.
Step 1: Prepare the Crust
- Combine graham cracker crumbs, melted butter, and sugar
- Mix until the texture resembles wet sand
- Press firmly into a pie dish
- Chill in the refrigerator for 20–30 minutes
Step 2: Make the Cream Filling
- Beat softened cream cheese until smooth
- Add powdered sugar and vanilla extract
- Mix until creamy and lump-free
- Fold in whipped cream gently
Step 3: Divide and Color
- Split the filling into separate bowls
- Add a few drops of gel food coloring to each
- Mix until soft pastel shades form
Popular colors:
- Pink
- Yellow
- Blue
- Lavender
Step 4: Create the Swirl Effect
- Spoon different colored fillings randomly into the crust
- Use a toothpick or skewer to gently swirl
Step 5: Chill and Set
- Place the pie in the refrigerator
- Chill for at least 4 hours (overnight preferred)
Step 6: Decorate and Serve
- Add whipped cream on top
- Sprinkle Easter decorations
- Slice and serve chilled
Pro Tips for the Perfect Swirl Pie
To elevate your no-bake Easter pie, follow these expert tips:
- Use gel food coloring for vibrant pastel tones
- Chill all ingredients before mixing
- Fold—not stir—whipped cream
- Use a light hand when swirling
- Refrigerate overnight for best results
Common Mistakes to Avoid
Even simple recipes can go wrong—here’s what to watch out for:
- Overmixing colors → muddy appearance
- Using liquid coloring → weak pastel shades
- Skipping chill time → soft, unstable pie
- Overwhipping cream → dense texture
- Loose crust → crumbly slices
Creative Variations of Easter Swirl Pie
Want to customize your spring dessert recipe? Try these variations:
Chocolate Swirl Version
- Add cocoa powder to one portion
- Create chocolate-vanilla swirls
Fruit-Flavored Swirl
- Add fruit purees or extracts:
- Strawberry
- Lemon
- Blueberry
Cookie Crust Variation
- Use crushed Oreos or vanilla cookies
- Adds a richer flavor
Dairy-Free Option
- Use plant-based cream cheese
- Substitute coconut whipped cream
Low-Sugar Version
- Use sugar alternatives
- Adjust sweetness carefully
Decoration & Presentation Ideas
Make your Easter dessert unforgettable:
- Pipe whipped cream along the edges
- Add pastel sprinkles
- Use mini chocolate eggs
- Dust with edible glitter
- Serve in mini jars for individual portions
How to Store and Make Ahead
This make-ahead Easter dessert is perfect for planning ahead.
Refrigeration
- Store covered in the fridge
- Best consumed within 2–3 days
Freezing
- Freeze for up to 1 month
- Thaw in refrigerator before serving
Make-Ahead Tips
- Prepare 1 day in advance
- Add toppings just before serving
Frequently Asked Questions (FAQs)
Can I make a no-bake pie without cream cheese?
Yes, you can substitute:
- Mascarpone
- Whipped topping-based fillings
However, cream cheese provides the best structure and flavor.
How long does a no-bake cream pie need to set?
- Minimum: 4 hours
- Ideal: Overnight
This ensures a firm, sliceable texture.
Can I freeze a no-bake Easter pie?
Yes:
- Wrap tightly
- Freeze up to 1 month
- Thaw before serving
What is the best crust for no-bake pies?
Popular options include:
- Graham cracker crust
- Cookie crust
- Biscuit crust
Each offers a different flavor and texture.
Can I use whipped topping instead of whipped cream?
Yes, it’s a convenient substitute and stabilizes the filling well.
Final Thoughts
The No-Bake Easter Pastel Swirl Cream Pie is the perfect combination of beauty, simplicity, and flavor. With its creamy texture, vibrant pastel colors, and effortless preparation, it stands out as one of the best no-bake Easter desserts you can make.
Print
No-Bake Easter Pastel Swirl Cream Pie – Easy & Colorful Spring Dessert
- Total Time: PT2H20M
- Yield: 8 slices 1x
- Diet: Vegetarian
Description
No-Bake Easter Pastel Swirl Cream Pie is a dreamy, colorful dessert featuring a buttery graham cracker crust filled with a light, creamy filling swirled in soft pastel shades.
Ingredients
- 1 ½ cups graham cracker crumbs
- 6 tablespoons melted butter
- 2 tablespoons granulated sugar
Cream Filling Ingredients
- 8 oz cream cheese (softened)
- 1 cup powdered sugar
- 1 teaspoon vanilla extract
- 1 cup whipped cream (or whipped topping)
- 1 cup sweetened condensed milk
Coloring Ingredients
- Gel food coloring in pastel shades:
- Pink
- Yellow
- Blue
- Purple
Toppings & Decoration (Optional)
- Whipped cream (for piping or spreading)
- Easter sprinkles
- Mini chocolate eggs or candy
- Edible glitter or colored sugar
Instructions
Step 1: Prepare the Crust
- Combine graham cracker crumbs, melted butter, and sugar
- Mix until the texture resembles wet sand
- Press firmly into a pie dish
- Chill in the refrigerator for 20–30 minutes
Step 2: Make the Cream Filling
- Beat softened cream cheese until smooth
- Add powdered sugar and vanilla extract
- Mix until creamy and lump-free
- Fold in whipped cream gently
Step 3: Divide and Color
- Split the filling into separate bowls
- Add a few drops of gel food coloring to each
- Mix until soft pastel shades form
Popular colors:
- Pink
- Yellow
- Blue
- Lavender
Step 4: Create the Swirl Effect
- Spoon different colored fillings randomly into the crust
- Use a toothpick or skewer to gently swirl
Step 5: Chill and Set
- Place the pie in the refrigerator
- Chill for at least 4 hours (overnight preferred)
Step 6: Decorate and Serve
- Add whipped cream on top
- Sprinkle Easter decorations
- Slice and serve chilled
- Prep Time: PT20M
- Category: Dessert
- Method: No-Bake
- Cuisine: American
Nutrition
- Serving Size: 1 slice
- Calories: 350 kcal
- Sugar: 20 g
- Sodium: 220 mg
- Fat: 24 g
- Saturated Fat: 14 g
- Unsaturated Fat: 8 g
- Trans Fat: 0 g
- Carbohydrates: 30 g
- Fiber: 1 g
- Protein: 4 g
- Cholesterol: 70 mg