
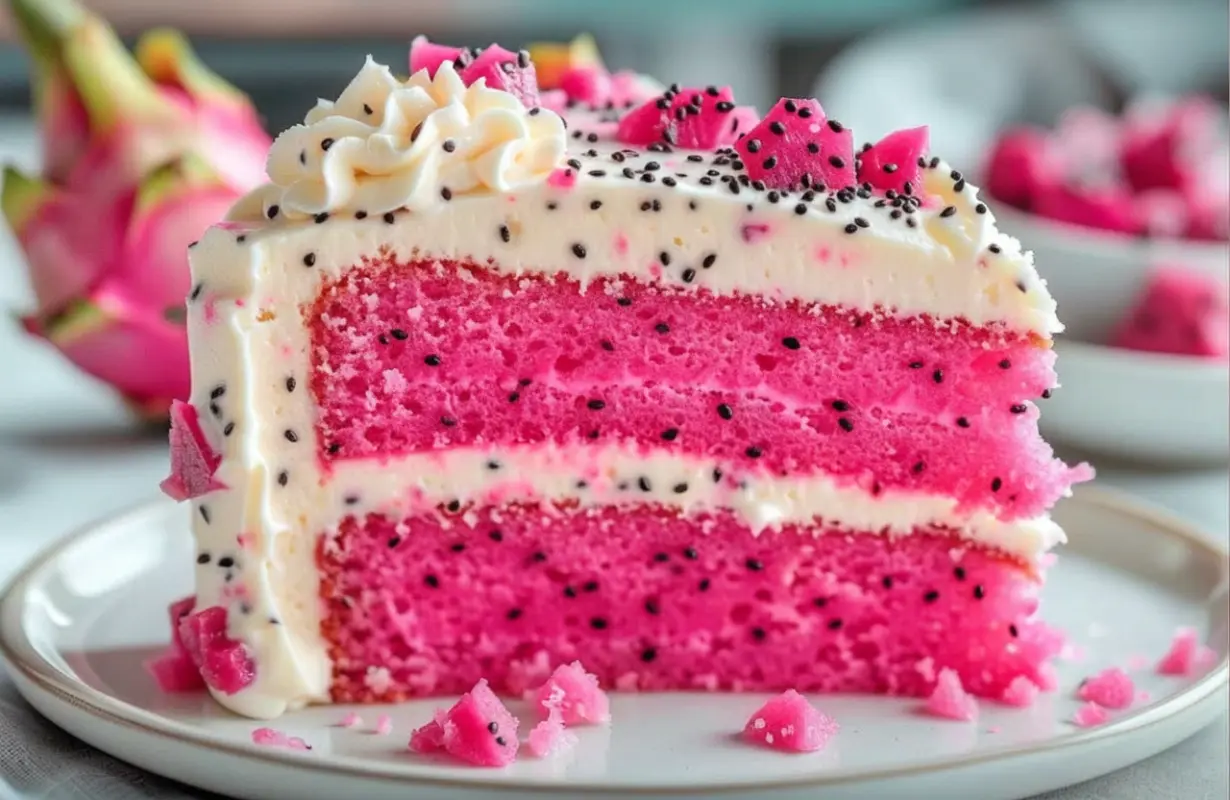
What Is Dragon Fruit Layer Cake?
Dragon fruit layer cake is a soft, layered sponge cake made with dragon fruit purée and finished with a creamy frosting. Also called pitaya cake, it is known for its beautiful pink appearance, delicate fruit flavor, and attractive presentation.
Dragon fruit comes in several varieties, including white-fleshed fruit with pink skin and red-fleshed fruit with pink or reddish-purple flesh. For this recipe, red-fleshed dragon fruit is preferred because it gives the sponge a more noticeable pink color.
The cake itself has a tender crumb, a mild sweetness, and a subtle tropical flavor. Rather than overpowering the other ingredients, dragon fruit works as a gentle fruity addition that complements vanilla and creamy frosting.
A typical dragon fruit layer cake includes:
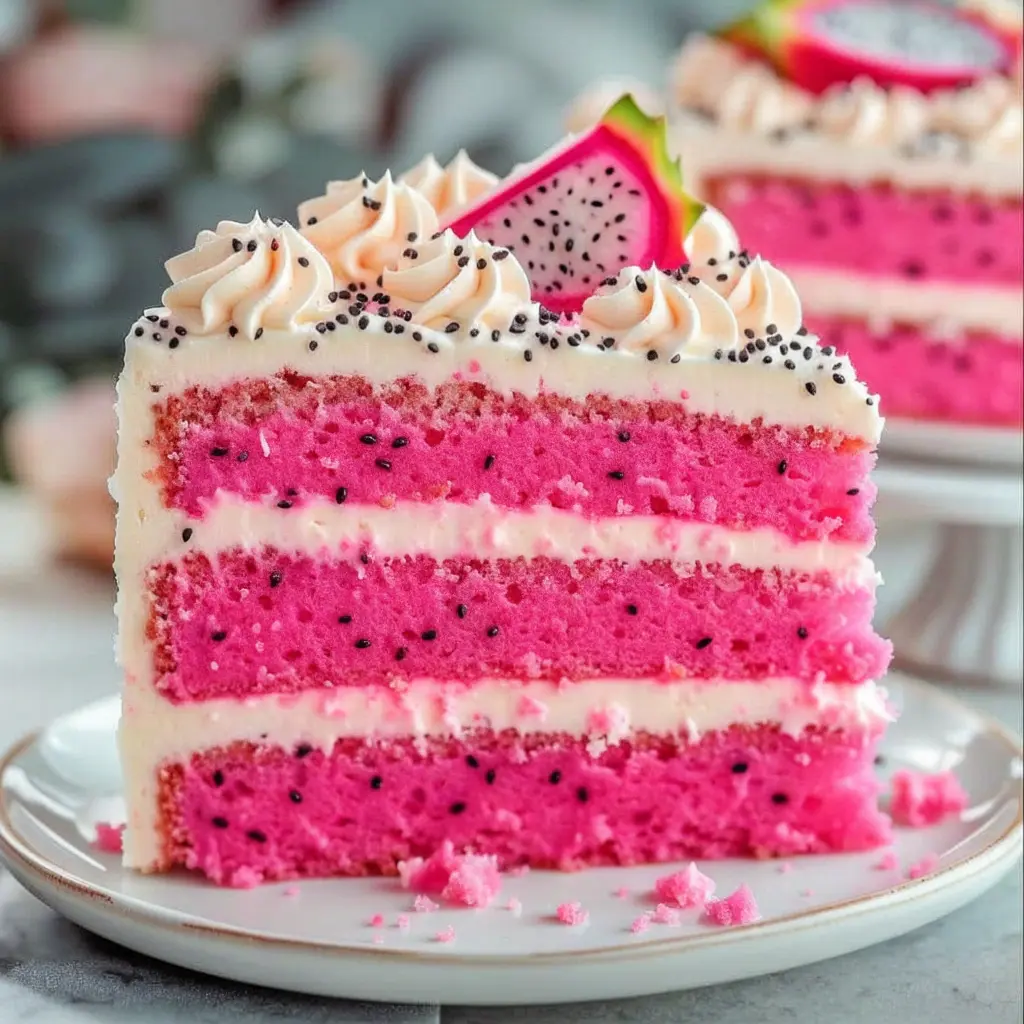
- Pink sponge layers: Soft, moist cake made with dragon fruit purée.
- Creamy filling: Whipped cream, cream cheese frosting, or buttercream between the layers.
- Smooth outer frosting: A light pink or white coating that holds the cake together.
- Fresh decoration: Dragon fruit slices, berries, coconut, or edible flowers.
Why You’ll Love This Dragon Fruit Layer Cake Recipe
There are plenty of reasons to add this pink dragon fruit cake to your homemade dessert collection.
- Naturally beautiful color: Red dragon fruit adds a lovely pink hue to the sponge, making the cake stand out without complicated decorating techniques.
- Soft and fluffy texture: The cake has a delicate crumb that pairs wonderfully with smooth frosting.
- Subtle tropical flavor: Dragon fruit brings a mild, fruity taste that works well with vanilla, coconut, and berries.
- Perfect for celebrations: Its colorful layers and attractive decoration make it a lovely centerpiece for birthdays and special gatherings.
- Easy to customize: You can use whipped cream, cream cheese frosting, or buttercream depending on the finish you prefer.
- Made with accessible ingredients: Most of the ingredients are everyday baking staples, while dragon fruit is available fresh or frozen in many supermarkets.
- Beautiful individual slices: The pink sponge and creamy filling create an eye-catching effect when the cake is sliced.
Ingredients for Dragon Fruit Layer Cake
Ingredients for the Cake
- 2½ cups (300 g) all-purpose flour: Creates the structure of the cake while keeping the crumb tender.
- 1¼ cups (250 g) granulated sugar: Adds sweetness and helps create a soft texture.
- ¾ cup (170 g) unsalted butter, softened: Gives the sponge its rich flavor and delicate crumb.
- 3 large eggs, at room temperature: Help bind the batter and give the cake structure.
- ¾ cup (180 g) red dragon fruit purée: Adds a gentle fruity flavor and pink color.
- ½ cup (120 ml) whole milk: Provides moisture and helps create a smooth batter.
- 2 teaspoons baking powder: Helps the cake rise evenly.
- 1 teaspoon vanilla extract: Adds a warm, sweet aroma.
- ½ teaspoon salt: Balances the sweetness and enhances the overall flavor.
Ingredients for the Creamy Frosting
- 1½ cups (360 ml) cold heavy whipping cream: Creates a light and airy frosting.
- 8 oz (225 g) cream cheese, softened: Gives the frosting a creamy texture and helps it hold its shape.
- ¾ cup (90 g) powdered sugar: Sweetens the frosting while keeping it smooth.
- 1 teaspoon vanilla extract: Complements the fruity flavor.
- 2 tablespoons thick dragon fruit purée: Adds a gentle pink color and subtle fruit flavor.
Ingredients for Decoration
- ½ fresh red dragon fruit, sliced or scooped into small balls
- ½ cup fresh strawberries or raspberries
- 2 tablespoons shredded coconut (optional)
- Edible flowers (optional)
- A few cake crumbs for decoration (optional)
Essential Equipment
Before you begin, gather the equipment you’ll need to prepare, bake, cool, and decorate the cake.
- Two 8-inch round cake pans
- Parchment paper
- Large mixing bowl
- Medium mixing bowl
- Electric hand mixer or stand mixer
- Whisk
- Rubber spatula
- Measuring cups and spoons or kitchen scale
- Blender or food processor
- Fine-mesh sieve (optional)
- Cooling rack
- Serrated knife
- Offset spatula
- Cake turntable (optional)
- Cake scraper (optional)
Step-by-Step Instructions for Dragon Fruit Layer Cake
Step 1: Prepare the Oven and Cake Pans
Start by preheating your oven to 350°F (175°C).
Prepare two 8-inch round cake pans by following these steps:
- Lightly grease the bottoms and sides of both pans with butter or baking spray.
- Cut two circles of parchment paper to fit the bottoms.
- Place the parchment paper inside the pans.
- Lightly grease the parchment paper if needed.
Set the pans aside while you prepare the batter.
Preparing the pans in advance makes it easier to transfer the batter straight into the oven once mixing is complete.
Step 2: Combine the Dry Ingredients
In a medium mixing bowl, add:
- All-purpose flour
- Baking powder
- Salt
Whisk the ingredients together until evenly combined. You can sift the mixture if your flour contains lumps.
Combining the dry ingredients separately helps distribute the baking powder evenly throughout the batter, giving the cake a more consistent rise.
Set the bowl aside while you prepare the wet ingredients.
Step 3: Cream the Butter and Sugar
Place the softened unsalted butter in a large mixing bowl. Add the granulated sugar and beat with an electric mixer on medium speed for approximately 3–4 minutes.
Continue mixing until the butter and sugar become pale, fluffy, and creamy.
Scrape down the sides and bottom of the bowl with a rubber spatula to ensure everything is evenly incorporated.
This creaming step helps incorporate air into the batter, contributing to a light and tender sponge.
Avoid using melted butter because the recipe relies on softened butter to create the intended texture.
Step 4: Add the Eggs and Vanilla
Add the eggs one at a time to the creamed butter and sugar.
- Beat well after adding each egg.
- Scrape down the sides of the bowl when necessary.
- Add the vanilla extract.
- Mix until the ingredients are smooth and combined.
If the mixture looks slightly curdled, don’t worry. It can still come together when you add the flour and other ingredients.
Avoid beating excessively at this stage, as you want to maintain a smooth batter without overworking it.
Step 5: Add the Dragon Fruit Purée and Milk
Measure the prepared dragon fruit purée and whole milk.
With the mixer on low speed, add the dragon fruit purée gradually, followed by the milk in small additions.
The batter should develop a soft pink color with a smooth, creamy consistency.
If the mixture looks slightly separated, continue with the next step, adding the dry ingredients gradually. Avoid adding extra liquid to thin the batter.
For a stronger pink appearance, you can add a tiny amount of pink food coloring, although this is completely optional.
Step 6: Combine the Wet and Dry Ingredients
Gradually add the dry ingredient mixture to the wet ingredients in two or three additions.
- Mix on low speed after each addition.
- Scrape down the sides of the bowl.
- Stop mixing as soon as no large streaks of dry flour remain.
- Use a rubber spatula to gently finish combining the batter.
The finished batter should be thick but easily spreadable.
Overmixing at this stage can make the sponge less tender, so avoid continuing to beat the batter once it is combined.
Step 7: Divide the Batter Between the Pans
Divide the finished batter evenly between the two prepared cake pans.
If you have a kitchen scale, weigh the pans to ensure both layers contain approximately the same amount of batter.
Use a spatula to spread the batter evenly toward the edges.
Gently tap each pan against the countertop to release any large air bubbles. Avoid tapping too forcefully, as this can disturb the batter.
Evenly divided batter helps the two cake layers bake at a similar rate and makes assembling the finished cake much easier.
Step 8: Bake the Cake Layers
Place both cake pans on the center rack of the preheated oven.
Bake for approximately 28–35 minutes, depending on your oven and the depth of the batter.
Avoid opening the oven door during the first 20 minutes.
To check whether the cakes are ready:
- Insert a toothpick into the center of each cake.
- Check that it comes out clean or with a few dry crumbs.
- Gently press the surface of the cake to see whether it springs back.
- Look for edges that have started to pull slightly away from the pans.
If the centers still appear wet, continue baking for a few more minutes and check again.
Once baked, remove the pans from the oven and place them on a cooling rack.
Step 9: Cool the Cake Layers
Allow the cakes to cool in their pans for approximately 10 minutes.
Run a thin spatula or knife gently around the edges if necessary, then carefully turn each cake out onto a wire rack.
Remove the parchment paper and turn the layers upright to cool completely.
This step is particularly important because frosting a warm cake can cause the cream to soften, slide, or melt.
For easier handling, you can wrap the completely cooled layers and refrigerate them briefly before assembly.
Step 10: Level the Cake Layers
Once the cake layers are completely cool, inspect their tops.
If they have domed during baking, use a long serrated knife to carefully trim the raised sections.
Try to keep both layers level and approximately the same thickness.
Save any trimmed cake pieces to crumble over the finished cake or use as a topping for individual dessert portions.
How to Make Dragon Fruit Frosting
Step 1: Beat the Cream Cheese
Place the softened cream cheese in a large mixing bowl.
Beat it with an electric mixer on medium speed until smooth and creamy, with no visible lumps.
Add the powdered sugar gradually, mixing on low speed to avoid creating a cloud of sugar.
Add the vanilla extract and beat again until everything is evenly combined.
Step 2: Whip the Heavy Cream
In a separate chilled bowl, pour in the cold heavy whipping cream.
Beat with a clean electric mixer until medium-to-stiff peaks form.
The cream should hold its shape when you lift the beaters, but avoid overwhipping it.
Step 3: Combine the Frosting
Gently fold the whipped cream into the cream cheese mixture using a rubber spatula.
Add the dragon fruit purée one tablespoon at a time, folding gently after each addition.
Stop once the frosting reaches a smooth, spreadable consistency and an attractive pale pink shade.
If the frosting becomes too soft, refrigerate it briefly before assembling the cake.
How to Assemble and Decorate the Cake
Step 1: Place the First Cake Layer
Place one completely cooled cake layer on a serving plate, cake board, or turntable.
Position it flat-side down so the top surface is as level as possible.
If you’re using a cake turntable, make sure the cake is centered before adding frosting.
Step 2: Add the Creamy Filling
Spoon a generous amount of dragon fruit frosting onto the first cake layer.
Use an offset spatula to spread the frosting evenly across the surface, leaving a small border around the edge.
The filling should be thick enough to create a visible cream layer without spilling out when you add the second sponge.
Step 3: Add the Second Cake Layer
Carefully place the second cake layer on top of the filling.
Align the edges so the cake looks straight from every angle.
Press very gently to secure the layers without squeezing out too much frosting.
If the top layer shifts, carefully reposition it before proceeding.
Step 4: Apply a Crumb Coat
Spread a thin layer of frosting over the top and sides of the entire cake.
This first coating is called a crumb coat. It traps loose cake crumbs and provides a smooth foundation for the final frosting layer.
Use an offset spatula or cake scraper to distribute the frosting evenly.
Refrigerate the cake for approximately 20–30 minutes, or until the coating feels firm.
Step 5: Apply the Final Frosting
Remove the chilled cake from the refrigerator.
Spread the remaining frosting over the top and sides, working gradually to achieve an even finish.
You can choose from several decorating styles:
- Smooth finish: Use a cake scraper to create straight, clean sides.
- Rustic finish: Create gentle swirls and soft textures with an offset spatula.
- Decorative finish: Use a piping bag fitted with a star nozzle to add frosting rosettes around the top.
Don’t worry if the cake isn’t perfectly smooth. A slightly textured finish can look just as attractive.
Step 6: Decorate with Fresh Fruit
Arrange fresh dragon fruit slices, small fruit balls, or cubes on top of the cake.
Add strawberries, raspberries, or blueberries for extra color.
You can also sprinkle a little shredded coconut around the top or add a few edible flowers for an elegant finish.
For a simple design, keep the decoration concentrated in the center. For a more elaborate celebration cake, arrange the fruit around the entire top edge.
Step 7: Chill Before Serving
Refrigerate the finished cake for approximately 30–60 minutes to allow the frosting to firm up.
When ready to serve, use a long, sharp knife to cut clean slices.
Wipe the knife between cuts to keep the pink sponge and creamy filling looking neat.
Dragon Fruit Layer Cake Variations and Substitutions
1. Dragon Fruit Coconut Layer Cake
For a tropical twist, combine dragon fruit with coconut.
- Replace some of the milk with coconut milk.
- Add a little shredded coconut to the frosting.
- Decorate the cake with toasted coconut flakes.
- Use coconut cream frosting for a more pronounced coconut flavor.
The coconut adds a sweet, aromatic flavor that pairs beautifully with the mild taste of dragon fruit.
2. Dragon Fruit and Raspberry Cake
If you enjoy a fruity filling, raspberry is an excellent addition.
- Spread a thin layer of raspberry jam over the first cake layer.
- Add the dragon fruit frosting on top.
- Sandwich with the second cake layer.
- Decorate with fresh raspberries and dragon fruit pieces.
The contrasting pink and red colors create a beautiful presentation, while the raspberry adds a slightly tart flavor.
3. Dragon Fruit Vanilla Sponge Cake
For a simpler version, prepare a traditional vanilla sponge and use dragon fruit in the frosting and filling instead.
This creates a lovely contrast between the pale vanilla cake and the pink cream.
You can also add a thin layer of dragon fruit purée between the sponge and frosting for extra fruit flavor. Make sure the filling is thick enough to prevent the layers from sliding.
4. Vegan Dragon Fruit Layer Cake
You can adapt this recipe to make a vegan version.
- Replace the butter with a plant-based baking alternative.
- Use plant-based milk.
- Replace the eggs with a suitable baking substitute.
- Choose a vegan whipped topping or coconut cream frosting.
- Use powdered sugar and flavorings that are suitable for a vegan recipe.
Storage, Freezing, and Make-Ahead Tips
Proper storage helps your dragon fruit layer cake maintain its texture and appearance after baking.
How to Store Dragon Fruit Layer Cake
Because this recipe uses cream cheese and whipped cream frosting, the finished cake should be refrigerated.
- Place the cake in an airtight cake container.
- Keep it refrigerated at or below 40°F (4°C).
- For the best texture and appearance, enjoy it within approximately 3 days.
- Keep leftover slices covered to prevent them from drying out or absorbing refrigerator odors.
For additional guidance on handling and storing food, consult the FoodKeeper App .
Avoid leaving the frosted cake at room temperature for extended periods, especially during warm weather.
Can You Freeze Dragon Fruit Layer Cake?
Yes, the unfrosted sponge layers can be frozen for convenient preparation in advance.
- Allow the baked cake layers to cool completely.
- Wrap each layer tightly in plastic wrap.
- Add a second protective layer of foil or place the wrapped cakes in a freezer-safe container.
- Label the container with the date.
- Freeze for up to 2 months for best quality.
When you’re ready to use them, thaw the wrapped layers in the refrigerator. Once completely thawed, unwrap and assemble with freshly prepared frosting.
Although the unfrosted cake layers freeze well, whipped cream frosting and fresh fruit decorations may change texture after freezing. For the best presentation, prepare the frosting and decorate the cake after thawing.
Make-Ahead Instructions
If you’re preparing the cake for a birthday or celebration, you can divide the work over two days.
The day before serving:
- Bake the cake layers.
- Cool them completely.
- Wrap and refrigerate the layers.
On the day of serving:
- Prepare the dragon fruit frosting.
- Assemble the cake.
- Apply the crumb coat and final frosting.
- Decorate with fresh dragon fruit and berries.
- Refrigerate until serving.
Frequently Asked Questions
What Does Dragon Fruit Cake Taste Like?
Dragon fruit cake has a mild, subtly sweet tropical flavor. The fruit itself is delicate, so the vanilla sponge and creamy frosting contribute much of the overall flavor. Fresh berries, coconut, or citrus can be added for extra flavor.
Can I Use Frozen Dragon Fruit to Make Layer Cake?
Yes, frozen dragon fruit works well in this recipe. Thaw it completely before blending or using it as purée. If it contains excess liquid, strain or gently reduce the purée and let it cool before adding it to the batter.
How Do You Make Dragon Fruit Cake Naturally Pink?
Use red-fleshed dragon fruit to create a natural pink shade. The final color depends on the fruit’s variety and ripeness, as well as the baking process. If you want a more intense pink color, you can add a small amount of food coloring.
Can I Make Dragon Fruit Layer Cake Without Food Coloring?
Absolutely! Red dragon fruit purée can give the sponge and frosting a natural pink hue. Keep in mind that the color may be softer or more muted than the bright shade of some decorated bakery cakes.
Why Is My Dragon Fruit Cake Dense?
A dense cake can result from overmixing, inaccurate flour measurements, excess liquid, or expired baking powder. Make sure you measure the ingredients carefully, combine the batter gently, and check that your leavening agent is fresh.
Conclusion
This Dragon Fruit Layer Cake Recipe is a beautiful homemade dessert that combines soft pink sponge, creamy frosting, and the delicate flavor of fresh tropical fruit. Its vibrant appearance makes it a lovely choice for birthdays, celebrations, afternoon tea, or simply when you want to bake something a little different.