
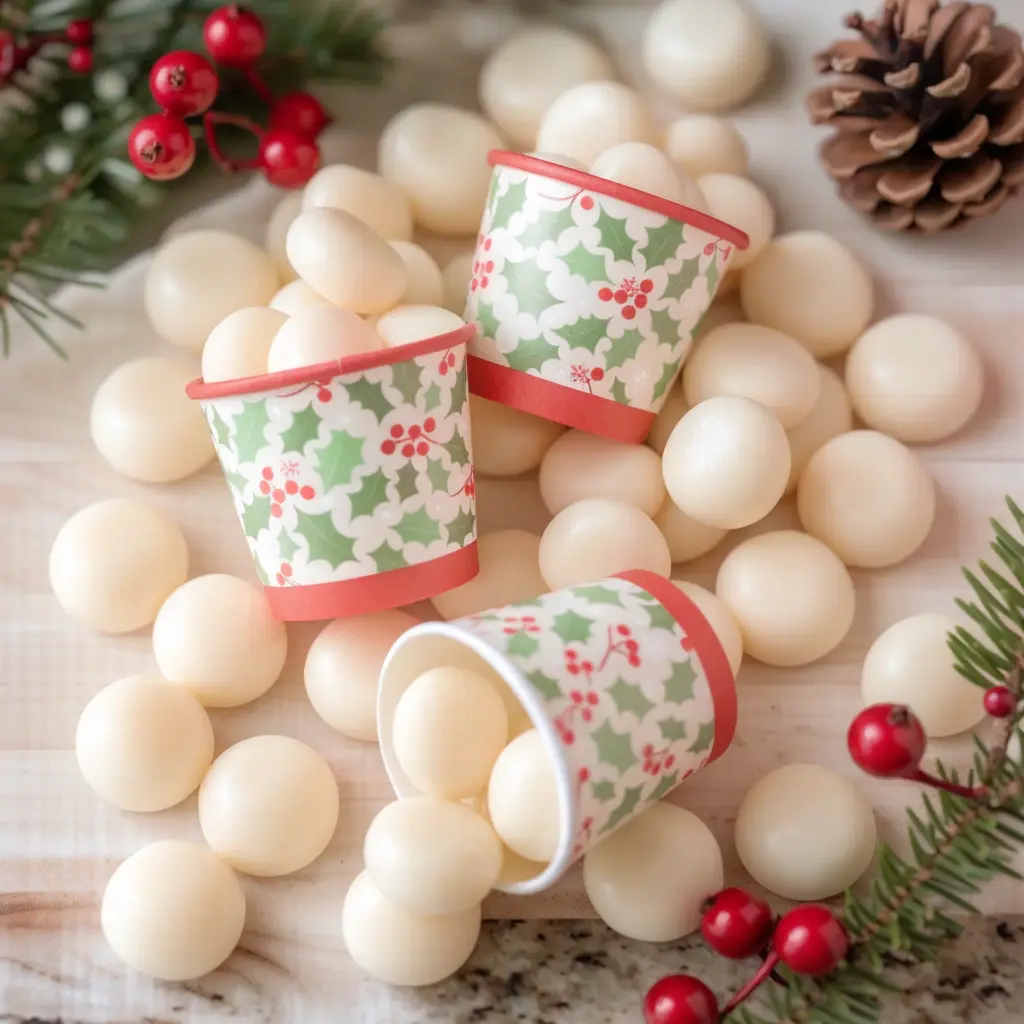
What Are Christmas Butter Mints Recipe?
Christmas butter mints are small, sweet candies traditionally made with butter, powdered sugar, peppermint flavoring, and a little liquid to bring everything together. Unlike hard peppermint candies, these homemade treats have a soft, creamy texture that gradually melts in your mouth.
They are often shaped into small pillows, rolled into ropes and sliced, or pressed into decorative molds. During Christmas, the dough can be divided into separate portions and colored red, green, and white to create a festive assortment.
Butter mints have long been popular at celebrations, including weddings, parties, and holiday gatherings. Their simple appearance and delicate flavor make them an easy addition to a dessert table without competing with larger desserts such as cakes, pies, and cookies.
The homemade version is especially appealing because you control the flavor, shape, size, and color. You can keep the candies traditional or experiment with different designs to suit your Christmas theme.
Why You’ll Love This Christmas Butter Mints Recipe
There are plenty of reasons to add this easy candy recipe to your holiday baking list.
- No baking required: Prepare the candy dough without an oven or complicated candy-making equipment.
- Simple ingredients: Butter, powdered sugar, peppermint extract, and a few optional additions form the foundation of the recipe.
- Festive colors: Red, green, and white make the candies instantly recognizable as Christmas treats.
- Easy to customize: Choose traditional pillow shapes, twisted peppermint designs, or molded candies.
- Perfect for gifting: Package the finished mints in small tins, decorative boxes, or food-safe treat bags.
- Great for entertaining: Arrange them on a Christmas dessert platter or place them in a bowl for guests.
- Convenient to prepare ahead: The candies need time to dry, making them a practical addition to a holiday preparation schedule.
You do not need advanced candy-making skills to get started. Once you understand the right dough consistency, rolling, cutting, and decorating become straightforward.
Ingredients for Christmas Butter Mints Recipe
The ingredient list is short, but each ingredient plays an important role in creating the characteristic flavor and texture of these homemade Christmas mints.
1. Unsalted Butter
Butter gives the mints their rich, creamy flavor and helps form the dough. Use unsalted butter softened to room temperature.
Softened butter should yield slightly when pressed but should not look shiny, oily, or melted. Butter that is too warm can make the mixture greasy and difficult to shape.
2. Powdered Sugar
Powdered sugar, also called confectioners’ sugar, provides the sweetness and structure.
It combines with the butter to create a dough that can be rolled and cut into small candies. If your powdered sugar contains lumps, sift it before adding it to the mixing bowl.
Keep a little extra powdered sugar nearby for dusting your work surface and correcting dough that feels sticky.
3. Heavy Cream
A small amount of heavy cream helps bring the ingredients together and makes the dough easier to handle.
Add it gradually rather than pouring it all in at once. The amount needed can vary slightly depending on the butter’s temperature and the powdered sugar you use.
If the dough is already soft and pliable, you may not need additional cream.
4. Peppermint Extract
Peppermint extract provides the familiar cool, refreshing flavor associated with traditional Christmas mints.
Start with the amount specified in the recipe and adjust cautiously if necessary. Different extracts vary in strength, so adding too much at once can overpower the buttery flavor.
Use a food-grade extract intended for cooking.
5. Vanilla Extract
Vanilla is an optional ingredient that adds a rounded flavor to the candy. It pairs nicely with peppermint and gives the finished mints a more balanced taste.
You can leave it out if you prefer a stronger, more traditional peppermint flavor.
6. Fine Salt
A small pinch of fine salt is optional. It helps balance the overall flavor and complements the butter.
Use only a little so that the mints retain their characteristic sweet taste.
7. Red and Green Gel Food Coloring
Gel food coloring is ideal for creating festive Christmas butter mints because it provides concentrated color without adding much liquid.
Use red and green for a traditional appearance, or leave some dough uncolored to create white mints.
Add coloring gradually until you reach your preferred shade.
Ingredient Summary
For this version, gather:
- 1/2 cup unsalted butter, softened
- 4 cups powdered sugar, sifted if needed, plus extra for dusting
- 1 tablespoon heavy cream, plus a few drops if necessary
- 1 teaspoon vanilla extract
- 1 teaspoon peppermint extract
- 1 small pinch of fine salt, optional
- Red gel food coloring, as needed
- Green gel food coloring, as needed
Kitchen Equipment You’ll Need
You do not need a specialized candy-making setup for this recipe. Most of the equipment is probably already in your kitchen.
- A large mixing bowl
- An electric hand mixer or stand mixer
- Measuring cups and spoons
- A rubber spatula
- Parchment paper or wax paper
- A flat tray or baking sheet
- A sharp knife, bench scraper, or pizza cutter
- Small bowls for coloring the dough
- An airtight container for storing the finished mints
A stand mixer makes combining the powdered sugar easier, especially when preparing a large batch. However, a hand mixer works well, too. Once the dough becomes thick, you may find it easier to finish mixing with a sturdy spatula or clean hands.
How to Make Christmas Butter Mints Step by Step
Making Christmas Butter Mints involves mixing, coloring, shaping, and drying. Follow these steps carefully to create candies that look neat and have the right consistency.
Step 1: Prepare Your Workspace
Before mixing the ingredients, organize your equipment and prepare a clean work surface.
Line a flat tray or baking sheet with parchment paper. Measure the butter, powdered sugar, cream, vanilla, and peppermint extract.
Place the food coloring and extra powdered sugar within reach. Having everything ready makes the shaping process easier because the dough can begin to dry when left uncovered for too long.
Step 2: Beat the Butter Until Smooth
Place the softened butter in a large mixing bowl.
Beat it with an electric mixer until it becomes smooth and creamy. Stop occasionally to scrape down the sides of the bowl with a rubber spatula.
Avoid using melted butter. Melted butter changes the consistency of the mixture and can make the dough difficult to roll into neat shapes.
The butter should be soft enough to mix easily but firm enough to hold its structure.
Step 3: Add the Flavorings
Add the peppermint extract, vanilla extract, and optional pinch of salt to the butter.
Mix until the ingredients are evenly distributed.
Add the heavy cream and mix again briefly. At this stage, the mixture may look softer than the final dough, which is normal.
Be careful not to add extra liquid without checking the consistency first. A little liquid can make a significant difference once the powdered sugar is incorporated.
Step 4: Gradually Add the Powdered Sugar
Add the powdered sugar in small batches, mixing at low speed.
Adding it gradually helps prevent a cloud of sugar from escaping the bowl and makes it easier to control the dough.
At first, the mixture may look crumbly. Continue mixing and scrape down the bowl as needed. The ingredients should eventually form a smooth, firm dough.
Check the consistency by pinching a small piece between your fingers.
- If it holds together and feels pliable, it is ready.
- If it sticks heavily to your fingers, add a little more powdered sugar.
- If it cracks and falls apart, add a few drops of cream and knead gently.
The ideal dough should feel similar to soft modeling clay.
Step 5: Divide and Color the Dough
Transfer the dough to a clean work surface and divide it into three portions.
Leave one portion white. Place the other two portions in separate bowls.
Add a tiny amount of red gel food coloring to one portion and green gel food coloring to the other. Knead each portion until the color is evenly distributed.
Wear food-safe gloves if you want to avoid staining your hands.
If the colors appear too pale, add another small amount of coloring. It is easier to deepen the color gradually than to correct dough that has become too soft from excess liquid.
Keep portions you are not using covered with plastic wrap or in a sealed container.
Step 6: Roll the Dough Into Ropes
Lightly dust your work surface with powdered sugar.
Take a small portion of dough and roll it between your hands or against the counter to form a long, even rope.
Aim for a rope approximately 1/2 inch thick. You can make it slightly thinner if you prefer smaller candies.
Try to maintain an even thickness along the entire rope. Uniform ropes make cutting easier and help the finished pieces dry at a similar rate.
If the dough begins sticking to the counter, dust the surface lightly with powdered sugar rather than adding a large amount all at once.
Step 7: Cut the Mints Into Small Pieces
Use a sharp knife or bench scraper to cut the ropes into small pieces.
Pieces approximately 1/2 inch long make attractive, bite-sized pillow mints. You can adjust the size to suit your preferred presentation.
For a traditional appearance, leave the cut edges slightly rounded rather than pressing the pieces completely flat.
Transfer the mints to the prepared tray, leaving a little space between them.
Repeat the process with the remaining dough colors.
Step 8: Create Festive Shapes
You can leave the candies in their simple pillow shape or experiment with a few decorative designs.
For striped peppermint mints, roll a thin rope of red dough and place it beside a slightly thicker rope of white dough. Gently twist the two together, then cut the twisted rope into small pieces.
For molded candies, press small portions of dough into clean silicone candy molds. Release them gently and arrange them on parchment paper.
Avoid making too many shapes at once until you are comfortable with the dough’s consistency.
Step 9: Let the Butter Mints Dry
Arrange the finished mints in a single layer on parchment paper.
Leave them in a cool, dry location away from direct sunlight and heat. Allow approximately 12–24 hours for drying, checking their texture as they rest.
The exact time depends on the size of the candies, the moisture in the dough, and the humidity in your kitchen.
The exterior should become set while the center remains creamy. If the mints still feel very sticky, give them additional time before packaging.
Step 10: Serve or Package Your Christmas Butter Mints
Once the mints have dried sufficiently, transfer them carefully to a serving bowl or storage container.
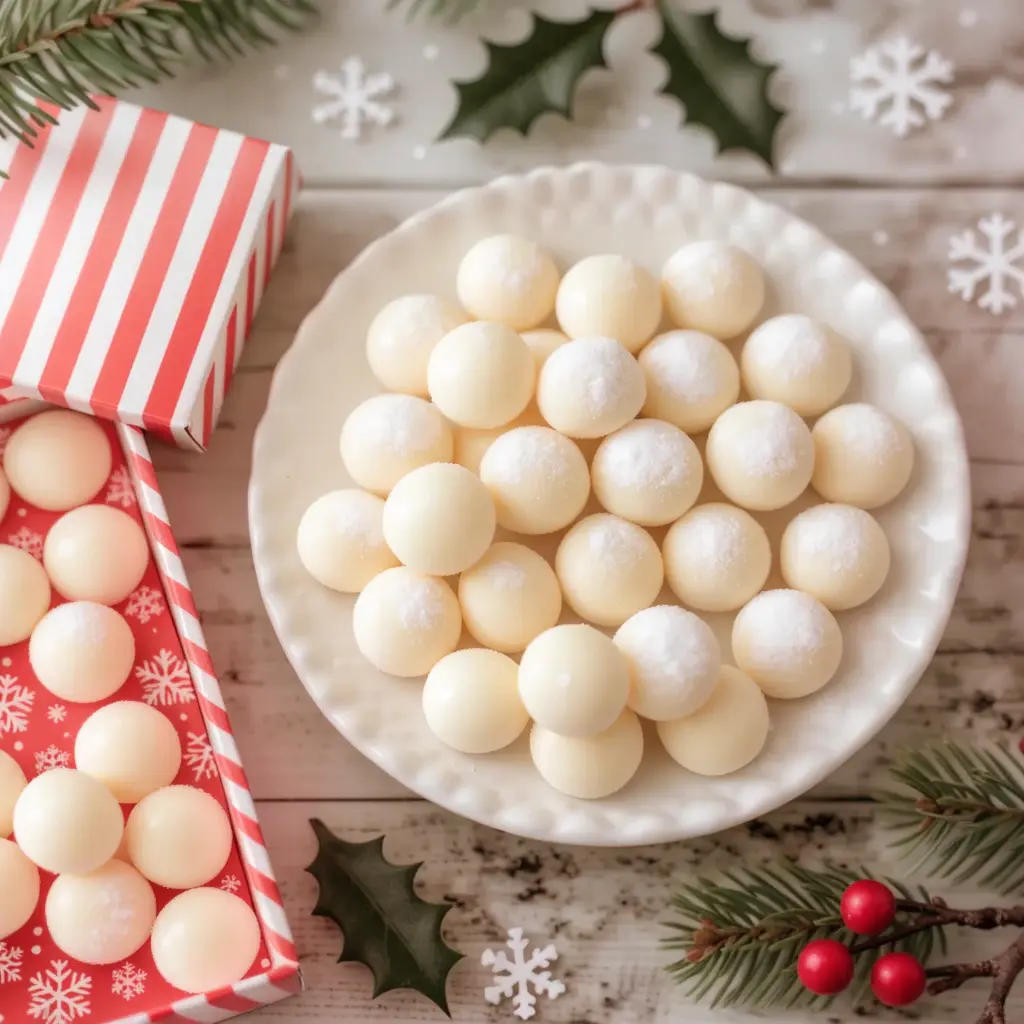
Arrange the white, red, and green candies together for a traditional Christmas display.
If you are making them as gifts, place the candies in small paper cups or separate layers with parchment paper to help prevent sticking.
Christmas Butter Mints Variations and Decorating Ideas
One of the most enjoyable parts of this recipe is choosing the colors and shapes. You can create several different styles from the same basic dough.
Classic Red, Green, and White Butter Mints
For a traditional Christmas look, divide the dough into three portions and color them red, green, and white.
Arrange the finished candies in alternating colors in a decorative bowl. This simple combination works beautifully for Christmas parties and holiday dessert tables.
Red and White Peppermint Mints
Red-and-white mints resemble the colors of traditional candy canes.
Roll small ropes of red and white dough, twist them together gently, and cut them into short pieces. You can also place the two colors side by side for a striped effect.
Pastel Christmas Butter Mints
If you prefer a softer appearance, use tiny amounts of food coloring to create pale pink and mint-green candies.
These gentle colors pair well with white serving dishes, silver decorations, and pastel Christmas packaging.
Vanilla Butter Mints
For a milder flavor, replace some of the peppermint extract with vanilla extract.
Add the flavoring gradually and keep the total liquid small enough to maintain a firm dough. The result is a sweet, buttery candy with a gentler flavor.
Almond-Flavored Butter Mints
Almond extract offers another interesting variation. Use it sparingly because its flavor can become strong very quickly.
You can leave the mints white for a simple, elegant appearance or use pale pink coloring for a decorative finish.
Common Mistakes to Avoid
Even though this is an easy no-bake candy recipe, a few small mistakes can make shaping and drying more difficult.
The Dough Is Too Sticky
Sticky dough usually indicates that it contains too much moisture or that the butter has become too warm.
To fix it:
- Add powdered sugar one tablespoon at a time.
- Knead gently after each addition.
- Chill the dough briefly if the butter feels unusually soft.
- Dust the work surface lightly before rolling.
Avoid adding large amounts of powdered sugar at once because the dough can quickly become too stiff.
The Dough Is Too Dry or Crumbly
If the mixture refuses to hold together, it may need a little more moisture.
Add a few drops of heavy cream and knead gently. Repeat only if necessary until the dough becomes pliable.
The Peppermint Flavor Is Too Strong
Peppermint extract varies by brand, so careful measuring is important. Adding too much at the beginning can make it difficult to achieve a balanced flavor.
Use the recommended amount for your chosen extract and avoid substituting concentrated peppermint oil in equal quantities.
The Colors Look Uneven
Uneven coloring usually happens when the food coloring has not been mixed thoroughly.
Add a small amount of gel coloring and knead until the color is consistent throughout the dough. Keep in mind that darker shades may require several small additions.
The Mints Stick Together
Mints can stick when they are placed in a container before the outside has dried sufficiently.
Allow additional drying time, arrange them in a single layer, and separate stacked layers with parchment paper when storing.
The Mints Become Too Hard
Excessive drying or an overly stiff dough can produce candies that are firmer than intended.
Follow the ingredient measurements carefully and check the texture periodically during drying. The goal is a set exterior with a creamy center, not a completely hard candy.
How to Serve Christmas Butter Mints
These festive candies are versatile enough to complement a variety of Christmas desserts and party arrangements.
Christmas Dessert Platters
Arrange the mints alongside gingerbread cookies, sugar cookies, chocolate truffles, and other homemade sweets.
Mix different shapes and colors to create an attractive platter that guests can enjoy throughout the gathering.
After-Dinner Treats
Serve a small bowl of butter mints after a Christmas meal. Their compact size makes them convenient to offer alongside coffee, tea, or hot chocolate.
Christmas Parties
Place the mints in decorative glass bowls, small serving dishes, or individual paper cups. Use red and green candies for a traditional display or white candies for a more understated arrangement.
Homemade Edible Gifts
Fill small tins, food-safe gift boxes, or clear treat bags with the finished candies.
Tie each package with a festive ribbon and add a handwritten label featuring the candy’s name and preparation date.
Christmas Candy Buffets
Combine butter mints with other homemade candies to create a colorful holiday display.
Arrange the different sweets in separate containers and provide small scoops or serving spoons where appropriate.
How to Store Christmas Butter Mints
Proper storage helps your homemade candies maintain their appearance and texture.
Storing at Room Temperature
Once the mints have dried sufficiently, place them in a clean, airtight container and keep them in a cool, dry location away from sunlight and heat.
Separate the layers with parchment paper if you need to stack them. This helps prevent the pieces from sticking together.
The appropriate storage duration depends on the exact ingredients, preparation conditions, and moisture remaining in the candies. Follow a storage recommendation established for your particular recipe rather than assuming every butter mint recipe has the same shelf life.
Refrigerating Butter Mints
Refrigeration can help keep butter-based candies firm, especially in a warm environment.
Place the mints in a sealed container to protect them from moisture and odors. If you remove them from the refrigerator before serving, keep the container closed initially to reduce condensation on the candy.
For general guidance on handling and storing foods, consult FoodSafety.gov’s cold food storage charts. These charts provide general food-storage information, not a specific shelf-life guarantee for homemade butter mints.
Can You Make Christmas Butter Mints Ahead of Time?
Yes! These candies are convenient for advance preparation because they need time to dry after shaping.
Making them ahead also reduces the number of tasks you need to complete on Christmas Eve or the day of a holiday party.
A Simple Christmas Preparation Schedule
Several days before your event:
- Gather the ingredients and equipment.
- Prepare the dough and divide it into colors.
- Shape the candies and arrange them on parchment paper.
During the drying period:
- Check that the mints are setting properly.
- Allow additional time if the kitchen is humid.
- Avoid stacking or packaging the pieces while they remain tacky.
Before serving or gifting:
- Check the candies for sticking or changes in texture.
- Transfer them to an appropriate storage container.
- Package them in decorative tins or arrange them on a serving platter.
Frequently Asked Questions About Christmas Butter Mints
1. What are Christmas butter mints made of?
Christmas butter mints are generally made with softened butter, powdered sugar, peppermint extract, and a small amount of cream or milk. Vanilla extract and food coloring are optional additions. The ingredients are mixed into a firm dough, shaped into small candies, and allowed to dry.
2. Do Christmas butter mints need to be baked?
No. Traditional homemade butter mints are no-bake Christmas candies. The dough is mixed, shaped, and left to dry at room temperature under suitable conditions. No oven or candy thermometer is required.
3. How long do homemade butter mints take to dry?
Many recipes allow approximately 12–24 hours for drying, although the exact time varies. Smaller pieces may dry faster than larger ones, while humid conditions can slow the process. Check that the outside has set before storing the candies.
4. Why are my butter mints sticky?
The dough may be sticky because the butter is too warm, too much cream was added, or the mixture needs additional powdered sugar. Add powdered sugar gradually, chill the dough briefly if necessary, and allow the shaped mints more drying time.
5. Can I make Christmas butter mints without peppermint extract?
Yes. You can use vanilla extract or another suitable food flavoring for a different taste. However, without peppermint, the candies will not have the classic flavor associated with traditional Christmas butter mints.
Conclusion
These Christmas Butter Mints are a lovely addition to your collection of homemade holiday treats. With simple ingredients, a no-bake preparation method, and plenty of decorating options, they are easy to customize for Christmas parties, dessert platters, and edible gifts.