
What Are Cheese Garlic Rolls Recipe?
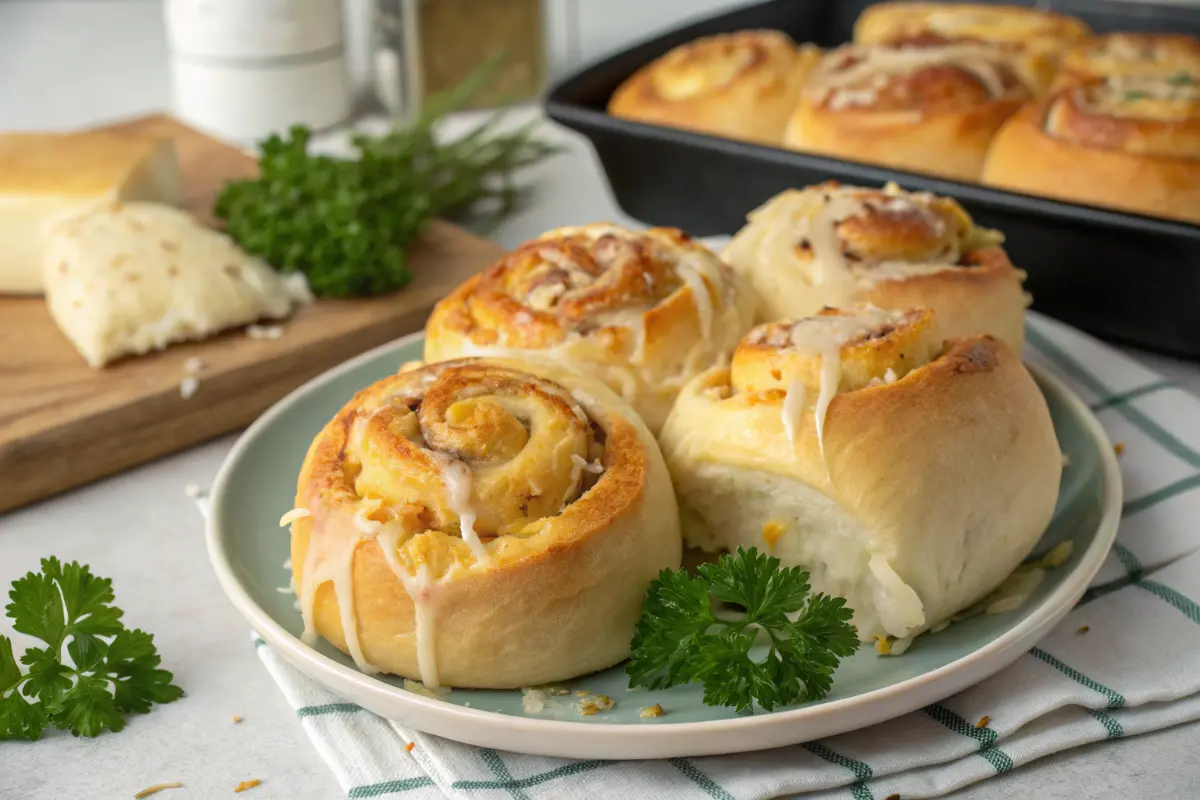
Cheese garlic rolls are soft baked bread rolls flavored with garlic butter and filled with melted cheese. They are often made from a yeast-based dough that is allowed to rise before being rolled into a rectangle, spread with garlic butter, covered with cheese, and shaped into individual rolls.
The finished rolls have several appealing textures. The outside becomes lightly golden and buttery, while the inside remains soft and tender. When served warm, the cheese in the center becomes wonderfully melty.
Unlike traditional garlic bread, which is often made by spreading garlic butter over a loaf or sliced baguette, cheesy garlic rolls are built around a soft roll dough. This makes them especially enjoyable as a side dish, appetizer, or pull-apart bread.
Why You’ll Love This Cheese Garlic Rolls Recipe
There are plenty of reasons to keep this recipe in your baking rotation.
- Soft and fluffy: The yeast dough creates a tender, pillowy texture.
- Loaded with garlic flavor: Fresh garlic and butter create an irresistible aroma.
- Extra cheesy: Melted mozzarella, cheddar, Parmesan, or a combination can be used.
- Perfectly buttery: Garlic herb butter adds richness to every bite.
- Great for sharing: The rolls work beautifully for family dinners, gatherings, and parties.
- Customizable: You can easily change the cheese, herbs, spices, and fillings.
- Excellent served warm: The cheese is at its best when the rolls are fresh from the oven.
- Beginner-friendly: Once you understand the dough, the rest of the process is straightforward.
These rolls are also versatile enough to pair with many different meals. Serve them alongside pasta, soup, roasted chicken, steak, casseroles, or a simple salad.
Ingredients for Cheese Garlic Rolls Recipe
The ingredients are divided into three simple components: the dough, the garlic butter, and the cheese filling.
For the Dough
- 3 ½ cups (440 g) all-purpose flour
- 2 ¼ teaspoons (7 g) active dry yeast
- 1 cup (240 ml) warm milk
- 2 tablespoons granulated sugar
- 1 teaspoon salt
- 1 large egg
- 4 tablespoons (56 g) unsalted butter, softened
For the Garlic Butter
- 5 tablespoons (70 g) unsalted butter, softened
- 4 cloves garlic, finely minced
- 2 tablespoons fresh parsley, finely chopped
- ½ teaspoon Italian seasoning
- ¼ teaspoon garlic powder
- ¼ teaspoon salt
For the Cheese Filling
- 1 ½ cups (170 g) shredded mozzarella cheese
- ½ cup (50 g) shredded sharp cheddar cheese
- ¼ cup (25 g) finely grated Parmesan cheese
Optional Topping
- 1 tablespoon melted butter
- 1 tablespoon fresh parsley, chopped
- 2 tablespoons grated Parmesan cheese
- Pinch of red pepper flakes
Kitchen Equipment
You do not need specialized equipment to make these homemade garlic cheese rolls.
Essential equipment
- Large mixing bowl
- Measuring cups and spoons
- Kitchen scale, if available
- Rolling pin
- Baking dish
- Sharp knife
- Pastry brush
- Clean kitchen towel
- Wire cooling rack
Optional equipment
- Stand mixer with dough hook
- Dough scraper
- Parchment paper
- Instant-read thermometer
A kitchen scale can be especially helpful when dividing the dough into equal portions.
Step-by-Step Instructions for Cheese Garlic Rolls Recipe
Step 1: Prepare the Yeast
If using active dry yeast, combine the warm milk with the yeast and sugar.
Let the mixture stand for several minutes.
A foamy surface indicates that the yeast is active.
If using instant yeast, follow the instructions on the package and mix it according to your chosen dough method.
Step 2: Make the Dough
Add the flour and salt to a large mixing bowl.
Add the yeast mixture, softened butter, and egg if your dough formula includes one.
Mix until the ingredients come together into a rough dough.
At first, the dough may look uneven and slightly sticky. That is normal.
Avoid adding large amounts of extra flour immediately.
Step 3: Knead the Dough
Transfer the dough to a lightly floured surface.
Knead it for approximately 8 to 10 minutes by hand, or use a stand mixer fitted with a dough hook.
The dough should gradually become:
- Smooth
- Elastic
- Soft
- Slightly tacky
- Easier to handle
A dough that feels extremely stiff usually contains too much flour.
Step 4: Let the Dough Rise
Place the kneaded dough into a lightly greased bowl.
Cover it with a clean towel or plastic wrap.
Leave it in a warm, draft-free location until it has roughly doubled in size.
The exact time can vary depending on the temperature of your kitchen.
Rather than relying only on the clock, look at the dough. It should appear noticeably larger, lighter, and puffy.
How to Make Garlic Butter
While the dough rises, prepare the garlic butter.
Combine:
- Softened butter
- Fresh minced garlic
- Chopped parsley
- Italian seasoning
- A pinch of salt
- Optional garlic powder
Mix until evenly combined.
Taste the butter and adjust the seasoning if needed.
Keep the garlic butter at room temperature so that it remains easy to spread.
Preparing the Cheese Filling
Shred your chosen cheese while the dough is rising.
If using several cheeses, combine them in a bowl.
A classic combination is:
- Mozzarella
- Cheddar
- Parmesan
Keep the cheese chilled until you are ready to use it.
Having the filling prepared before rolling the dough makes the shaping process much faster.
Rolling Out the Dough
Once the dough has doubled in size, gently press it down to release excess air.
Transfer it to a lightly floured surface.
Use a rolling pin to form a rectangle.
Try to maintain an even thickness from one end to the other.
An evenly rolled rectangle helps produce similarly sized rolls with consistent layers.
Avoid using excessive flour during this stage because too much flour can make the finished rolls heavier.
Adding the Garlic Butter and Cheese
Spread the prepared garlic butter evenly across the dough.
Leave a small border around the edges.
Sprinkle the shredded cheese over the butter.
Do not pile the cheese too heavily in one area.
An even layer gives every roll a balanced combination of bread, garlic butter, and cheese.
Rolling the Dough
Start at one long edge of the rectangle.
Begin rolling the dough into a log.
Roll it firmly enough to keep the layers together, but do not crush the dough.
Continue until you reach the opposite edge.
Pinch the seam gently to close it.
Place the seam underneath the log.
Cutting the Rolls
Use a sharp knife to divide the log into equal pieces.
Depending on the size of your baking dish, aim for approximately 8 to 12 rolls.
For very clean cuts, you can also use unflavored dental floss.
Slide the floss underneath the log, cross the ends over the top, and pull to create a clean cut.
Try to keep the pieces similar in size so they bake evenly.
Arranging the Cheese Garlic Rolls
Grease your baking dish with butter or cooking spray.
Place each roll cut-side up.
Leave a little space between them so they have room to expand.
For soft pull-apart sides, arrange the rolls relatively close together.
For more individually browned edges, leave slightly more space between them.
Second Rise
Cover the shaped rolls loosely.
Allow them to rise again until they look visibly puffy.
This second rise is important because it helps create the soft, airy texture associated with excellent homemade rolls.
Do not rush this stage.
At the same time, avoid letting the rolls rise far beyond their ideal point, as overproofing can weaken the dough.
Baking the Cheese Garlic Rolls
Preheat your oven before the rolls are ready.
If using an egg wash, lightly brush the exposed dough before baking.
Place the baking dish in the preheated oven.
Bake until the tops are golden brown and the cheese is melted.
The exact baking time depends on the size of your rolls, the baking dish, and your oven.
Watch the color toward the end of baking.
You want a beautiful golden surface rather than an overly dark crust.
The Final Garlic Butter Finish
One of the best parts of this Cheese Garlic Rolls Recipe happens immediately after baking.
Prepare a little additional garlic butter while the rolls are in the oven.
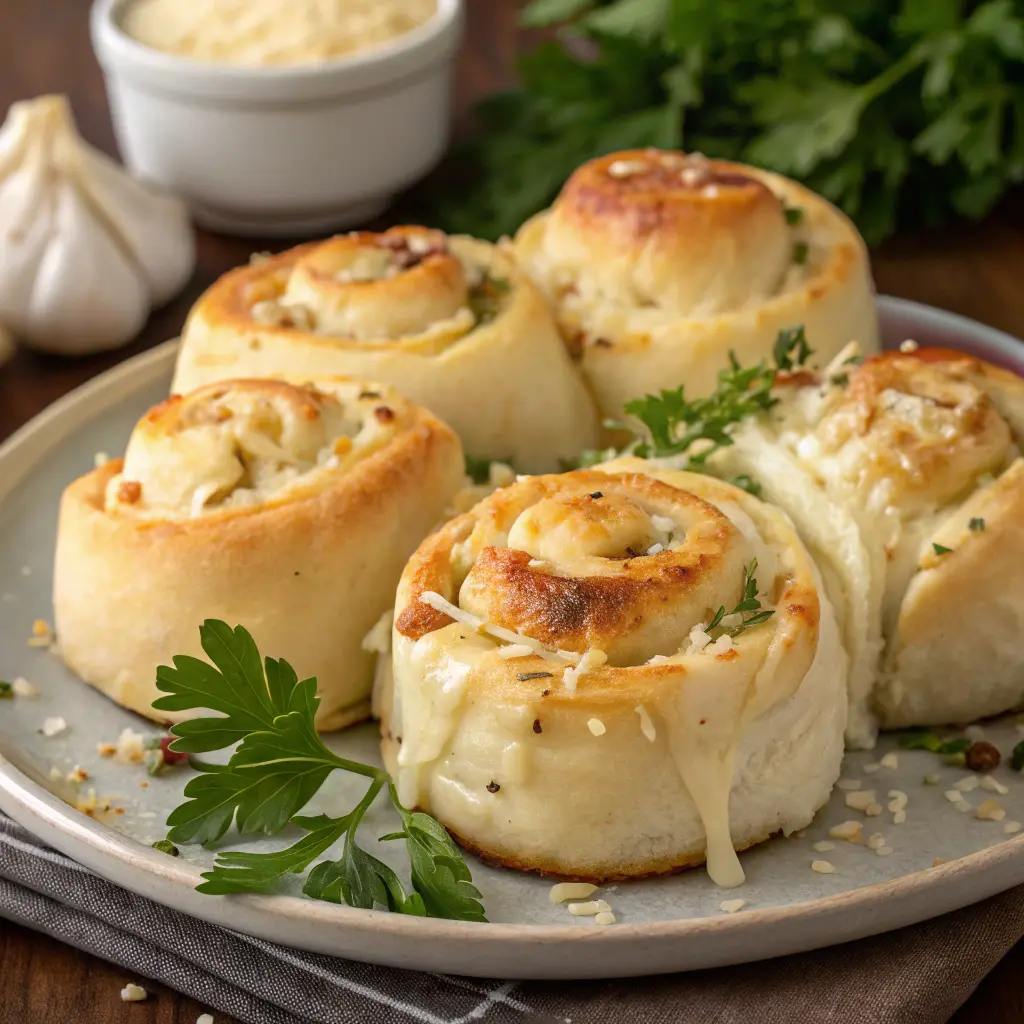
As soon as the rolls come out, brush the tops generously with the warm garlic butter.
Finish with:
- Fresh parsley
- Parmesan
- Chopped chives
- Italian seasoning
- Red pepper flakes
Let the rolls rest for a few minutes before serving.
The centers will be extremely hot immediately after baking, and allowing them to rest briefly makes them easier to handle.
Expert Baking Tips for Soft, Fluffy Rolls
Use Warm, Not Hot, Liquid
The temperature of the liquid matters.
Very hot liquid can interfere with yeast activity, while cold liquid can slow the rising process.
Aim for a comfortably warm temperature.
Don’t Add Too Much Flour
This is one of the most common mistakes when making homemade rolls.
The dough should be soft and slightly tacky rather than stiff.
Add flour gradually until the dough becomes manageable.
Knead Until Smooth
Proper kneading develops the dough’s structure.
The dough should become elastic and smoother as you knead.
If it constantly tears and feels rough, it may need additional kneading.
Give the Dough Enough Time to Rise
Do not judge proofing entirely by minutes.
Kitchen temperature can dramatically affect how quickly dough rises.
Common Mistakes to Avoid
Using Yeast That Is No Longer Active
If the yeast is inactive, the dough may fail to rise.
Always check the yeast before committing to the entire recipe.
Using Liquid That Is Too Hot
Overheated liquid can interfere with yeast performance.
Use warm rather than hot liquid.
Adding Too Much Flour
Too much flour creates a dense dough.
Add it gradually and stop once the dough reaches the right consistency.
Skipping the Second Rise
The second proof gives the shaped rolls time to become lighter and puffier.
Skipping it can result in heavier rolls.
Delicious Cheese Garlic Roll Variations
Once you have mastered the basic recipe, there are many ways to customize it.
Three-Cheese Garlic Rolls
Combine mozzarella, cheddar, and Parmesan for a rich combination of textures and flavors.
Cheddar Garlic Rolls
Use sharp cheddar as the primary filling for a stronger cheese flavor.
Mozzarella Garlic Rolls
Use shredded mozzarella for an especially stretchy center.
Cream Cheese Garlic Rolls
Spread a thin layer of softened cream cheese underneath the shredded cheese.
This creates a creamy filling with a slightly tangy flavor.
Herb and Garlic Rolls
Add parsley, oregano, basil, chives, and thyme to the garlic butter.
Best Toppings for Cheese Garlic Rolls Recipe
The topping is an easy way to give the finished rolls even more flavor.
Try:
- Garlic butter
- Melted butter
- Fresh parsley
- Chopped chives
- Grated Parmesan
- Italian seasoning
- Red pepper flakes
- Fresh basil
- Pesto
- Extra shredded cheese
For a classic finish, brush the rolls with garlic butter immediately after baking and sprinkle them with Parmesan and parsley.
What to Serve With Cheese Garlic Rolls Recipe
These rolls can accompany almost any savory meal.
Pasta Dishes
Serve them alongside:
- Spaghetti
- Lasagna
- Baked ziti
- Fettuccine Alfredo
- Creamy pasta
- Tomato-based pasta
The buttery garlic flavor pairs especially well with tomato and cheese-based dishes.
Soups
These rolls are excellent with:
- Tomato soup
- Minestrone
- Chicken soup
- Vegetable soup
- Creamy mushroom soup
- Potato soup
Main Dishes
Serve them alongside:
- Roast chicken
- Baked chicken
- Meatballs
- Steak
- Roasted vegetables
- Casseroles
Dipping Sauces
You can also turn the rolls into an appetizer by serving them with:
- Warm marinara sauce
- Pizza sauce
- Garlic butter
- Pesto
- Ranch dressing
Storage Instructions
Allow leftover rolls to cool before storing them.
Place them in an airtight container or tightly covered storage dish.
At room temperature, they are best enjoyed within a few days.
For longer short-term storage, refrigeration is an option, although chilled bread can become firmer.
When ready to serve, gently warm the rolls in the oven.
If you want to preserve their soft texture, cover them loosely with foil while reheating.
Avoid overheating them because this can make the bread firm.
Freezing Guide
Cheese garlic rolls can be frozen, making them convenient for future meals.
How to Freeze Baked Rolls
- Allow the rolls to cool completely.
- Wrap individual rolls or group several together.
- Place them inside a freezer-safe bag or container.
- Remove as much excess air as practical.
- Label the container with the date.
- Freeze for best quality within approximately 1 to 2 months.
How to Reheat Frozen Rolls
For the best texture, thaw the rolls in the refrigerator or at room temperature.
Then place them in a preheated oven until warmed through.
Cover them loosely with foil if the tops begin browning too quickly.
A small amount of fresh garlic butter brushed over the rolls after reheating can bring back their buttery finish.
Make-Ahead Tips
These homemade cheesy garlic rolls can be prepared ahead when you want fresh bread without doing every step at the last minute.
Make the Garlic Butter Ahead
Prepare the garlic butter several hours ahead or the day before.
Store it covered in the refrigerator.
Allow it to soften before spreading.
Prepare the Dough Ahead
Prepare the dough according to the recipe and refrigerate it when appropriate.
Cold dough may rise more slowly, so allow enough time for it to become puffy before continuing.
Shape the Rolls Ahead
One convenient method is to prepare the dough, add the filling, roll the dough into a log, and cut the individual rolls.
Arrange them in the baking dish.
Cover and refrigerate overnight.
Before baking, allow them enough time to warm slightly and become visibly puffy.
Frequently Asked Questions
Can I use instant yeast instead of active dry yeast?
Yes. Instant yeast can generally be used in yeast-roll recipes, although the mixing method can differ slightly.
Follow the instructions on the yeast package or the specific dough formula you are using.
What is the best cheese for garlic rolls?
Mozzarella is an excellent choice because it melts beautifully and creates a stretchy center.
Cheddar adds stronger flavor, while Parmesan contributes a savory finish.
For the best combination, try mozzarella with cheddar and Parmesan.
Why didn’t my cheese garlic rolls rise?
Several factors can prevent dough from rising properly.
Common causes include:
- Inactive yeast
- Liquid that was too hot
- Liquid that was too cold
- Too much flour
- A very cold kitchen
- Insufficient rising time
Check the yeast first, then review the dough consistency and proofing environment.
Why are my garlic rolls dense?
Dense rolls are often caused by too much flour, insufficient kneading, inactive yeast, or inadequate proofing.
The dough should remain soft and elastic rather than stiff.
Conclusion
These Cheese Garlic Rolls are the perfect combination of soft, fluffy bread, rich garlic butter, and gooey melted cheese. Every bite is packed with savory flavor and a deliciously tender texture, making them a wonderful addition to almost any meal.