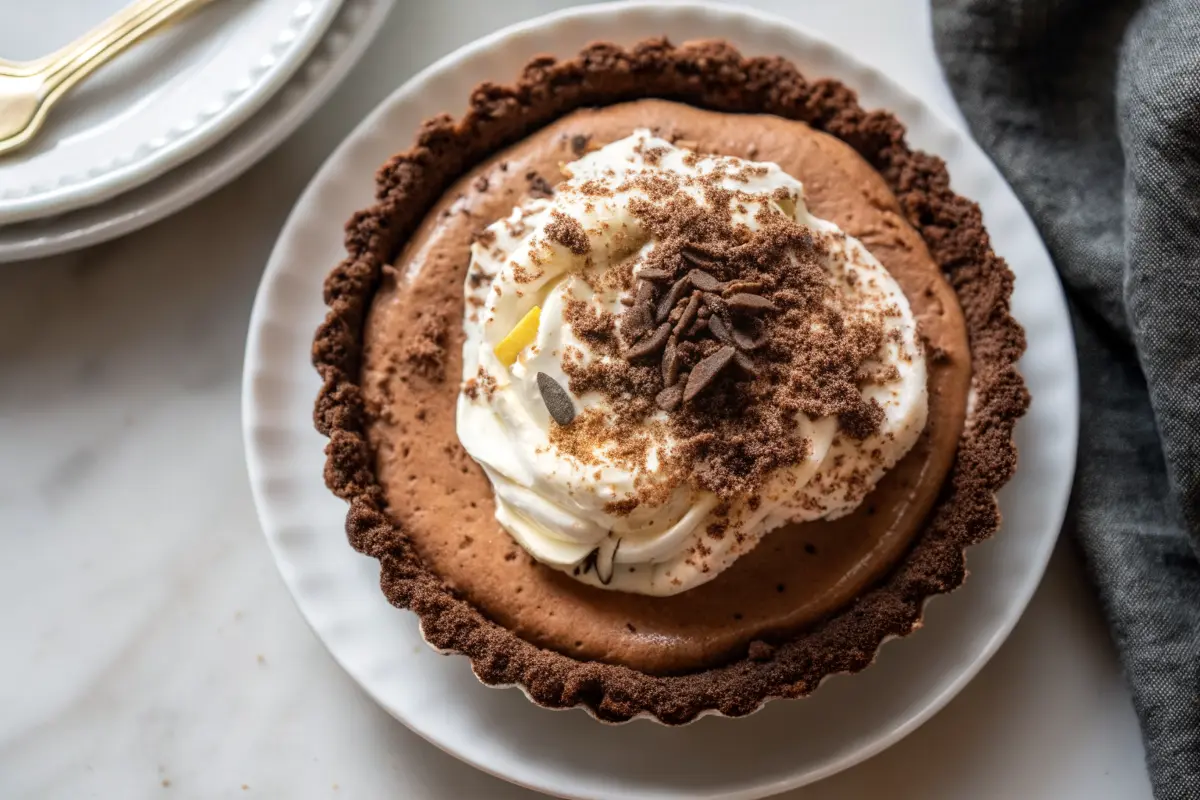
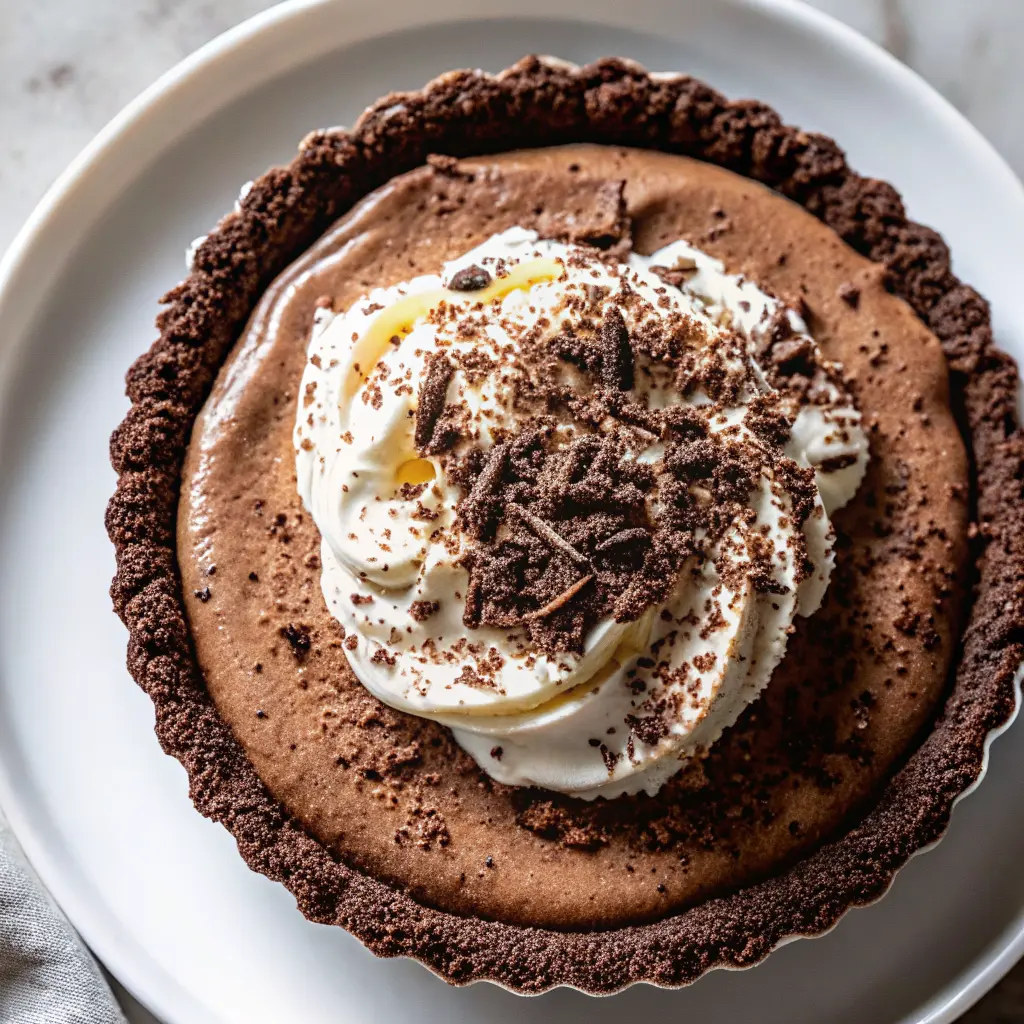
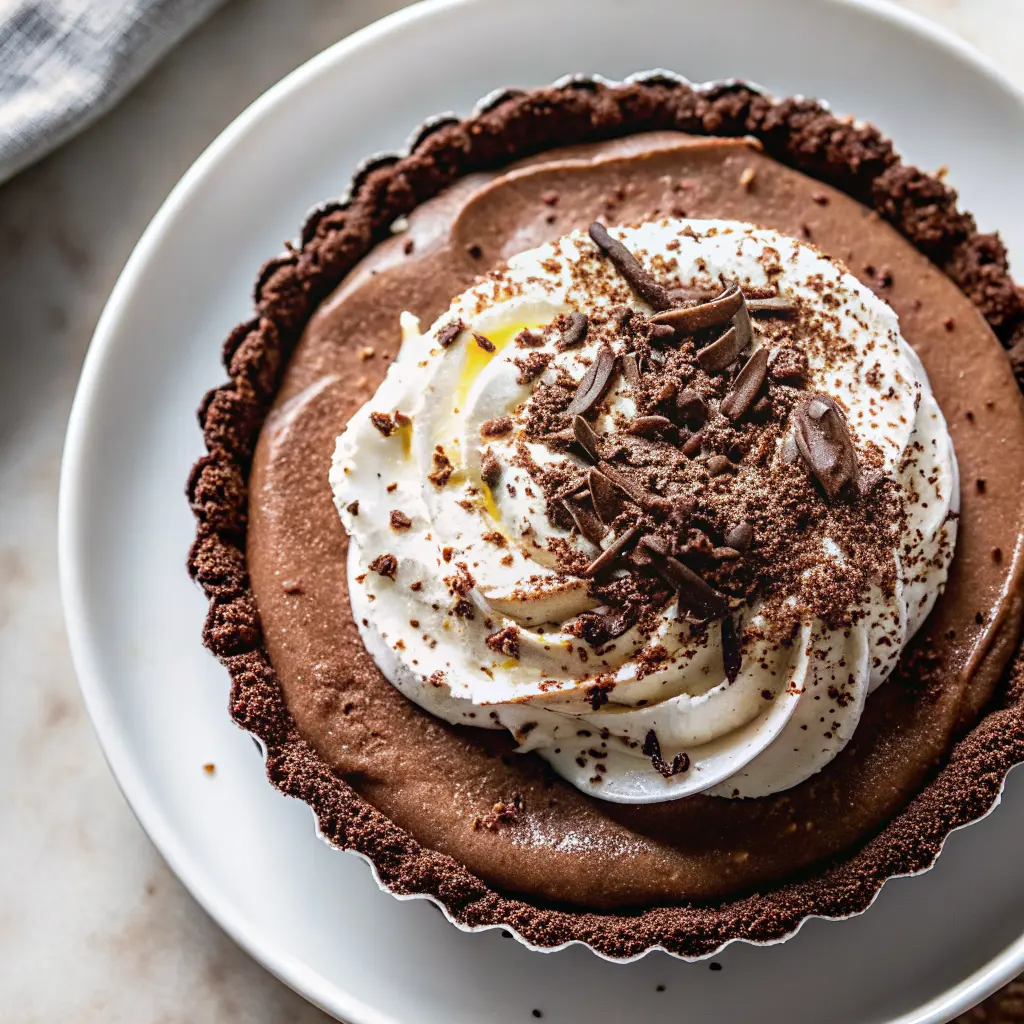
Silky chocolate custard. Bold espresso. Cloud-soft whipped cream. This Chocolate Espresso Cream Pie is the dessert you pull out when you want a jaw-dropping, photo-worthy slice that tastes like a mocha latte turned into pure silk. We’ll cover everything: ingredients, crust options (no-bake cookie vs. bakery-style pastry), a step-by-step custard that actually sets, a no-bake filling path, make-ahead tips, variations, and a pro troubleshooting guide—then finish with a clear recipe you can follow tonight.
What Is Chocolate Espresso Cream Pie?
At its heart, Chocolate Espresso Cream Pie is a silky, sliceable chocolate custard infused with espresso for roasty depth, cradled by a crisp crust, and crowned with soft billows of whipped cream. Think mocha pastry cream meets classic cream pie. Some versions are fully no-bake (cookie crust + pudding-style filling); others go pâtisserie-style with a blind-baked butter crust and a yolk-and-cornstarch custard cooked on the stovetop.
What you’ll love:
- Deep, balanced chocolate with fragrant coffee notes.
- A stable, clean set that slices neatly.
- Two crust paths (no-bake cookie or flaky butter pastry).
- Make-ahead friendly components.
Ingredients for Chocolate Espresso Cream Pie
- Chocolate: Use bars (55–70%). Bars melt smoothly than chips (chips contain stabilizers). For bolder intensity, go 70% and nudge sugar up 1–2 Tbsp if you like.
- Cocoa (optional but impactful): A tablespoon of Dutch-process cocoa deepens color and rounds flavor. Bloom it in warm dairy for a fuller mocha note.
- Espresso: Espresso powder is your friend—made for baking, it dissolves cleanly and tastes balanced. Start with 1 tsp; for a stronger mocha, go up to 2 tsp. You can also use strong-brewed espresso (reduce slightly on the stovetop so you don’t water the custard). Decaf espresso powder works perfectly if you want the flavor without the buzz.
- Dairy: Whole milk + heavy cream = body and sheen. Butter emulsifies for a glossy custard.
- Egg Yolks + Cornstarch: The classic pastry-cream duo. Yolks enrich; cornstarch gives a clean, reliable set.
- Sugar + Salt: Balance is everything. A modest pinch of fine salt snaps chocolate into focus.
- Vanilla: A small splash after cooking rounds edges and lifts aroma.
- Crust Options:
- No-bake cookie crust (Oreo/chocolate wafer): fastest and wildly crowd-pleasing.
- All-butter pastry shell (blind-baked): bakeshop vibe, impeccable flake.
- Topping: Whipped cream—plain vanilla, espresso-whipped, or stabilized for long holds and sharp slices.
- Garnish (optional but show-stopping): chocolate curls, shaved chocolate, ganache drizzle, flaky sea salt, coffee beans coated in chocolate, or a whisper of orange zest.
Choose Your Crust Path
1) No-Bake Chocolate Cookie Crust
- When to choose it: Minimal effort, summer heat, fast turnaround.
- How it feels: Familiar, chocolate-forward, great texture contrast with creamy filling.
- Pro tip: Chill for firmness; an 8–10 minute optional bake at 175–180°C crisps the crumb for cleaner slices.
2) Blind-Baked Butter Pastry Crust
- When to choose it: You want a bakery-style finish and ultra-crisp bite.
- Keys to success:
- Keep fats cold.
- Rest dough before rolling, and again in the pan.
- Dock the base and use pie weights (or granulated sugar) to prevent puffing.
- Fully bake to golden; cool completely before filling.
Equipment Checklist
- Heavy-bottom saucepan
- Whisk + heatproof spatula
- Fine-mesh strainer (for a fabulously smooth custard)
- Instant-read thermometer (optional but confidence-boosting)
- Stand/hand mixer
- 9-inch pie plate (glass or aluminum conducts heat well)
- Pie weights (or sugar), rolling pin (for pastry crust)
Method 1: Classic Stovetop Chocolate-Espresso Custard (Slice-Perfect)
This is your pâtisserie-style path: glossy, spoon-coating custard that sets into neat slices once chilled.
Custard Principles (Quick Science)
- Cornstarch needs heat: Let the custard bubble for 60–90 seconds after reaching a full simmer to fully activate the starch.
- Temper yolks: Prevents curdling and keeps the texture satin-smooth.
- Strain: Removes any micro-lumps and yields that professional finish.
Step-by-Step
- Prep the chocolate: Chop 170–200 g of good dark/semi-sweet chocolate. Set aside with 2–3 Tbsp butter.
- Heat the dairy: In a saucepan, whisk 2 cups (480 ml) milk + ½ cup (120 ml) heavy cream, ¾ cup (150 g) sugar, a pinch of salt, and optionally 1 Tbsp Dutch-process cocoa. Warm until steaming. Bloom the cocoa here if using.
- Whisk the yolk base: In a bowl, whisk 4 large egg yolks with ¼ cup (32 g) cornstarch until thick and smooth.
- Temper: Slowly drizzle half the hot dairy into the yolk mixture, whisking constantly. Return everything to the saucepan.
- Cook to thicken: Medium heat, steady whisking. When it starts to bubble, cook 60–90 seconds, whisking—this is where the starch fully activates for a firm, clean set.
- Finish off-heat: Remove from heat; whisk in the chopped chocolate and butter until melted and glossy. Stir in 1–2 tsp espresso powder (start with 1 tsp; add more to taste) and 1 tsp vanilla.
- Strain & cool: Pass through a fine-mesh strainer into a bowl. Press plastic wrap onto the surface. Let cool to warm room temp.
- Fill: Pour into your cooled crust. Level the top; press wrap to surface again. Chill at least 4–6 hours (overnight is bliss).
Method 2: Faster No-Bake Mocha Filling (Chilled Pudding Style)
Prefer to skip yolk tempering? Try a no-bake path that sets up beautifully in the fridge.
You’ll use: cornstarch-thickened pudding or a cream-cheese-lightened base for extra stability.
High-level steps:
- Make a pudding base with milk, sugar, cornstarch, a little cocoa, and chopped chocolate.
- Stir in espresso powder and vanilla off heat; cool to lukewarm.
- Fold in a portion of whipped cream (or whipped cream + a touch of softened cream cheese for structure).
- Spread into a cookie crust; chill 4–6 hours before topping and serving.
Flavor/texture: slightly lighter than the custard route, with a plush spoonable set that firms well when fully chilled.
Variations & Swaps
- Extra-Dark Mocha: Use 70–75% chocolate; add 1–2 Tbsp extra sugar to taste.
- Salted Mocha Pie: Finish with flaky sea salt + a thin ganache veil.
- Kahlúa Kiss: Stir 1–2 Tbsp coffee liqueur into the warm custard.
- No-Bake Summer Special: Cookie crust + pudding-style mocha filling; top with espresso whipped cream.
- Gluten-Free Path: Use GF chocolate cookies for the crust; the cornstarch custard is naturally wheat-free.
- Decaf All the Way: Use decaf espresso powder; flavor stays, jitters don’t.
Troubleshooting (Quick Fixes to Common Hiccups)
- My filling is soupy / won’t set:
- Most often, not cooking long enough after the first boil. Keep it at a simmering bubble for 60–90 seconds to fully activate cornstarch.
- Recheck measurements: You want roughly ¼ cup (32 g) cornstarch per ~2½ cups dairy for a tidy, sliceable set.
- Chill long enough—4–6 hours minimum, overnight for best slices.
- Whipped cream deflated or wept:
- Whip to medium peaks, not stiff (stiff collapses faster).
- Try the stabilized method for events or warm rooms.
- Soggy crust (pastry):
- Fully blind-bake and cool. Avoid filling a warm shell.
- Glass/aluminum pans brown better than ceramic.
- Too bitter:
- Step down to 60% chocolate or add 1–2 Tbsp more sugar.
- Nudge the espresso powder down by ¼–½ tsp.
Serving, Slicing, Storage
- Chill time: 4–6 hours minimum for clean slices; overnight is perfection.
- Slice cleanly: Warm a chef’s knife under hot water, wipe dry, cut, and wipe between slices.
- Storage: Cover and refrigerate; best within 2–3 days for peak texture.
- Freezer-friendly: Freeze the un-topped pie (well wrapped) up to 1 month; thaw overnight in the fridge, then add cream and garnish.
FAQs (Quick Answers)
Can I use instant coffee instead of espresso powder?
Yes, but it’s milder and can taste a bit harsh. You may need more to achieve the same intensity. Espresso powder is ground and processed to dissolve cleanly and flavor baked goods beautifully.
Do I have to bake the crust?
No. A cookie crust is no-bake (chilling firms it). A butter pastry crust must be blind-baked for flakiness and crispness.
How strong should the coffee taste be?
Start with 1 tsp espresso powder and taste. For a true mocha, 1½–2 tsp is a sweet spot for most palates.
Can I make it ahead?
Absolutely. Crust and custard a day or two in advance; whip the topping day-of (or use stabilized cream).
Is there a no-bake version?
Yep—cookie crust + pudding-style mocha filling. Chill well before topping and serving.
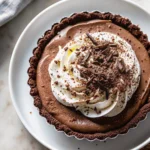
Delicious Chocolate Espresso Cream Pie
- Total Time: PT35M
- Yield: 8 servings 1x
- Diet: Vegetarian
Description
This Chocolate Espresso Cream Pie is the ultimate dessert for chocolate and coffee lovers alike. It combines a buttery cookie crust, velvety espresso-infused chocolate filling, and a cloud of whipped cream on top. Each bite delivers a balance of smooth, bold, and creamy flavors — perfect for any celebration or cozy night in.
Ingredients
Crust (choose one):
A) No-Bake Cookie Crust
- 300 g chocolate wafer or Oreo crumbs (about 30 whole Oreos, finely processed)
- 90 g unsalted butter, melted
- Pinch of fine salt
B) Blind-Baked Butter Pastry Crust
- 190 g all-purpose flour
- 115 g cold unsalted butter, cubed
- ½ tsp fine salt
- 1–3 Tbsp ice water (as needed)
Mocha Chocolate Filling (Custard Method)
- 480 ml whole milk
- 120 ml heavy cream
- 150 g granulated sugar
- Pinch fine salt
- 1 Tbsp Dutch-process cocoa (optional, for depth)
- 4 large egg yolks
- 32 g cornstarch (¼ cup)
- 170–200 g good dark/semi-sweet chocolate, finely chopped
- 28–42 g unsalted butter (2–3 Tbsp), cubed
- 1–2 tsp espresso powder (to taste)
- 1 tsp vanilla extract
Topping
- 360 ml heavy cream, well chilled
- 30–45 g icing sugar, to taste
- 1 tsp vanilla extract
- Optional stabilized method: 1 tsp powdered gelatin + 1 Tbsp cold water
Garnish (optional)
- Chocolate curls/shavings, cocoa dusting, ganache drizzle, flaky sea salt, or chocolate-coated espresso beans
Instructions
1) Make the Crust
A) Cookie Crust (No-Bake)
- Mix crumbs, melted butter, and a pinch of salt until the texture resembles damp sand.
- Press firmly into a 9-inch pie plate (base and sides).
- Option 1: Chill 30–45 minutes to set.
- Option 2 (crisper): Bake at 175–180°C for 8–10 minutes; cool completely.
B) Butter Pastry Crust (Blind-Baked)
- Pulse flour and salt, then add cold butter and pulse to pea-size bits.
- Drizzle in just enough ice water to form shaggy clumps that hold when pressed.
- Bring together, flatten into a disc, wrap, and chill 45–60 minutes.
- Roll to ~3 mm thick; line the pie plate. Trim and crimp; chill 20 minutes.
- Dock base, line with parchment, add weights (or sugar).
- Bake at 200°C for 15–18 minutes; remove weights; bake 10–12 minutes more to golden. Cool completely.
2) Cook the Mocha Custard Filling
- Warm dairy: In a saucepan, whisk milk, cream, sugar, salt, and optional cocoa; heat until steaming.
- Yolk base: Whisk yolks with cornstarch until thick and smooth.
- Temper: Slowly whisk half the hot dairy into the yolks; return the mixture to the pot.
- Thicken fully: Cook over medium heat, whisking constantly, until it boils. Maintain a bubbling simmer for 60–90 seconds to activate the cornstarch.
- Finish off-heat: Remove from heat; whisk in chopped chocolate and butter until glossy. Stir in espresso powder (start with 1 tsp, taste, then add more) and vanilla.
- Strain: Push through a fine-mesh strainer for the smoothest texture.
- Cool slightly: Press plastic wrap directly on the surface to prevent a skin.
3) Fill and Chill
- Pour the warm custard into your cooled crust; smooth the top.
- Press plastic wrap onto the surface.
- Chill 4–6 hours, preferably overnight.
4) Whipped Cream (Choose Classic or Stabilized)
Classic Whipped Cream
- Whip cold cream with icing sugar and vanilla to medium peaks.
- For espresso whipped cream, add ½–1 tsp espresso powder while whipping.
Stabilized Whipped Cream (Gelatin)
- Bloom gelatin in cold water 5 minutes; melt gently (microwave a few seconds).
- Whip cream with sugar and vanilla to soft peaks; stream in warm gelatin while whipping; finish to medium peaks.
5) Finish & Serve
- Crown the chilled pie with whipped cream.
- Garnish: curls, cocoa, ganache drizzle, flaky salt, or beans.
- Slice with a hot, dry knife for those enviable, tidy wedges.
- Prep Time: PT25M
- Cook Time: PT10M
- Category: Desserts
- Method: Baked
- Cuisine: American
Nutrition
- Serving Size: 1 slice
- Calories: 450 kcal
- Sugar: 28g
- Sodium: 210mg
- Fat: 32g
- Saturated Fat: 18g
- Unsaturated Fat: 12g
- Trans Fat: 0g
- Carbohydrates: 38g
- Fiber: 2g
- Protein: 6g
- Cholesterol: 170mg