Introduction
Sinking your fork into a bowl of Japanese Katsu Bowls with Tonkatsu Sauce is like taking a bite-sized trip to Japan’s bustling eateries. This one-bowl wonder combines crunchy, golden‐fried cutlets with fluffy rice, crisp slaw, and a luscious, tangy sauce—an irresistible harmony of textures and flavors. In this guide, you’ll discover:
Ready to master this ultimate comfort-food bowl? Let’s get started.
What Is a Japanese Katsu Bowl?
A Japanese Katsu Bowl merges the classic breaded cutlet known as katsu with a bed of steaming rice and colorful toppings. Unlike the traditional katsudon, where the cutlet simmers briefly in an egg-onion broth before serving, modern katsu bowls keep the cutlet crisp and separate, allowing each bite to balance crunch, creaminess, and tang.
To dive deeper into the rich background of tonkatsu, check out Tonkatsu history and ingredients.
Origins & History of Katsu in Japan
The katsu story begins in the late 19th century, during Japan’s Meiji era, when Western-style cooking (yōshoku) swept through Tokyo. Local chefs adapted European breading techniques, swapping breadcrumbs for Japanese panko to achieve a lighter, airier crust. Over time:
- Early yōshoku restaurants served tonkatsu alongside steak and other Western dishes
- Regional variations emerged, from miso-glazed cuts in Nagoya to spicy soy versions in Osaka
- By the mid-20th century, the concept of pairing katsu with rice, cabbage slaw, and sauce evolved into what we now call the katsu bowl
For a closer look at how katsudon a close relative—developed, visit Origins of Katsudon.
Understanding Tonkatsu Sauce
At the heart of every Japanese Katsu Bowl lies the Tonkatsu Sauce, a rich, umami-packed condiment that transforms simple fried cutlets into flavor fireworks. Key characteristics:
- Sweet‐savory balance from ketchup, Worcestershire, and soy
- Umami depth thanks to fruit purées or juices
- Versatile texture—thick enough to coat, yet pourable for drizzling
Whether you buy it ready-made or whip up a batch from scratch, this sauce is non-negotiable for true katsu-bowl perfection.
Key Ingredients for Japanese Katsu Bowls
To assemble an authentic and vibrant katsu bowl, gather these essentials:
- Protein options:
- Boneless chicken breast or thighs
- Firm tofu (for a vegetarian twist)
- Breading components:
- Panko breadcrumbs—light, flaky, ultra-crisp
- All-purpose flour—for the first dredge
- Large eggs—beaten, to bind the crumbs
- Rice base:
- Japanese short-grain rice (sushi rice) or medium-grain rice for the ideal sticky texture
- Toppings & aromatics:
- Shredded cabbage or crunchy slaw mix
- Thinly sliced scallions
- Pickled ginger or daikon radish for a tangy kick
- Sauce ingredients (for homemade):
- Ketchup, Worcestershire sauce, soy sauce
- Mirin or sugar (for sweetness)
- Optional: grated apple or pear to deepen flavor
Each element plays a vital role: from the crisp panko crust to the fluffy rice cushion and the bright, refreshing slaw.
Preparing the Meat
Achieving a tender, juicy cutlet starts long before the oil heats:
- Tenderize & season:
- Lightly pound pork or chicken to uniform thickness (about ½ inch) for even cooking
- Rub with salt and freshly ground pepper—keep it simple to let the crust shine
- Set up your breading station:
- Bowl 1: all-purpose flour, seasoned with a pinch of salt
- Bowl 2: beaten eggs, whisked until smooth
- Bowl 3: panko breadcrumbs, loosely packed
- Dredging technique:
- Pat excess moisture off the cutlet with paper towels
- Coat in flour, shake off the excess
- Dip firmly into the egg wash, ensuring full coverage
- Press into panko, turning to coat both sides evenly
Tip: Work on a wire rack to avoid soggy undersides—this keeps air circulating around the crust.
Making Homemade Tonkatsu Sauce
While store-bought sauce is convenient, homemade Tonkatsu Sauce offers unmatched freshness:
- Combine base ingredients:
- ½ cup ketchup
- 2 tablespoons Worcestershire sauce
- 1 tablespoon soy sauce
- 1 tablespoon mirin (or 1 teaspoon sugar)
- Add flavor boosters:
- 2 tablespoons finely grated apple or pear
- Optional dash of garlic powder or ground mustard
- Simmer & meld:
- Gently heat the mixture over low heat
- Stir until sugar dissolves and flavors marry (3–5 minutes)
- Cool before serving—thickens slightly as it rests
Store any leftovers in an airtight container in the fridge; it keeps beautifully for up to two weeks.
Cooking the Katsu
Key to a flawless katsu is precise frying:
- Oil selection:
- Neutral oils with high smoke points—canola, vegetable, or peanut oil
- Temperature control:
- Heat oil to 170–180 °C (340–360 °F)
- Use a kitchen thermometer for accuracy
- Frying technique:
- Gently lay cutlets into the oil—do not overcrowd
- Maintain temperature; adjust heat as needed
- Fry each side for 3–4 minutes until golden brown
- Optional: double-fry for extra crispiness—remove after first fry, let rest 2 minutes, then return to oil for 1 minute
- Draining & resting:
- Transfer to a wire rack over a baking sheet
- Rest 2–3 minutes to lock in juices and preserve crunch
The result: an impossibly crisp, golden exterior encasing tender, flavorful meat.
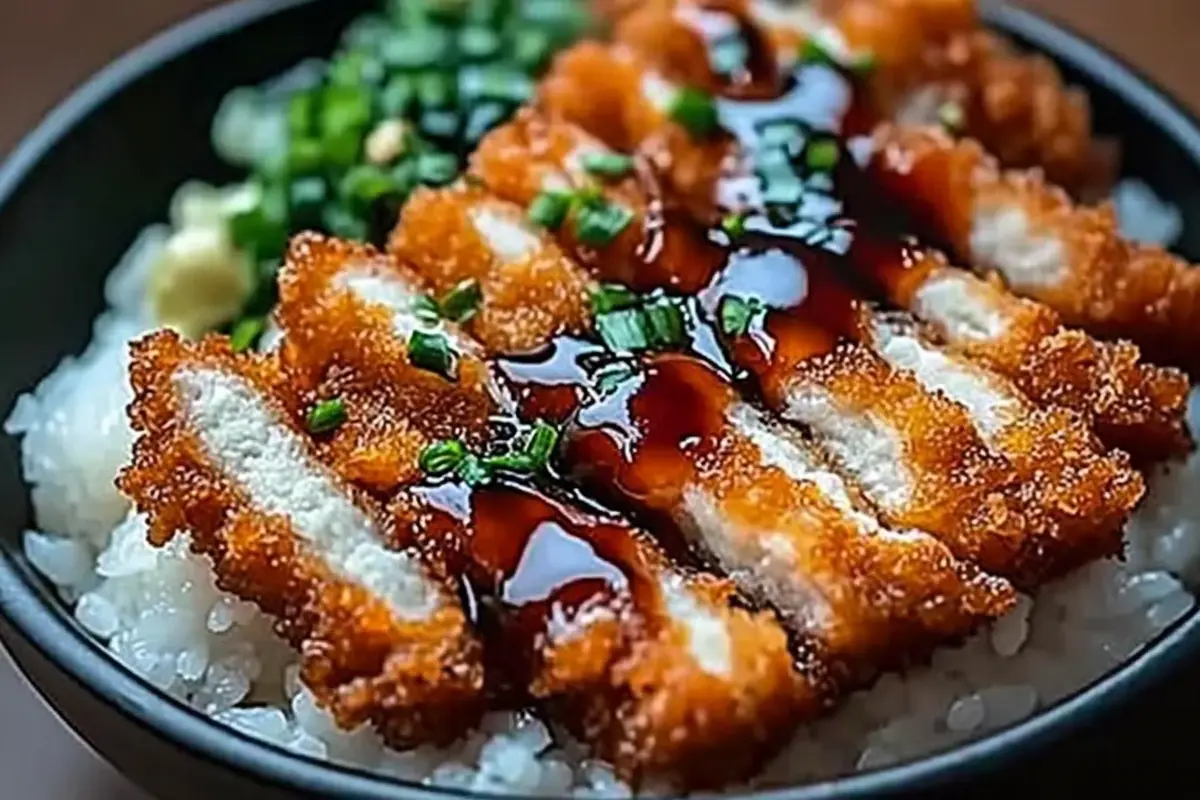
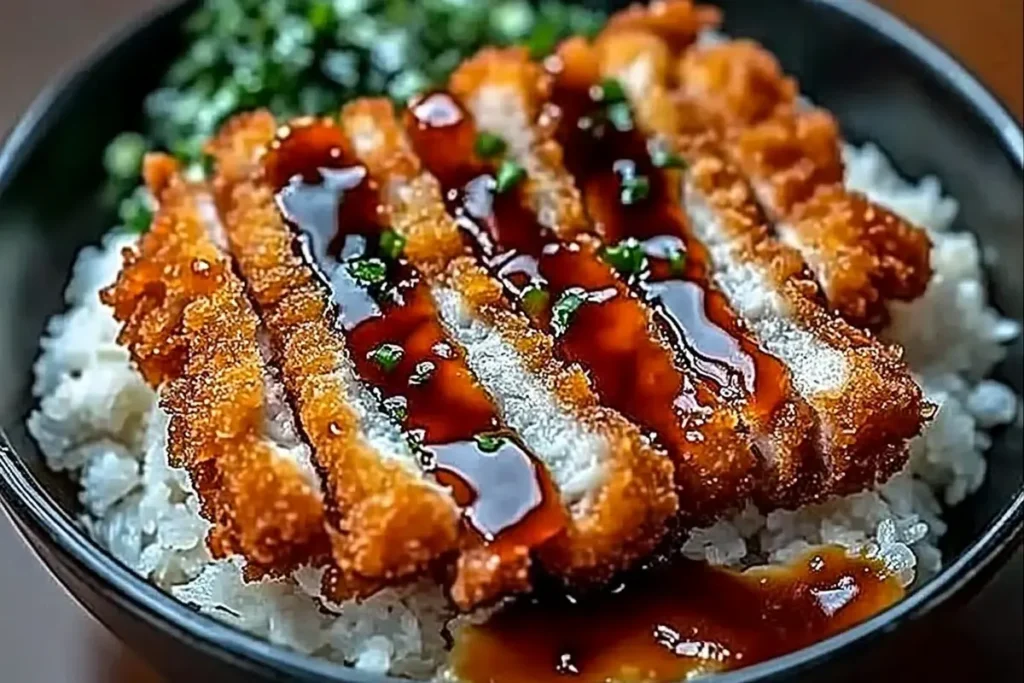
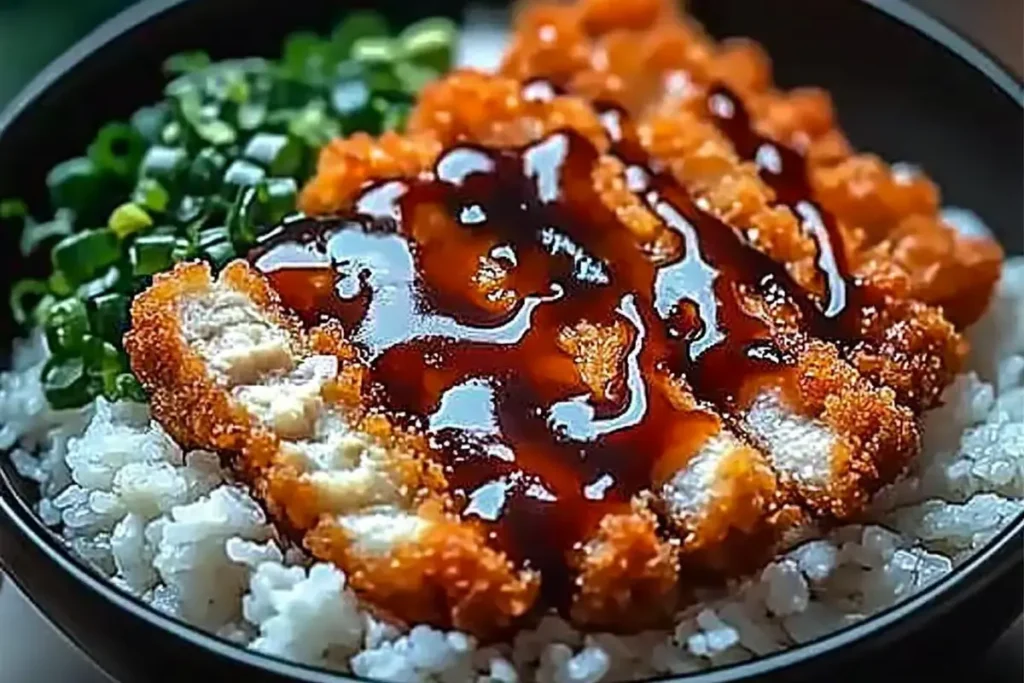
Assembling the Perfect Katsu Bowl
Crafting a visually stunning and balanced bowl involves thoughtful layering:
- Rice base:
- Mound 1 to 1½ cups of steamed short-grain rice in a deep bowl
- Toppings layer:
- Arrange a handful of shredded cabbage or slaw on one side
- Add a sprinkle of sliced scallions and pickles for color contrast
- Cutlet placement:
- Slice the katsu into 1-inch strips
- Fan out neatly across the rice
- Sauce application:
- Drizzle homemade or store-bought Tonkatsu Sauce in a zigzag pattern
- For extra creaminess, add a dollop of spicy mayo on top
- Finishing touches:
- Garnish with sesame seeds, nori strips, or microgreens
- Serve immediately to preserve the cutlet’s crunch
Tip: Serve bowls on a wooden tray with a small side of miso soup and pickled vegetables for a complete experience.
Variations & Substitutions
Feel free to customize your katsu bowl to suit any palate:
- Protein swaps:
- Chicken katsu for a lighter taste
- Firm tofu or eggplant for a vegetarian option
- Shrimp katsu for a seafood twist
- Gluten-free options:
- Swap wheat flour for rice flour
- Use gluten-free panko breadcrumbs
- Cooking methods:
- Oven-baked katsu: brush cutlets with oil, bake at 200 °C (400 °F) for 15–20 minutes
- Air-fryer version: 180 °C for 12–15 minutes, flipping halfway
- Sauce tweaks:
- Mix Tonkatsu Sauce with sriracha for heat
- Stir in Japanese curry roux for a curry-katsu bowl
Experimenting with textures and flavors keeps this bowl exciting every time.
Side Dishes & Accompaniments
Elevate your meal with simple Japanese sides:
- Miso soup:
- Silken tofu, wakame seaweed, scallions
- Edamame:
- Steamed and lightly salted pods
- Pickled vegetables:
- Takuan (pickled daikon), pickled cucumbers
- Seaweed salad:
- Sesame-dressed wakame strands
These sides provide a refreshing counterpoint to the rich, fried katsu.
Presentation & Plating Tips
A well-styled bowl is both art and appetite:
- Color balance:
- Bright slaw against golden cutlet and white rice
- Height & layers:
- Pile toppings strategically to create visual depth
- Garnish thoughtfully:
- Lightly sprinkle sesame seeds
- Add a few ribbons of nori for contrast
Use simple, neutral‐colored bowls to let the food’s hues pop.
Common Mistakes & Troubleshooting
Avoid these pitfalls for flawless results:
- Soggy crust:
- Oil too cool ensure proper temperature before frying
- Uneven frying:
- Overcrowding the pan fry in batches
- Sauce too runny:
- Simmer longer to reduce and thicken
- Rice too sticky or dry:
- Rinse rice thoroughly before cooking; use correct water ratio
Learning from these errors brings you closer to katsu mastery.
FAQs
1. Can I make katsu bowls ahead of time?
Yes! Fry the cutlets and prepare rice and sauce separately. Store cutlets on a wire rack at room temperature for up to 1 hour before serving, then reheat in a 180 °C (350 °F) oven for 5–7 minutes to restore crispiness.
2. What’s the best oil for frying katsu?
Neutral oils with high smoke points—canola, vegetable, or peanut oil—are ideal. They deliver a clean flavor and maintain stable frying temperatures.
3. How do I store leftover Tonkatsu Sauce?
Transfer cooled sauce into an airtight container and refrigerate. It will keep fresh for up to two weeks. Bring to room temperature or gently reheat before using.
4. Is there a vegetarian version of katsu bowls?
Absolutely. Use firm tofu, eggplant, or large mushroom caps instead of meat. Dredge and fry as you would pork or chicken, then assemble with the same toppings and sauce.
5. How spicy is traditional Tonkatsu Sauce?
Traditional sauce is mild, balancing sweet and savory notes. For a kick, you can stir in sriracha or chili flakes to customize the heat level.
Conclusion
With its crisp, golden cutlets, vibrant slaw, and tangy Tonkatsu Sauce, the Japanese Katsu Bowl reigns supreme in comfort-food bowls. By following these steps—from tenderizing and breading to frying and plating—you’ll create a show-stopping meal that delights every sense. Don’t hesitate to experiment with proteins, sauces, and sides to make this dish uniquely yours.
Print
Japanese Katsu Bowls with Tonkatsu Sauce
- Total Time: 40 minutes
- Yield: 4 Bowls 1x
Description
Japanese Katsu Bowls are a crispy-meets-comfort dream: golden-fried cutlets ( chicken) served over steamed rice, topped with a tangy-sweet Tonkatsu sauce, and finished with fresh veggies or slaw. It’s a beloved Japanese comfort food that’s easy to make at home.
Ingredients
For the Katsu (cutlets):
- 4 chicken breasts (pounded to 1/2-inch thick)
- Salt & pepper
- 1/2 cup flour
- 2 eggs, beaten
- 1 cup panko breadcrumbs
- Neutral oil (like vegetable or canola) for frying
For the Tonkatsu Sauce:
- 1/4 cup ketchup
- 2 tbsp Worcestershire sauce
- 1 tbsp soy sauce
- 1 tbsp mirin (or rice vinegar + 1/2 tsp sugar)
- 1 tsp Dijon mustard or a pinch of garlic powder (optional)
For the Bowls:
- 2 cups steamed white rice (short-grain preferred)
- 1 cup shredded cabbage or lettuce
- Sliced green onions (optional)
- Pickled ginger or daikon (optional)
Instructions
1. Prepare the Tonkatsu Sauce
- Whisk together all sauce ingredients in a small bowl until smooth.
- Taste and adjust — more ketchup for sweetness, more soy for saltiness.
2. Make the Katsu
- Season meat with salt and pepper.
- Dredge in flour, dip in beaten egg, then coat in panko, pressing gently to adhere.
- Heat about 1/4 inch oil in a large skillet over medium-high heat.
- Fry cutlets 2–3 minutes per side, until golden brown and cooked through (internal temp: 165°F/74°C for chicken, 145°F/63°C for pork).
- Transfer to paper towels and rest 5 minutes before slicing.
3. Assemble the Bowls
- Add rice to the bottom of each bowl.
- Top with sliced katsu, cabbage, and a drizzle of Tonkatsu sauce.
- Garnish with green onions, sesame seeds, or pickled ginger if desired.
Notes
- Swap white rice for brown rice or cauliflower rice.
- Use tofu for a vegetarian katsu.
- Add a soft-boiled egg or avocado slices for a richer bowl.
- Prep Time: 20 minutes
- Cook Time: 20 minutes
- Category: Main
- Method: Frying
- Cuisine: Japanese
Nutrition
- Serving Size: 4
- Calories: 620 kcal
- Sugar: 8 g
- Sodium: 950 mg
- Fat: 25 g
- Saturated Fat: 6 g
- Trans Fat: 0 g
- Carbohydrates: 64 g
- Fiber: 3 g
- Protein: 32 g
- Cholesterol: 140 mg