Introduction
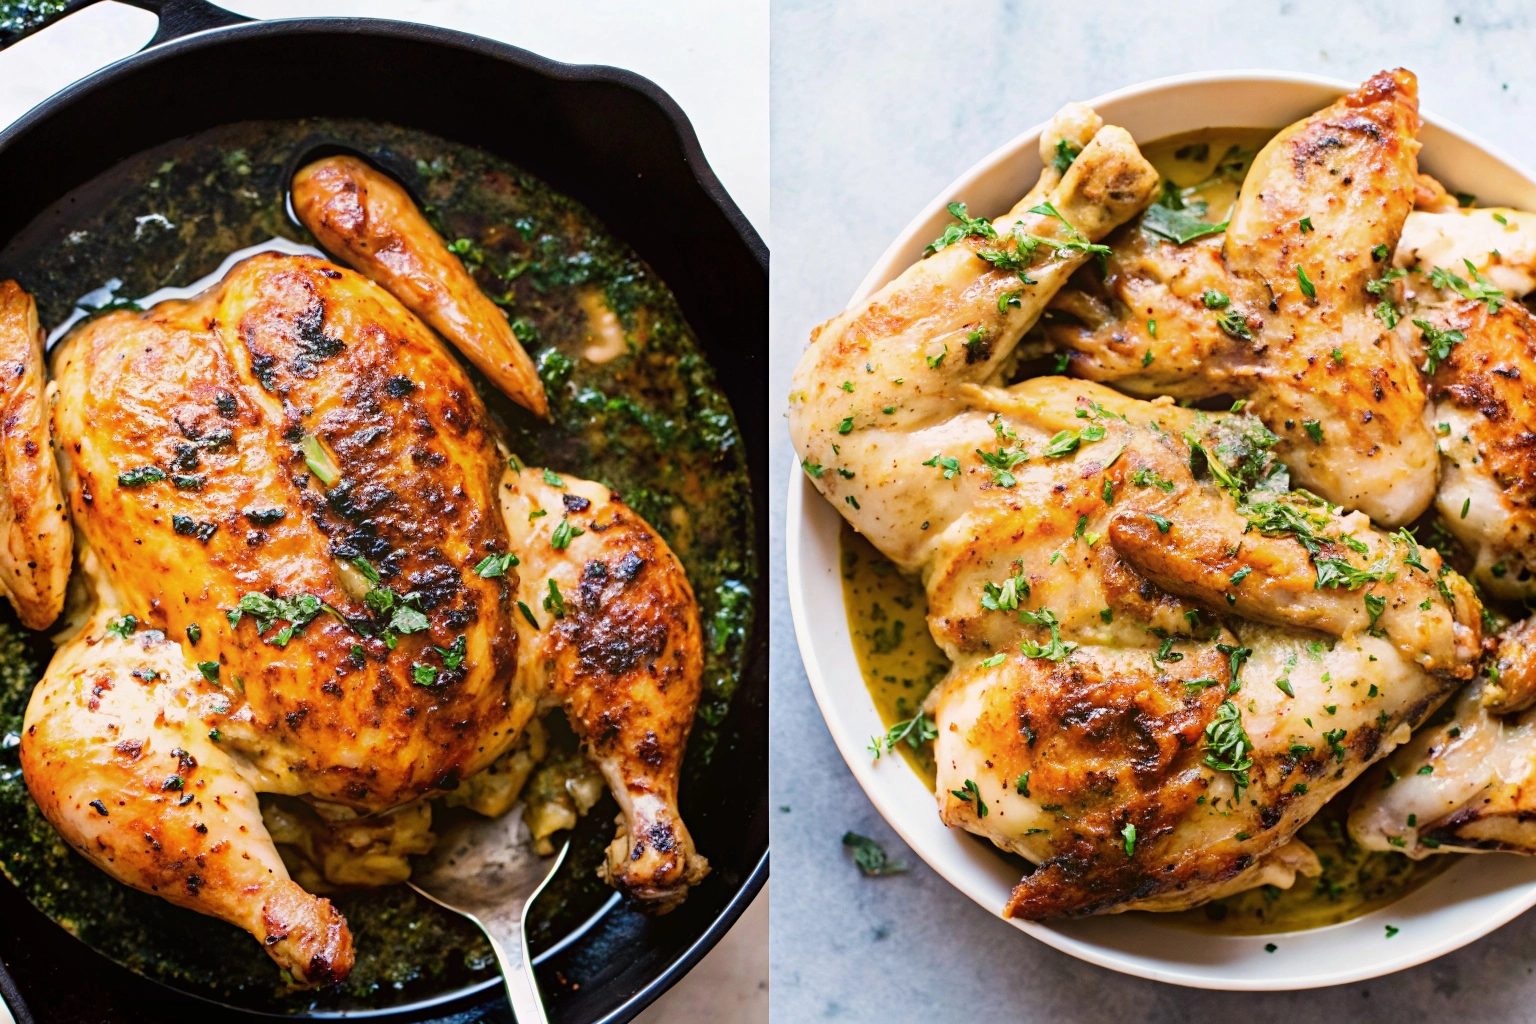
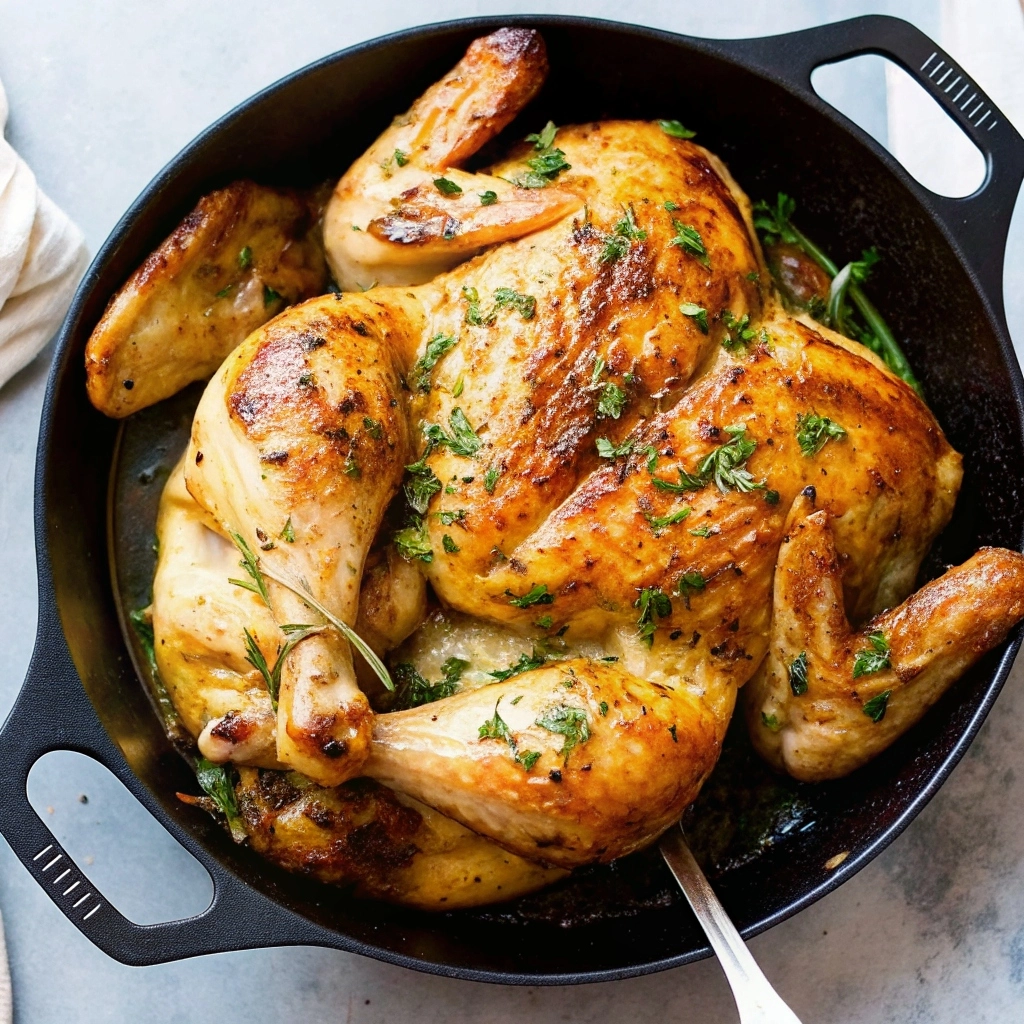
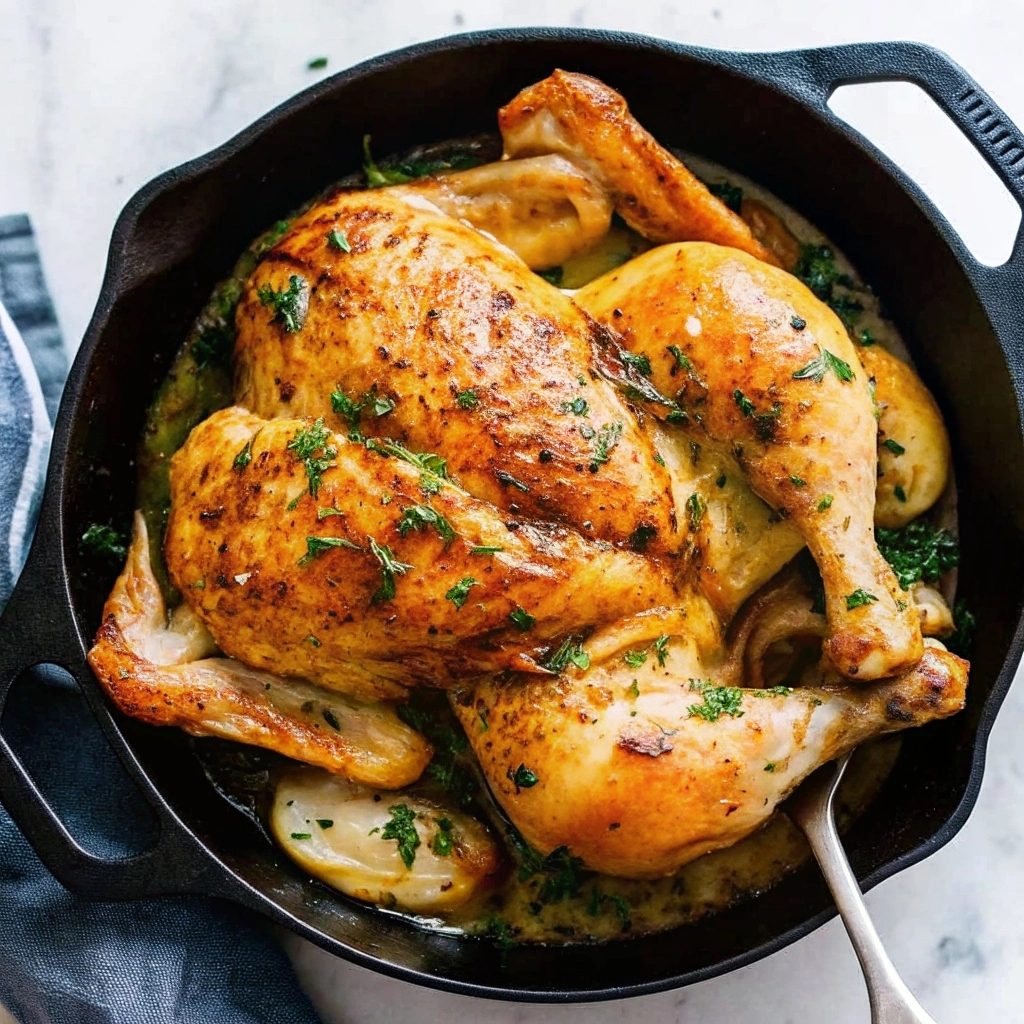
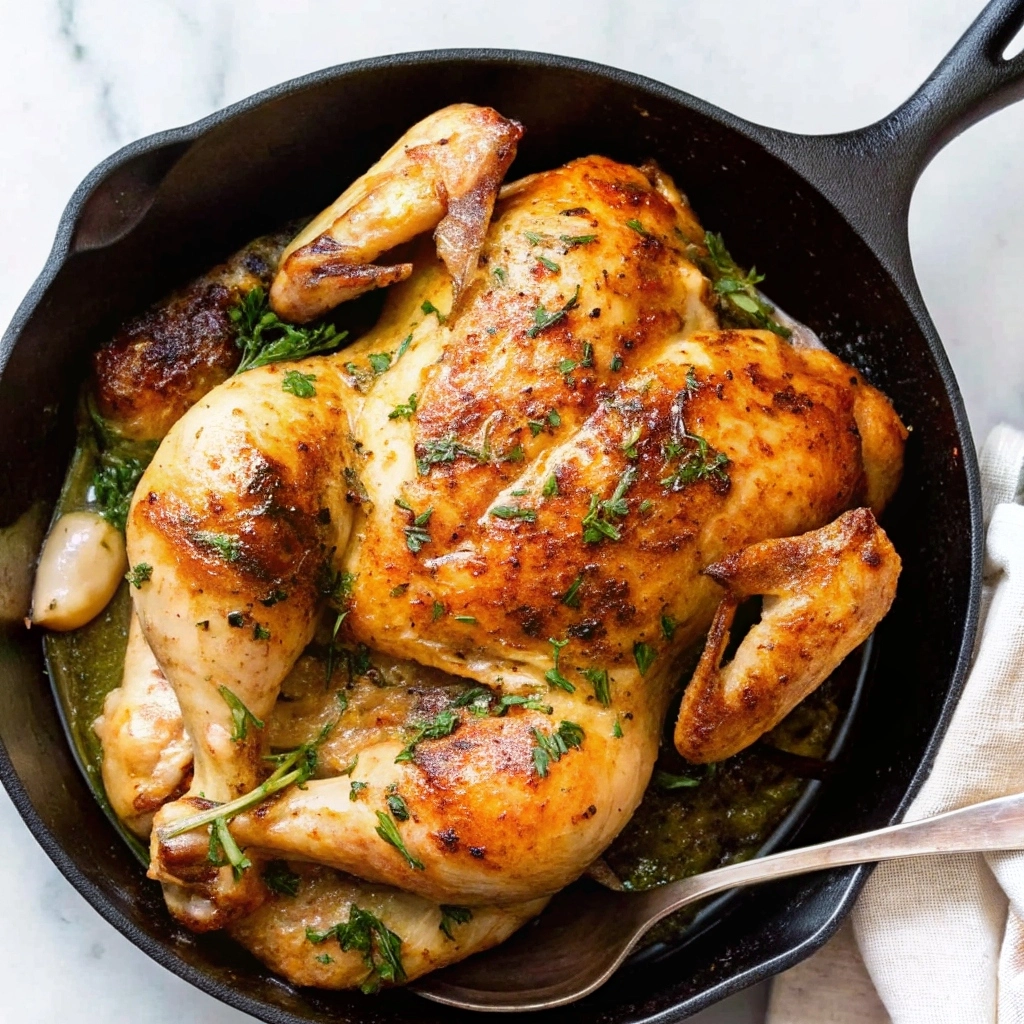
Roasted Lemon Garlic Butter Spatchcock Chicken is one of those dishes that delivers the ultimate comfort and show-stopping flavor in every bite. By removing the backbone and flattening the bird, you unlock faster, more even cooking, resulting in crispy skin and succulent meat throughout. This method transforms a humble whole chicken into a centerpiece-worthy marvel, combining bright lemon, pungent garlic, and rich butter for an unforgettable roast.
Why You’ll Love This Recipe
- Speed & Efficiency: Flattening the chicken reduces overall cooking time by up to 25%, so you spend less time waiting and more time enjoying.
- Even Cooking: No more undercooked breasts or overdone wings, every part reaches perfect doneness.
- Bold, Balanced Flavor: The tangy brightness of lemon melds with savory garlic and luscious butter, creating a harmonious trifecta.
- Impressive Presentation: A beautifully butterflied chicken makes for a stunning centerpiece and straightforward carving.
For an in-depth look at this time-saving method, consult the Spatchcocking technique explained guide. You’ll see why professional chefs and home cooks alike swear by this approach.
Understanding the Spatchcock Technique
Spatchcocking—also known as butterflying—involves removing the chicken’s backbone and pressing it flat. This simple yet transformative step provides two key advantages:
- Even Heat Distribution
- A flat bird exposes more surface area, ensuring uniform roasting and preventing dry edges alongside undercooked joints.
- Reduced Cook Time
- With more of the chicken directly exposed to heat, you can slice minutes off your roasting schedule without sacrificing quality.
Ingredient for Roasted Lemon Garlic Butter Spatchcock Chicken
Quality ingredients are the foundation of an unforgettable dish. Here’s what you’ll need:
- Whole Chicken (3–4 lbs)
- Opt for air-chilled or free-range if possible—these birds tend to have firmer texture and reduced water retention.
- Fresh Lemons (2–3)
- Zest: Adds volatile oils and intense aroma—use a microplane grater for the finest threads.
- Juice: Provides bright acidity to balance the butter’s richness.
- Always choose organic lemons when zesting the skin to avoid pesticide residues.
- Garlic (4–6 cloves)
- Fresh bulbs give the best pungency.
- Sliced cloves roast to sweet, mellow notes; minced garlic offers sharper, more direct heat.
- Unsalted Butter (½ cup)
- Unsalted lets you control sodium levels precisely.
- You can replace up to 25% of the butter with extra-virgin olive oil for a lighter mouthfeel, but keep a minimum of half as butter for flavor depth.
- Fresh Herbs & Seasonings
- Thyme and rosemary: Woody, aromatic notes that complement poultry beautifully.
- Parsley: Added at the end for a pop of green freshness.
- Sea Salt and Freshly Ground Black Pepper: The foundation of every great roast.
- Red Pepper Flakes (optional): For a subtle warming heat.
- Optional Aromatics
- Shallots or lemon halves tucked under the bird can roast alongside and yield flavorful pan juices.
- Paprika or smoked paprika: Adds color and a hint of smokiness.
Essential Tools & Equipment
- Poultry Shears or Sharp Chef’s Knife: For clean, precise backbone removal.
- Roasting Rack & Pan: Elevates the bird so hot air circulates underneath, yielding uniform crispness.
- Instant-Read Thermometer: Essential to nail exact doneness without slicing into the meat prematurely.
- Basting Brush: For even application of garlic butter.
- Cutting Board: Sturdy, non-slip surface for spatchcocking and carving.
- Tongs & Carving Knife: To handle hot poultry safely and carve with ease.
How to Spatchcock Your Chicken
- Prepare Your Workspace
- Place a damp towel under your cutting board to prevent slipping.
- Position the chicken breast-side down, wings tucked under the breast.
- Remove the Backbone
- Using poultry shears, cut along one side of the backbone from tail to neck.
- Repeat on the opposite side to fully detach the spine.
- Reserve the backbone for homemade stock or discard.
- Flatten the Bird
- Flip the chicken breast-side up.
- Press firmly on the center of the breastbone with both palms until you hear a crack—this flattens the rib cage.
- Spread the legs and wings outward; the chicken should lie completely flat.
- Trim & Tuck
- Remove any excess skin, fat, or stray bits for a clean look.
- Tuck the wing tips behind the shoulders to prevent burning during roasting.
- Safety & Sanitation
- Wash your hands, tools, and work surface thoroughly with hot, soapy water after handling raw poultry.
- Use separate cutting boards for meat and produce to avoid cross-contamination.
Mastering this technique pays dividends in cooking speed and uniform texture, key to sensational results every time.
Crafting the Lemon Garlic Butter Marinade
- Melt the Butter
- In a small saucepan over low heat, melt ½ cup of unsalted butter just until fully liquefied.
- Infuse with Garlic
- Add 4–6 cloves of sliced or minced garlic.
- Sauté gently for 2–3 minutes until fragrant, ensuring the garlic softens without browning (to avoid bitterness).
- Add Citrus Brightness
- Stir in the zest of 2 lemons, capturing those essential oils.
- Squeeze in both juices for vibrant acidity that cuts through the butter’s richness.
- Season & Herb
- Mix in 1 teaspoon of fresh thyme leaves and a pinch of red pepper flakes for complexity.
- Season with 1 teaspoon of sea salt and ½ teaspoon of freshly ground black pepper.
- Rest & Cool
- Remove from heat and let the mixture sit for 3–5 minutes.
- Cooling slightly ensures the butter clings to the cold chicken rather than sliding off.
Roasting Methods: Oven vs. Grill
Oven Roasting
- Preheat to 425°F (218 °C).
- Arrange the spatchcocked chicken skin-side up on a rack set in a rimmed baking sheet.
- Roast for 35–45 minutes, basting with reserved lemon garlic butter every 10–15 minutes.
- Finish with a 5-minute high-heat blast at 450°F (232 °C) to lock in crispness.
Grilling
- Prepare for indirect heat: place coals or burners to one side only.
- Position chicken skin-side down over the cooler zone.
- Cover the grill and cook for 30–40 minutes, flipping to finish skin-side up if desired.
- Sear for 3–5 minutes over direct heat to achieve extra char and crunch.
Both methods yield exceptional results—choose based on your equipment, weather, and flavor preferences. Oven roasting offers consistency and convenience, while grilling adds subtle smokiness and char.
Achieving Crispy Skin: Pro Tips
- Dry Foundation: Thoroughly pat the skin with paper towels before seasoning—moisture prevents browning.
- High-Heat Finish: Increase oven temperature to 450°F for the last 5 minutes, or move the grill grate closer to coals.
- Minimal Cover: Avoid tenting with foil during cooking; trapped steam softens the skin.
- Restraint in Basting: One or two bastes add flavor and color—over-basting can introduce too much moisture.
These targeted techniques ensure every bite delivers that coveted golden crunch.
Resting, Carving & Presentation
- Rest the cooked chicken on a cutting board, tented loosely with foil, for 10–15 minutes.
- Carving Order:
- Remove legs and thighs by cutting through the joint.
- Slice wings off at the shoulder.
- Cut along each side of the breastbone to release the breasts; then slice against the grain.
- Garnish with lemon wheels and fresh herb sprigs (thyme or parsley) for a vibrant, restaurant-worthy finish.
Serving Suggestions & Side Pairings
- Roasted Potatoes: Toss with garlic, rosemary, and olive oil before roasting for complementary flavors.
- Green Beans Almondine: Sauté slivered almonds with green beans for a crunchy contrast.
- Rice Pilaf: A neutral canvas to absorb the buttery pan juices.
- Pan Jus: Deglaze the roasting pan with a splash of white wine or chicken stock, whisking in any browned bits for a simple yet flavorful sauce.
Flavor Variations & Twists
- Citrus Swap: Replace lemon with lime for a tropical flair, or orange for sweeter notes.
- Herb Swap: Experiment with fresh sage, tarragon, or oregano for an herbal twist.
- Spice Kick: Stir in smoked paprika, chili powder, or cayenne into the butter infusion for warming heat.
- Aromatic Add-Ins: Roast halved shallots or whole garlic cloves underneath the bird for additional depth and visual appeal.
Common Pitfalls & How to Avoid Them
| Issue | Solution |
|---|---|
| Undercooked Breast | Check internal temp early; tent with foil if skin browns too fast. |
| Soggy Skin | Start with thoroughly dried skin; finish at high heat without covering. |
| Bitter or Burnt Garlic | Add garlic later in roasting or use whole cloves that can be removed early. |
| Uneven Seasoning | Massage rub into all crevices; lift wings and thighs to season underneath. |
FAQs
- Can I spatchcock the chicken ahead of time?
Yes—prepare and season up to 24 hours in advance. Store uncovered in the fridge to help the skin dry out for extra crispiness. Bring to room temperature before roasting. - What’s the best way to store leftovers?
Remove meat from bones, slice, and place in an airtight container. Refrigerate for up to 3 days. Reheat in a low oven (300 °F/150 °C) to preserve moisture. - Can I use ghee instead of butter?
Absolutely. Ghee offers a higher smoke point and subtle nuttiness. Substitute 1:1, but note the flavor shifts slightly toward earthier tones. - How do I prevent the garlic from burning?
Add sliced or minced garlic 10 minutes into roasting, or use larger smashed cloves; you can fish out once they’ve released their essence. - Is brining necessary before spatchcocking?
Not required if you marinate effectively. For extra juiciness, opt for a dry-brine: rub salt over the bird, refrigerate uncovered overnight, then proceed with the recipe. - Can I double the recipe for a larger bird?
Yes. Adjust cook time by roughly 5 minutes per additional half-pound, and ensure your roasting vessel accommodates the size.

Delicious Roasted Lemon Garlic Butter Spatchcock Chicken: Crisp, Juicy & Flavorful
- Total Time: PT1H
- Yield: 4 servings 1x
Description
This Roasted Lemon Garlic Butter Spatchcock Chicken is the ultimate way to enjoy a juicy, flavorful roast with golden, crispy skin. By spatchcocking (butterflying) the chicken, it cooks faster and more evenly, ensuring tender meat in every bite. A rich blend of melted butter, fresh garlic, zesty lemon, and herbs infuses the chicken with irresistible flavor, while basting locks in moisture and creates a mouthwatering finish.
Ingredients
- 1 whole chicken (3–4 lbs), spatchcocked (backbone removed, flattened)
- ½ cup unsalted butter, melted
- 4–6 garlic cloves, minced or thinly sliced
- 2 fresh lemons (zest and juice)
- 1 tablespoon fresh thyme leaves
- 1 teaspoon fresh rosemary, chopped
- 1 teaspoon sea salt (adjust to taste)
- ½ teaspoon freshly ground black pepper
- ¼ teaspoon red pepper flakes (optional, for a subtle kick)
- 2 tablespoons fresh parsley, chopped (for garnish)
Instructions
- Preheat the oven
- Set your oven to 425°F (218°C). If grilling, prepare a two-zone setup with indirect heat.
- Prepare the chicken
- Place the chicken breast-side down on a cutting board.
- Using poultry shears, cut along both sides of the backbone and remove it.
- Flip the chicken breast-side up, then press firmly on the breastbone to flatten.
- Pat the chicken dry with paper towels.
- Make the lemon garlic butter
- Melt butter in a small saucepan over low heat.
- Add minced garlic and cook gently for 1–2 minutes until fragrant.
- Stir in lemon zest, lemon juice, thyme, rosemary, salt, black pepper, and red pepper flakes (if using).
- Remove from heat and let it cool slightly.
- Season the chicken
- Place the chicken skin-side up on a roasting rack set over a baking sheet.
- Brush two-thirds of the lemon garlic butter evenly under the skin and over the surface of the chicken.
- Tuck wing tips behind the shoulders to prevent burning.
- Roast the chicken
- Transfer the chicken to the oven and roast for 35–45 minutes, basting once or twice with reserved butter.
- Use an instant-read thermometer—chicken is done when the breast reaches 165°F (74°C) and thighs reach 175°F (79°C).
- Rest and carve
- Remove the chicken from the oven and let it rest for 10–15 minutes, tented loosely with foil.
- Carve by separating the thighs, drumsticks, wings, and slicing the breasts.
- Garnish and serve
- Sprinkle with fresh parsley and serve with lemon wedges on the side.
- Prep Time: PT20M
- Cook Time: PT40M
- Category: Main Course
- Method: Roasting
- Cuisine: American
Nutrition
- Calories: 420
- Sugar: 0.5
- Sodium: 410 mg
- Fat: 28g
- Saturated Fat: 12g
- Trans Fat: 0
- Carbohydrates: 2g
- Fiber: 0.3g
- Protein: 36g
- Cholesterol: 135mg
This page is so long, but in the recipe it doesn’t even mention how much of the mixture to put on the chicken before putting it in the oven. I’ve been sitting here with a raw chicken for 40 minutes trying to locate this information.
When you’ve prepared the lemon garlic butter, use about two-thirds of the mixture to coat the chicken before roasting. Brush it generously under the skin, over the skin, and in the crevices. The remaining one-third of the mixture should be set aside for basting once or twice during cooking.