
Why You’ll Love This Recipe
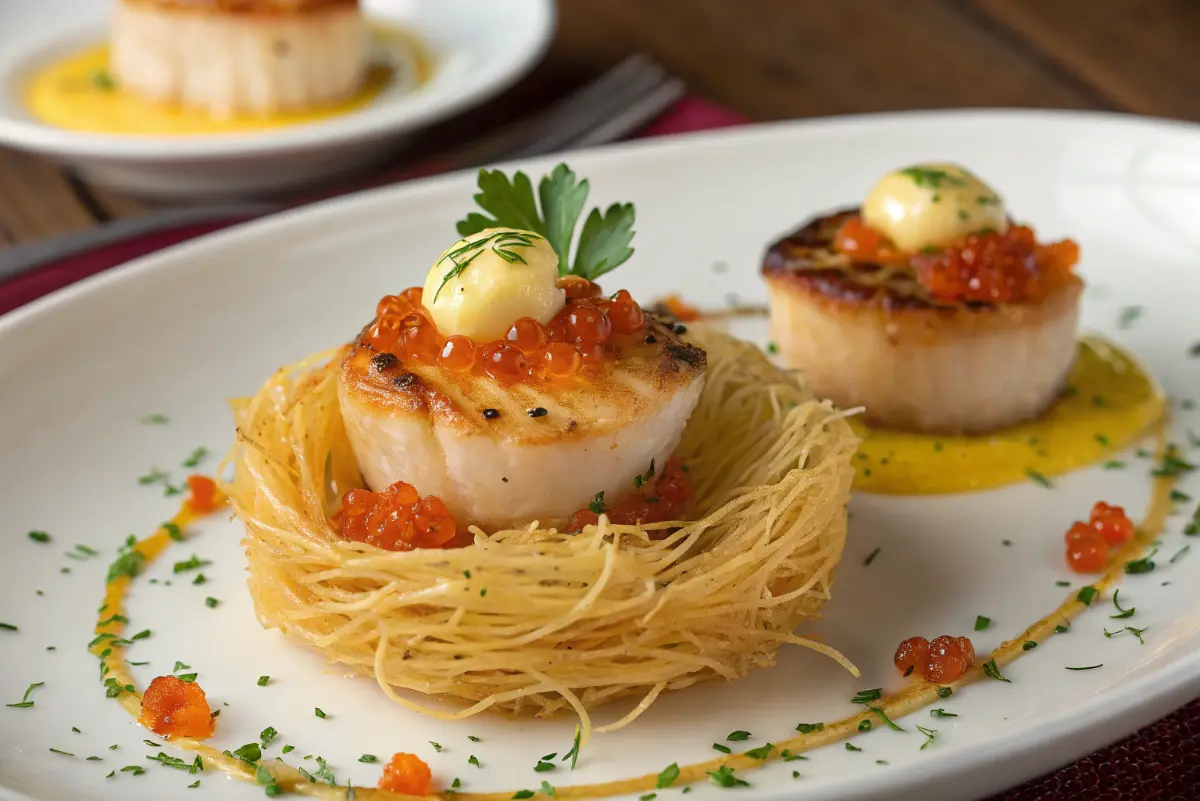
Seared Scallops in Crispy Kataifi Nests with Citrus Butter & Caviar combines several simple techniques into one sophisticated presentation.
Here are a few reasons to make it:
- Beautiful presentation: Golden kataifi nests make a natural edible base for each scallop.
- Fantastic texture: Crisp pastry contrasts beautifully with tender scallops.
- Bright flavor: Fresh lemon and orange keep the butter sauce lively.
- Elegant finish: A small spoonful of caviar adds a luxurious touch.
- Perfect for entertaining: Most components can be prepared separately before guests arrive.
- Restaurant-style appearance: The finished plate looks far more complicated than the actual cooking process.
The key is timing. The kataifi should remain crisp, the scallops should be served shortly after searing, and the caviar should be added at the very end.
What Is Kataifi Pastry?
Kataifi is a shredded phyllo pastry made from very fine strands of dough. Unlike traditional sheets of phyllo, kataifi looks almost like delicate threads. When coated with butter and baked, those strands become wonderfully crisp and golden.
It is also commonly called shredded phyllo, kadaifi, or kadayif.
For this recipe, kataifi is shaped into small nests before baking. The center creates a natural little space for the scallop, while the crisp strands provide an attractive contrast to the soft seafood.
When working with kataifi, moisture is your biggest enemy. The pastry should be thawed properly, loosened gently, and kept covered while you work. Athens Foods recommends thawing kataifi unopened in the refrigerator overnight and covering the pastry while handling it.
Why Kataifi Works So Well With Scallops
Scallops are naturally delicate, so they benefit from something crisp and texturally different.
The combination gives you:
- Tender scallop
- Crisp pastry
- Smooth butter sauce
- Bright citrus
- Briny caviar
- Fresh herb garnish
Every bite has a slightly different texture, which makes the appetizer feel special from the first bite to the last.
Why This Flavor Combination Works
The success of this recipe comes from balance.
Sweet Scallops
Large sea scallops have a naturally delicate sweetness. A good sear adds a savory, caramelized surface without masking that flavor.
Crisp Kataifi
The pastry introduces a light, crunchy texture. It also absorbs just enough of the citrus butter to become flavorful without needing a heavy sauce.
Citrus Butter
Butter gives the dish richness, while lemon and orange bring brightness. The citrus keeps the sauce from tasting too heavy.
Caviar
Caviar adds a concentrated, briny note. You only need a small amount because its flavor is naturally distinctive.
Fresh Garnish
Chives, microgreens, or a little citrus zest can finish the plate without competing with the main ingredients.
Ingredients
For the Scallops
- 12 large sea scallops
- 1 teaspoon kosher salt, or to taste
- ½ teaspoon freshly ground black pepper
- 1 tablespoon neutral cooking oil
- 2 tablespoons unsalted butter
Choose large scallops when possible. They are easier to sear beautifully and provide a better proportion between the seafood and the kataifi nest.
Look for scallops that have a clean, fresh aroma and a firm appearance. If purchasing frozen scallops, thaw them completely before cooking.
The most important preparation step is drying them thoroughly. NOAA Fisheries recommends removing surface moisture before searing, and its scallop cooking guidance also recommends cooking in small batches rather than overcrowding the skillet.
For the Crispy Kataifi Nests
- 8 ounces kataifi pastry
- 4 tablespoons unsalted butter, melted
- Pinch of fine salt
- Extra melted butter for brushing, if needed
You want enough butter to help the strands brown and crisp, but avoid soaking the pastry.
For the Citrus Butter
- 4 tablespoons unsalted butter
- 1 small shallot, finely minced
- 2 tablespoons fresh lemon juice
- 2 tablespoons fresh orange juice
- 1 teaspoon finely grated lemon zest
- 1 teaspoon finely grated orange zest
- 2 tablespoons dry white wine, optional
- 1 tablespoon finely chopped fresh chives
- Salt, to taste
- Freshly ground black pepper, to taste
Freshly squeezed citrus gives the sauce a much cleaner flavor than bottled juice.
For the Caviar and Garnish
- 2–3 tablespoons good-quality caviar
- Fresh chives
- Microgreens, optional
- Additional lemon or orange zest
- Small citrus wedges, optional
You do not need a large amount of caviar. A small spoonful on each scallop is enough to make the finishing touch noticeable.
Equipment You’ll Need
Keep the equipment simple:
- Large skillet
- Baking sheet
- Parchment paper
- Small saucepan
- Pastry brush
- Paper towels
- Microplane or fine grater
- Small spoon
- Mixing bowl
- Tongs or spatula
A muffin tin can also be useful if you want perfectly uniform kataifi nests.
How to Make Crispy Kataifi Nests
The pastry should be prepared first because it takes longer than the scallops.
Step 1: Thaw the Kataifi
If your kataifi is frozen, allow it to thaw unopened in the refrigerator according to the package instructions.
Once thawed, let it become workable before opening.
Keep unused kataifi covered while you work. Kataifi can dry out quickly when exposed to air. The manufacturer guidance recommends gently loosening the strands and covering the unused pastry during preparation.
Step 2: Loosen the Strands
Place a small handful of kataifi on your work surface.
Gently pull the strands apart with your fingers.
Do not aggressively tear or crush them. The strands are supposed to remain light and separate.
If the pastry seems unusually dry, work carefully rather than trying to force it apart.
Step 3: Add the Butter
Place the loosened kataifi in a bowl.
Drizzle with melted butter and gently toss.
You want the strands lightly coated.
Avoid adding so much butter that the pastry becomes heavy or wet.
Step 4: Shape the Nests
Take a small handful of buttered kataifi.
Twist or arrange the strands into a loose circle.
Create a small hollow in the center.
The finished nest should be large enough to hold one scallop comfortably.
You can make the nests freehand or use a muffin tin to help maintain their shape.
Step 5: Bake the Nests
Arrange the nests on a parchment-lined baking sheet.
Bake until they become golden brown and crisp.
Keep an eye on them during the final few minutes because kataifi can go from golden to overly dark quickly.
The finished pastry should feel crisp when lightly touched.
Remove from the oven and allow the nests to cool uncovered.
How to Prepare the Scallops for a Perfect Sear
A beautiful sear begins before the skillet ever gets hot.
Remove the Side Muscle
Check each scallop for the small, firm side muscle.
If you find it, gently pull it away with your fingers and discard it.
Dry the Scallops Thoroughly
Place the scallops on a plate lined with paper towels.
Use additional paper towels to press gently against the top and sides.
The surface should feel dry rather than damp.
This step is one of the most important parts of the recipe. Moisture creates steam, while a dry surface allows the scallop to brown properly.
Season Lightly
Season the scallops with salt and pepper shortly before cooking.
Do not heavily season them.
The citrus butter and caviar will add plenty of flavor later.
How to Make Citrus Butter
The sauce should be prepared gently so that it stays smooth and glossy.
Step 1: Cook the Shallot
Melt one tablespoon of butter in a small saucepan over medium-low heat.
Add the minced shallot.
Cook gently until softened but not deeply browned.
Step 2: Add the Citrus
Add the lemon juice, orange juice, citrus zest, and optional white wine.
Let the mixture simmer gently until it reduces slightly.
You want concentrated citrus flavor rather than a large amount of liquid.
Step 3: Add the Butter
Reduce the heat to low.
Add the remaining butter gradually, whisking as you go.
Adding the butter slowly helps create a smooth sauce rather than a greasy mixture.
Step 4: Finish the Sauce
Season lightly with salt and black pepper.
Stir in the fresh chives.
Taste the sauce.
If it needs more brightness, add a tiny squeeze of lemon.
If the citrus is too sharp, add another small piece of butter.
The finished citrus butter should be silky, aromatic, and balanced.
How to Sear the Scallops
Now comes the quickest part of the recipe.
Scallops cook surprisingly fast, so have everything ready before they enter the skillet.
Step 1: Heat the Pan
Place a large skillet over medium-high to high heat.
Allow it to become properly hot.
Add the neutral oil and swirl it across the bottom.
The oil should shimmer.
Step 2: Add the Scallops
Place the scallops in a single layer.
Leave space between them.
Do not crowd the pan.
If necessary, cook them in two batches.
A crowded pan loses heat and releases more moisture, making it harder to develop the deep golden crust you want.
Step 3: Leave Them Alone
Once the scallops are in the skillet, resist the temptation to move them.
Let the first side sear until golden brown.
Depending on size and heat, this will generally take around 1½–2 minutes.
NOAA Fisheries gives a similar approximate searing range for scallops and stresses the importance of a hot pan and thoroughly dried seafood.
Step 4: Flip Carefully
Once the first side is deeply golden, turn the scallops.
The second side generally needs less time.
Add the butter toward the end.
Step 5: Baste
As the butter melts, spoon it over the scallops.
This adds a glossy finish and gives the scallops a final layer of buttery flavor.
Food Network also recommends finishing seared scallops with butter after turning them in the pan.
Step 6: Remove From the Heat
Do not keep cooking the scallops simply because you want a darker exterior.
The goal is a golden crust with a tender center.
Transfer them to a clean plate as soon as they are ready.
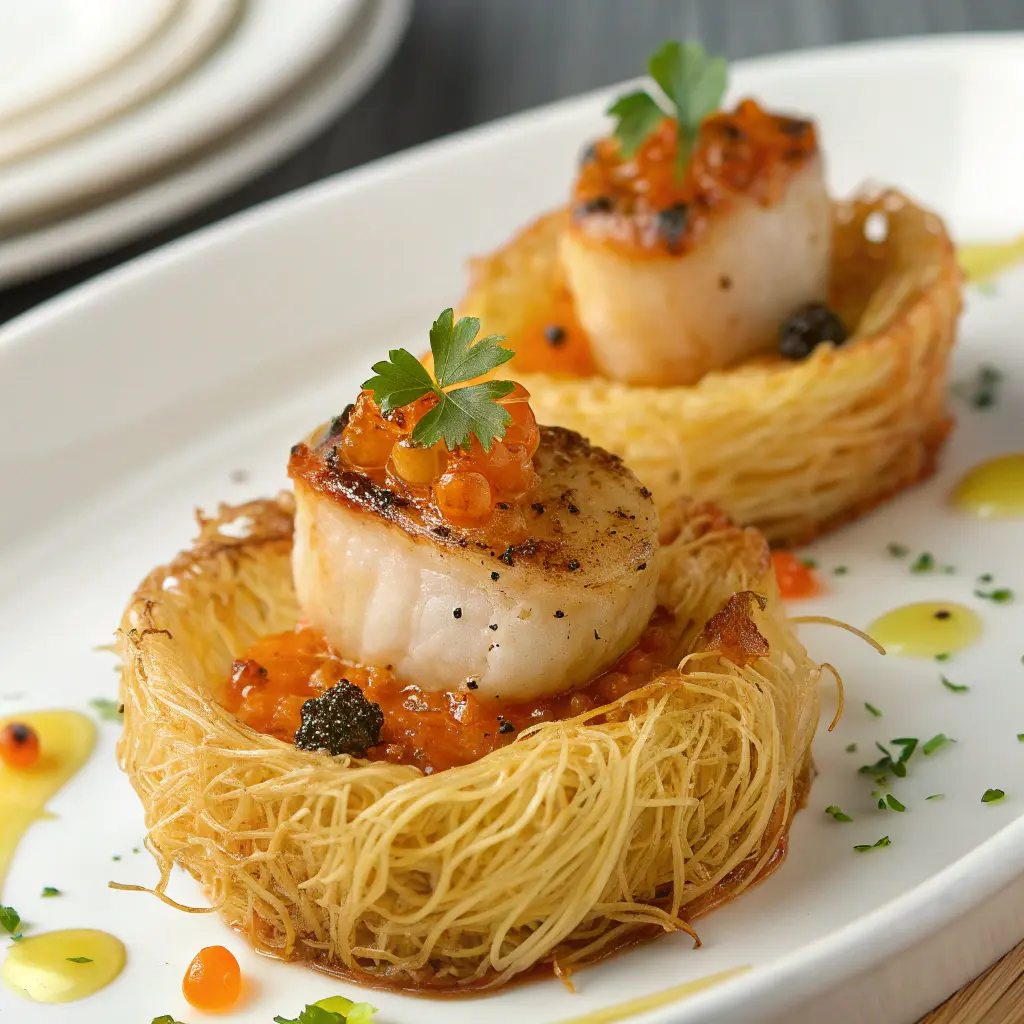
How to Assemble the Kataifi Scallop Nests
This is where all the individual components become one elegant appetizer.
Step 1: Arrange the Nests
Place one crispy kataifi nest on each serving plate.
If necessary, gently reshape the center with a spoon.
Step 2: Add Citrus Butter
Spoon a small amount of citrus butter into the center of the nest or around its base.
Avoid flooding the pastry.
The kataifi should remain visibly crisp.
Step 3: Add the Scallop
Place one seared scallop directly into the center of each nest.
The golden scallop should sit securely inside the pastry.
Step 4: Add Caviar
Place a small spoonful of caviar on top of the scallop.
Add it only after the scallop has been plated.
This keeps the caviar’s delicate character intact.
Step 5: Garnish
Finish with:
- Fresh chives
- Microgreens
- A little lemon zest
- A little orange zest
- Optional edible flowers
How to Keep Kataifi Nests Crispy
Crispness is essential to this recipe.
If the pastry becomes soft, you lose one of the most important contrasts in the dish.
Follow these rules:
- Bake the nests until properly golden.
- Allow them to cool uncovered.
- Keep them away from moisture.
- Store them separately from the sauce.
- Do not spoon sauce over them too early.
- Assemble just before serving.
- Avoid refrigerating assembled nests.
If you are preparing for a dinner party, the nests can be baked earlier in the day and kept completely dry until you are ready to plate.
Common Mistakes to Avoid
1. Using Wet Scallops
If scallops are wet, they can steam instead of sear.
Fix: Pat them very thoroughly with paper towels.
2. Starting With a Cold Pan
A lukewarm skillet makes it difficult to create the golden crust.
Fix: Give the pan enough time to heat before adding the oil and scallops.
3. Overcrowding the Skillet
Too many scallops can reduce the temperature of the pan.
Fix: Cook in batches if necessary.
4. Moving the Scallops
Constantly turning or lifting scallops interferes with browning.
Fix: Place them down and leave them alone until the first side is properly seared.
5. Overcooking the Scallops
Scallops continue cooking briefly after leaving the pan.
Fix: Remove them as soon as they are properly seared and cooked through.
6. Burning the Kataifi
Thin pastry strands brown quickly.
Fix: Watch closely during the last few minutes of baking.
7. Making the Sauce Too Sharp
Too much lemon can overwhelm the butter.
Fix: Balance the sauce with orange juice, butter, or additional zest.
Variations
This recipe is elegant as written, but there are several ways to customize it.
Lemon-Orange Citrus Butter
Use equal amounts of lemon and orange for a balanced citrus profile.
This is the best choice if you want the sauce to taste bright without becoming sharply acidic.
Meyer Lemon Version
Meyer lemon gives the butter a softer citrus character.
It works especially well for spring entertaining.
Champagne Citrus Butter
Replace some of the white wine with Champagne or another dry sparkling wine.
Reduce it gently with the citrus before whisking in the butter.
Brown Butter Citrus Sauce
For a deeper flavor, allow some of the butter to become lightly golden before adding the citrus.
Be careful not to let it burn.
Herb Citrus Butter
Add finely chopped:
- Chives
- Tarragon
- Dill
- Thyme
Chives are particularly good because their mild onion flavor complements both scallops and caviar.
What to Serve With Seared Scallop Kataifi Nests
Because this recipe is best presented as an appetizer, choose accompaniments that do not compete with it.
Light Side Ideas
- Fennel and citrus salad
- Arugula salad
- Cucumber ribbons
- Roasted asparagus
- Lightly dressed mixed greens
- Citrus-dressed fennel
- Small vegetable purée
Beverage Pairings
For an elegant dinner, consider:
- Brut Champagne
- Dry sparkling wine
- Chablis
- Sauvignon Blanc
- Dry Riesling
The bright acidity of these styles works naturally with the buttery citrus sauce.
Make-Ahead Tips
This recipe is easiest to manage when each component is prepared separately.
Kataifi Nests
The nests can be baked earlier in the day.
Let them cool completely before storing them in an airtight container.
Keep them somewhere dry.
Citrus Butter
The sauce can be prepared ahead and gently rewarmed.
If the butter sauce becomes too thick, warm it slowly and whisk until smooth.
Avoid aggressively boiling the sauce.
Scallops
Scallops are best seared immediately before serving.
They cook so quickly that there is little advantage to preparing them far in advance.
Caviar
Keep the caviar chilled until the final plating.
Add it immediately before serving.
Storage and Reheating
For the best texture, store the individual components separately.
Kataifi
Keep baked nests in an airtight container once completely cool.
If necessary, briefly re-crisp them in the oven before serving.
Citrus Butter
Store the sauce separately and rewarm gently.
Whisk before serving.
Scallops
Cooked scallops are best enjoyed immediately.
If you have leftovers, refrigerate them promptly in a covered container and avoid repeatedly reheating them.
Assembled Nests
Avoid storing the finished assembled appetizer.
The sauce will gradually soften the kataifi, changing the texture.
Frequently Asked Questions
What Is Kataifi Pastry?
Kataifi is a shredded phyllo pastry made from fine strands of dough. It can be shaped into nests, baked until crisp, and used in both sweet and savory preparations. It is particularly useful here because its texture provides a striking contrast to tender scallops.
How Do You Make Crispy Kataifi Nests?
Gently loosen the kataifi strands, lightly coat them with melted butter, shape them into small nests, and bake until golden and crisp.
Do not add excessive butter, and keep the baked nests away from moisture until serving.
How Do You Get a Perfect Sear on Scallops?
Start with thoroughly dried scallops and a properly heated skillet.
Place the scallops in a single layer and leave them undisturbed while the first side develops a golden crust. NOAA Fisheries specifically recommends drying scallops thoroughly and cooking them in small batches to avoid overcrowding.
Why Are My Scallops Not Getting Brown?
The most common reasons are:
- Too much surface moisture
- A pan that is not hot enough
- Overcrowding
- Moving the scallops too frequently
- Using too much liquid in the skillet
Should Scallops Be Dry Before Searing?
Yes.
Pat them thoroughly with paper towels before seasoning and cooking.
A dry surface allows the scallop to brown rather than releasing excess moisture into the skillet.
Conclusion
Seared Scallops in Crispy Kataifi Nests with Citrus Butter & Caviar is the kind of appetizer that makes an occasion feel instantly more elegant. Despite its sophisticated appearance, the recipe relies on a handful of approachable techniques: properly preparing kataifi, creating a strong scallop sear, gently emulsifying a citrus butter, and assembling everything at the right moment.