
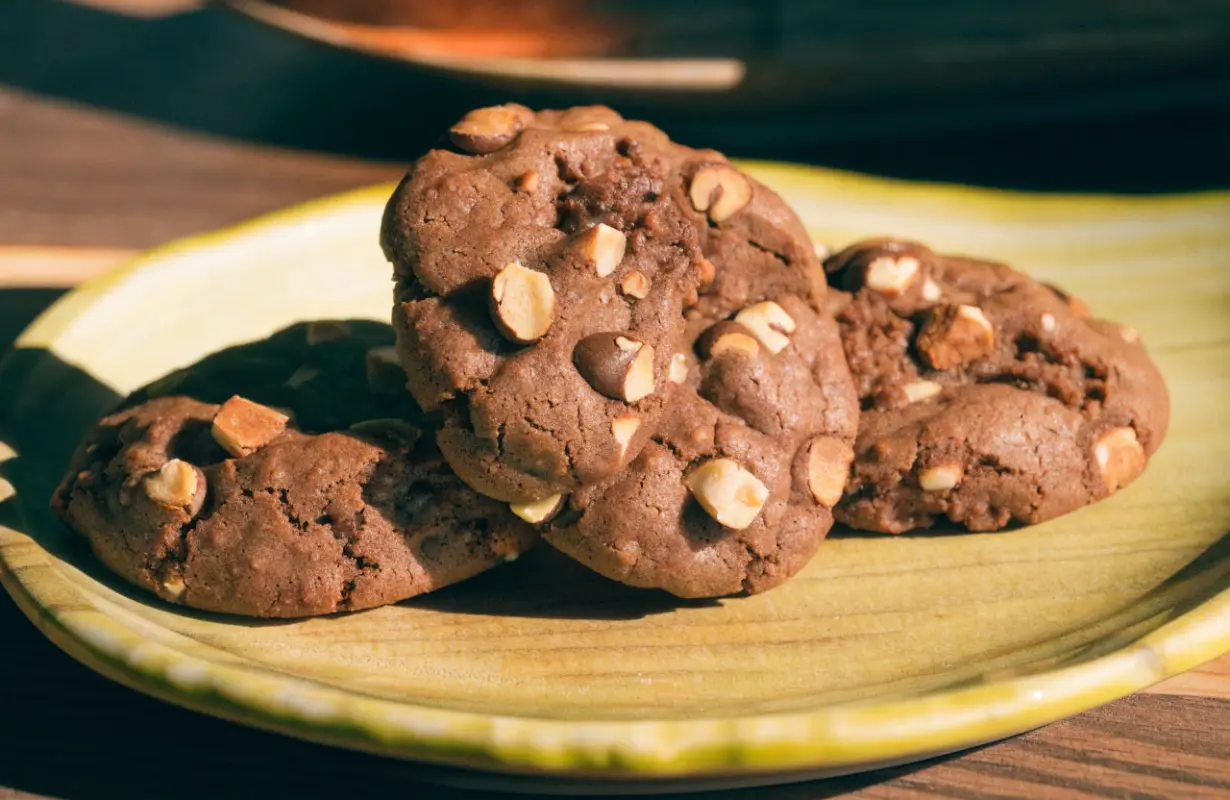
What Are Chocolate Hazelnut Crunch Cookies?
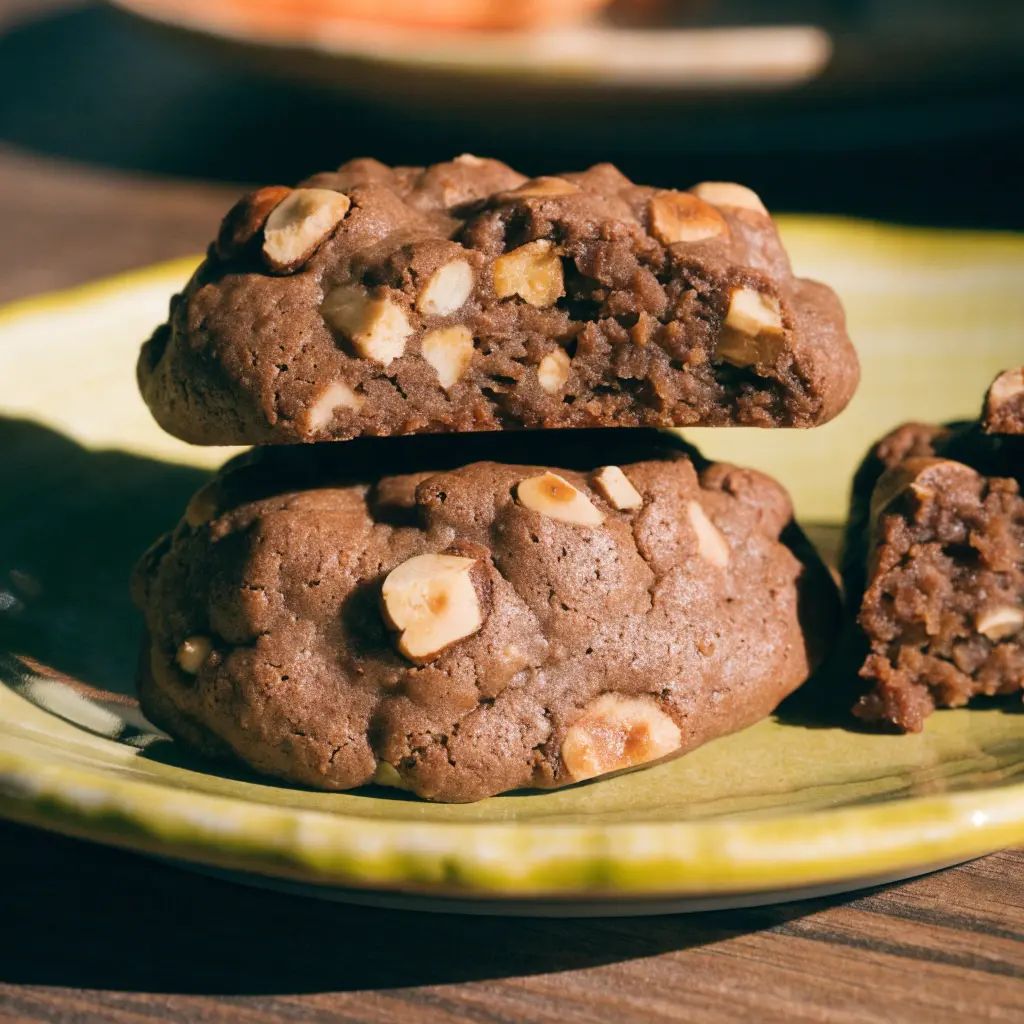
Chocolate hazelnut crunch cookies are homemade cookies that combine cocoa, chocolate, and toasted hazelnuts for a rich flavor and a pleasantly crisp bite. Depending on the recipe and baking time, the centers can remain slightly chewy while the edges become firm and crisp.
Unlike ordinary chocolate chip cookies, this version puts hazelnuts at the center of the experience. Their roasted, nutty flavor complements chocolate beautifully, while the chopped pieces add texture throughout the dough.
An optional chocolate coating takes the recipe a step further. Dipping the cooled cookies in melted chocolate and finishing them with finely chopped hazelnuts creates a decorative shell with an extra layer of crunch.
You can serve the cookies as they are or customize them with dark chocolate, a little espresso powder, or a sprinkle of flaky sea salt.
Ingredients for Amazing Chocolate Hazelnut Crunch Cookies
Gather and measure your ingredients before beginning. This makes the preparation more organized and helps you avoid missing an ingredient halfway through mixing.
For the Cookies
- 1½ cups (190 g) hazelnuts: Toasted and roughly chopped for a pronounced nutty flavor and crunchy texture.
- 1 cup (120 g) all-purpose flour: Provides the structure for the cookie dough.
- 2 tablespoons (15 g) unsweetened cocoa powder: Adds chocolate flavor and gives the cookies their dark color.
- 1 teaspoon baking powder: Helps create the desired cookie texture.
- ¼ teaspoon salt: Balances the sweetness and brings out the chocolate flavor.
- ½ cup (115 g) unsalted butter: Softened to room temperature for easy mixing.
- ½ cup (100 g) granulated sugar: Contributes sweetness and helps create crisp edges.
- ½ cup (100 g) packed brown sugar: Adds a deeper, caramel-like flavor and helps the centers stay softer.
- 1 large egg: Binds the ingredients and helps the dough hold together.
- 1 teaspoon vanilla extract: Complements the chocolate and toasted hazelnuts.
For the Chocolate Coating
- 8 ounces (225 g) semisweet or dark chocolate: Chopped into small pieces for easier melting.
- 1 tablespoon coconut oil or shortening (optional): Helps create a smoother coating.
- ½ cup (60 g) finely chopped toasted hazelnuts: Adds the signature crunch to the finished cookies.
Optional Decorations
- A few chocolate chips or chocolate chunks
- A small pinch of flaky sea salt
- Extra chopped toasted hazelnuts
- A light chocolate drizzle
Essential Kitchen Equipment
You do not need specialized baking equipment to make these cookies. A few everyday kitchen tools are enough.
- Mixing bowls for the dry ingredients and cookie dough
- Measuring cups and spoons or a kitchen scale
- Whisk for combining the dry ingredients
- Electric hand mixer or stand mixer
- Silicone spatula or wooden spoon
- Baking sheets
- Parchment paper
- Cookie scoop or tablespoon
- Cooling rack
- Microwave-safe bowl or heatproof bowl for melting chocolate
- Two forks for dipping the cookies
Step-by-Step Instructions for Making Chocolate Hazelnut Crunch Cookies
Now that your ingredients are ready, it is time to prepare the dough, bake the cookies, and finish them with a crunchy chocolate coating.
Step 1: Preheat the Oven
Preheat your oven to 350°F (175°C). Line two baking sheets with parchment paper to prevent sticking and make cleanup easier.
Make sure your oven has reached the correct temperature before placing the cookies inside. An oven that is not fully heated can affect how quickly the dough spreads and sets.
Arrange your baking racks near the center of the oven for even heat distribution.
Step 2: Combine the Dry Ingredients
In a medium mixing bowl, add the flour, cocoa powder, baking powder, and salt.
Whisk everything together until the cocoa is evenly distributed and no large lumps remain. This step helps prevent pockets of flour or cocoa from appearing in the finished cookies.
Set the bowl aside while you prepare the butter mixture.
Step 3: Cream the Butter and Sugars
Place the softened butter, granulated sugar, and brown sugar in a large mixing bowl.
Using an electric mixer, beat the mixture for approximately two to three minutes, scraping down the sides of the bowl when necessary.
The mixture should look smooth, creamy, and evenly combined. Avoid using butter that is completely melted, as this can change the texture and spread of the cookies.
If you do not have an electric mixer, use a sturdy wooden spoon and mix until the butter and sugars are thoroughly blended.
Step 4: Add the Egg and Vanilla
Add the egg and vanilla extract to the butter mixture.
Beat until the egg is fully incorporated and the mixture looks smooth. Scrape the sides and bottom of the bowl to ensure everything is combined.
Avoid excessive mixing at this stage. Once the ingredients are blended, you can move on to the dry mixture.
Step 5: Incorporate the Dry Ingredients
Add the flour and cocoa mixture to the wet ingredients in two or three additions.
Mix on low speed or stir with a spatula until the flour is just incorporated. The dough should be thick enough to scoop and shape.
If the dough appears slightly crumbly, press a small portion between your fingers to check whether it holds together. Avoid adding extra liquid immediately, as doing so may cause the cookies to spread too much during baking.
Step 6: Fold in the Toasted Hazelnuts
Add the roughly chopped toasted hazelnuts to the cookie dough.
Use a spatula to fold them in gently, distributing the nuts throughout the mixture. Reserve the finely chopped hazelnuts for the chocolate coating.
If you enjoy extra chocolate in every bite, fold in a small handful of semisweet chocolate chips or chopped dark chocolate.
The finished dough should contain visible pieces of hazelnut without becoming overloaded with additions.
Step 7: Chill the Dough if Necessary
If the dough feels very soft or sticky, cover the bowl and refrigerate it for approximately 20–30 minutes.
Chilling helps the butter firm up, making the dough easier to handle. It can also help control spreading during baking.
If your dough is already firm and easy to scoop, you may not need a long chilling period. The important thing is to work with dough that holds its shape.
Step 8: Shape the Cookies
Scoop approximately one tablespoon of dough for each cookie. Roll each portion gently between your palms to create a ball.
Place the dough balls on the prepared baking sheets, leaving about two inches between them.
Press each ball lightly with your fingers if you prefer flatter cookies with crisp edges. For thicker cookies, leave the portions slightly rounded.
If desired, press a few extra chocolate pieces or chopped hazelnuts onto the tops before baking.
Try to keep all the portions approximately the same size. This helps them bake at a similar rate.
Step 9: Bake the Cookies
Place the baking sheets on the center rack of the preheated oven.
Bake for approximately 10–12 minutes, checking toward the end of the baking time. The edges should look set, while the centers may still appear slightly soft.
Because cocoa powder gives the cookies a dark color, it can be difficult to judge doneness by appearance alone. For your first batch, bake one test cookie to determine the best timing for your oven.
If you prefer a crunchier texture, allow the cookies a little more time, checking frequently to prevent overbaking.
Step 10: Cool Completely
Remove the baking sheets from the oven and leave the cookies on the trays for about five minutes.
They will be delicate while hot, so avoid moving them immediately. After the initial cooling period, transfer them carefully to a wire rack.
Allow the cookies to cool completely before dipping them in chocolate. Warm cookies can cause the coating to slide off or become uneven.
How to Make the Crunchy Chocolate Coating
The chocolate coating is what transforms these homemade cookies into an especially impressive dessert. It adds a smooth chocolate layer, while finely chopped hazelnuts create an additional crunch.
Step 1: Chop the Chocolate
Place the semisweet or dark chocolate on a cutting board and chop it into small, evenly sized pieces.
Transfer the chocolate to a microwave-safe bowl. Add the optional coconut oil or shortening if you want a slightly thinner coating.
Step 2: Melt the Chocolate
Microwave the chocolate in 20–30-second intervals, stirring after each interval.
Continue until the chocolate is mostly melted, then stir until completely smooth. Residual heat will help melt the remaining pieces.
Alternatively, place the chocolate in a heatproof bowl over a saucepan of gently simmering water. Make sure the bottom of the bowl does not touch the water.
Keep water away from the chocolate, as even a small amount can cause it to become thick and grainy.
Step 3: Add the Chopped Hazelnuts
Stir the finely chopped toasted hazelnuts into the melted chocolate.
For extra crunch, you can also add finely crushed wafer pieces. Keep the pieces small enough to make dipping easy.
The mixture should be thick enough to cling to the cookies but fluid enough to coat them without excessive effort.
Step 4: Dip the Cookies
Working with one completely cooled cookie at a time, lower it into the chocolate mixture.
Use two forks to turn the cookie gently until it is coated. Lift it out and allow the excess chocolate to drip back into the bowl.
Place the coated cookie on a parchment-lined baking sheet.
If you prefer a lighter finish, dip only half of each cookie. This creates an attractive contrast between the dark chocolate coating and the exposed cookie surface.
Step 5: Add the Finishing Touches
While the coating is still wet, sprinkle extra chopped hazelnuts over the top.
You can also add a few chocolate shavings or a tiny pinch of flaky sea salt.
Allow the cookies to stand until the chocolate sets. If your kitchen is warm, place the tray in the refrigerator for approximately 15–20 minutes.
Once the coating is firm, transfer the cookies to a serving plate or storage container.
Common Mistakes to Avoid
Even a straightforward cookie recipe can produce unexpected results if a few details are overlooked.
1. Overtoasting the Hazelnuts
Hazelnuts can burn quickly, especially near the end of the roasting time. Check them frequently and remove them as soon as they smell fragrant and look lightly golden.
2. Using Too Much Flour
Excess flour can produce dry cookies that crumble when handled. Spoon flour into your measuring cup and level it rather than pressing the cup into the bag.
3. Mixing the Dough Too Much
Overmixing after adding flour can make the cookies tougher. Mix only until the ingredients come together.
4. Baking at the Wrong Temperature
An oven that is too hot can set the outside before the center is ready. An oven that is too cool can allow the cookies to spread excessively.
Use an oven thermometer if your oven tends to run hotter or cooler than its displayed temperature.
5. Overbaking the Cookies
Dark chocolate cookies can be difficult to judge by color. Start checking at the lower end of the recommended baking time and remember that the cookies will firm up as they cool.
6. Dipping Warm Cookies
If the cookies are still warm, the chocolate coating may slide off or become thin and uneven. Let them cool completely first.
Delicious Variations and Substitutions
One of the best features of these Amazing Chocolate Hazelnut Crunch Cookies is how easily you can customize them.
Double Chocolate Hazelnut Cookies
Add a small handful of semisweet chocolate chips or chopped dark chocolate to the dough. The extra chocolate creates rich pockets throughout the cookies.
Dark Chocolate Hazelnut Cookies
Use dark chocolate for both the cookie additions and the coating. This variation is ideal for people who enjoy a deeper, less sweet chocolate flavor.
Milk Chocolate Crunch Cookies
Replace the dark or semisweet coating with milk chocolate. The result is sweeter and creamier, with a flavor that pairs beautifully with roasted hazelnuts.
Chocolate-Hazelnut Spread Cookies
For a softer, more decadent variation, incorporate chocolate-hazelnut spread into a recipe specifically designed for it. Because the spread contains sugar and fat, it should not simply replace the cocoa powder without adjusting the other ingredients.
Espresso Chocolate Hazelnut Cookies
Add approximately half a teaspoon of espresso powder to the dry ingredients. It enhances the chocolate flavor without necessarily making the cookies taste strongly of coffee.
Orange Chocolate Hazelnut Cookies
Add a little finely grated orange zest to the butter mixture. The citrus aroma creates a pleasant contrast with the chocolate and roasted nuts.
What to Serve with Chocolate Hazelnut Crunch Cookies
These cookies are delicious on their own, but they also pair well with a variety of drinks and desserts.
- Coffee or espresso: The roasted flavor of coffee complements chocolate and hazelnuts.
- Hot chocolate: Create a chocolate-themed dessert pairing.
- Tea: Serve with black tea or a mild flavored tea during an afternoon break.
- Vanilla ice cream: Place a cookie beside a scoop of ice cream for a simple plated dessert.
- Fresh berries: Add strawberries or raspberries to a dessert platter for a colorful contrast.
- Other homemade cookies: Combine them with shortbread, sugar cookies, or chocolate chip cookies on a sharing tray.
How to Store Chocolate Hazelnut Crunch Cookies
Proper storage helps maintain the cookies’ texture and keeps the chocolate coating looking attractive.
- Allow the cookies to cool completely.
- Make sure the chocolate coating has fully set.
- Place the cookies in a clean, airtight container.
- Separate layers with parchment paper to prevent sticking.
- Store the container in a cool, dry place away from direct sunlight.
For the best crunch, avoid leaving the cookies exposed to humid air for long periods.
Cookies without a chocolate coating can be stored separately from dipped cookies if you want to preserve their different textures.
For a practical starting point, aim to enjoy the cookies within about four to five days, provided they have been prepared and stored appropriately. Actual keeping time depends on the ingredients, room conditions, and recipe.
If the chocolate becomes soft in warm weather, refrigerate the cookies briefly in a sealed container. Allow them to return to a suitable serving temperature before enjoying.
Can You Freeze Chocolate Hazelnut Crunch Cookies?
Yes, you can freeze these cookies, making them convenient to prepare ahead of a gathering or celebration.
Freezing Baked Cookies
- Allow the cookies to cool completely.
- If they are coated in chocolate, let the coating set fully.
- Place the cookies in a freezer-safe container.
- Separate layers with parchment paper.
- Label the container with the date and store it in the freezer.
For best results, freeze the cookies in a way that prevents them from being crushed or exposed to moisture.
Freezing Cookie Dough
You can also freeze the unbaked dough.
- Scoop the dough into individual portions.
- Arrange the portions on a parchment-lined tray.
- Freeze until firm.
- Transfer the frozen portions to a sealed freezer-safe bag or container.
- Label and date the container.
When you are ready to bake, follow the original recipe’s temperature and check the cookies as they bake. Frozen dough may require a little extra time, depending on the size of the portions.
How to Thaw Frozen Cookies
Allow baked cookies to thaw in their closed container at room temperature. This helps reduce condensation on the cookies and their chocolate coating.
Avoid opening the container while the cookies are still very cold if moisture tends to collect in your kitchen.
Frequently Asked Questions
How Do You Make Chocolate Hazelnut Cookies Crunchy?
Toast the hazelnuts before adding them to the dough, use evenly sized portions, and bake until the edges are set. Allow the cookies to cool completely so they can firm up.
Can I Use Chocolate-Hazelnut Spread Instead of Cocoa Powder?
Not as a direct substitute. Chocolate-hazelnut spread contains sugar and fat, so replacing cocoa powder with it changes the dough’s consistency. Use a recipe formulated for the spread.
Should I Toast Hazelnuts Before Adding Them to Cookie Dough?
Yes, toasting is recommended because it brings out the nuts’ roasted aroma and distinctive flavor. Let the hazelnuts cool completely before chopping and folding them into the dough.
Why Did My Chocolate Hazelnut Cookies Spread Too Much?
Common reasons include overly warm butter, soft dough, inaccurate ingredient measurements, or insufficient chilling when the dough needs it. Chill the dough if necessary and check your oven temperature.
Can I Make These Cookies Without an Electric Mixer?
Yes. A sturdy wooden spoon and a little extra effort can work well. Make sure the softened butter and sugars are thoroughly combined before adding the remaining ingredients.
Conclusion
These Amazing Chocolate Hazelnut Crunch Cookies bring together everything that makes homemade cookies special: rich chocolate flavor, toasted hazelnuts, crisp edges, and an optional crunchy chocolate shell.
Print
Amazing Chocolate Hazelnut Crunch Cookies – Easy & Crispy
- Total Time: PT32M
- Yield: 24 cookies 1x
- Diet: Vegetarian
Ingredients
For the Cookies
- 1½ cups (190 g) all-purpose flour
- 2 tablespoons (15 g) unsweetened cocoa powder
- 1 teaspoon baking powder
- ¼ teaspoon salt
- ½ cup (115 g) unsalted butter, softened
- ½ cup (100 g) granulated sugar
- ½ cup (100 g) packed brown sugar
- 1 large egg
- 1 teaspoon vanilla extract
- 1½ cups (190 g) hazelnuts, toasted and roughly chopped
For the Chocolate Coating
- 8 oz (225 g) semisweet or dark chocolate, chopped
- 1 tablespoon coconut oil or shortening (optional)
- ½ cup (60 g) finely chopped toasted hazelnuts
Optional Toppings
- ¼ cup chocolate chips or chocolate chunks
- Flaky sea salt, to taste
- Extra chopped hazelnuts for decoration
Instructions
- Preheat the oven: Preheat your oven to 350°F (175°C). Line two baking sheets with parchment paper.
- Toast the hazelnuts: Spread the hazelnuts on a baking sheet and toast for 8–12 minutes until fragrant and lightly golden. Let them cool completely, then chop them roughly. Reserve ½ cup of finely chopped hazelnuts for the chocolate coating.
- Mix the dry ingredients: In a medium bowl, whisk together the flour, cocoa powder, baking powder, and salt until evenly combined.
- Cream the butter and sugars: In a large bowl, beat the softened butter, granulated sugar, and brown sugar for 2–3 minutes until creamy and well combined.
- Add the egg and vanilla: Mix in the egg and vanilla extract until smooth.
- Combine the mixtures: Gradually add the dry ingredients to the butter mixture. Stir until just combined, being careful not to overmix the dough.
- Fold in the hazelnuts: Add the remaining chopped toasted hazelnuts to the dough. Fold gently until evenly distributed.
- Chill the dough: If the dough is too soft or sticky to handle, cover and refrigerate for 20–30 minutes.
- Shape the cookies: Scoop approximately 1 tablespoon of dough per cookie and roll into balls. Place them on the prepared baking sheets, leaving about 2 inches between each cookie.
- Bake: Bake for 10–12 minutes, or until the edges are set. Allow the cookies to rest on the baking sheet for 5 minutes before transferring them to a wire rack.
- Cool completely: Let the cookies cool completely before adding the chocolate coating.
- Melt the chocolate: Place the chopped chocolate in a microwave-safe bowl. Heat in 20–30-second intervals, stirring between each interval until smooth. Stir in the optional coconut oil for a thinner coating.
- Add the hazelnuts: Stir the reserved finely chopped hazelnuts into the melted chocolate, or keep them separate to sprinkle over the cookies.
- Dip the cookies: Dip each cooled cookie into the melted chocolate, coating it fully or halfway. Allow excess chocolate to drip off before placing the cookie on parchment paper.
- Decorate: Sprinkle with extra chopped hazelnuts and, if desired, a little flaky sea salt while the chocolate is still wet.
- Let the coating set: Allow the chocolate to firm up at room temperature, or refrigerate the cookies for 15–20 minutes.
- Serve and enjoy: Serve your Amazing Chocolate Hazelnut Crunch Cookies once the chocolate coating has set. Store leftovers in an airtight container in a cool, dry place.
- Prep Time: PT20M
- Cook Time: PT12M
- Category: Dessert
- Method: Baking
- Cuisine: American
Nutrition
- Serving Size: 1 cookie
- Calories: 210 Kcal
- Sugar: 14 g
- Sodium: 55 mg
- Fat: 15 g
- Saturated Fat: 5 g
- Unsaturated Fat: 9 g
- Trans Fat: 0 g
- Carbohydrates: 19 g
- Fiber: 2 g
- Protein: 3 g
- Cholesterol: 15 mg