
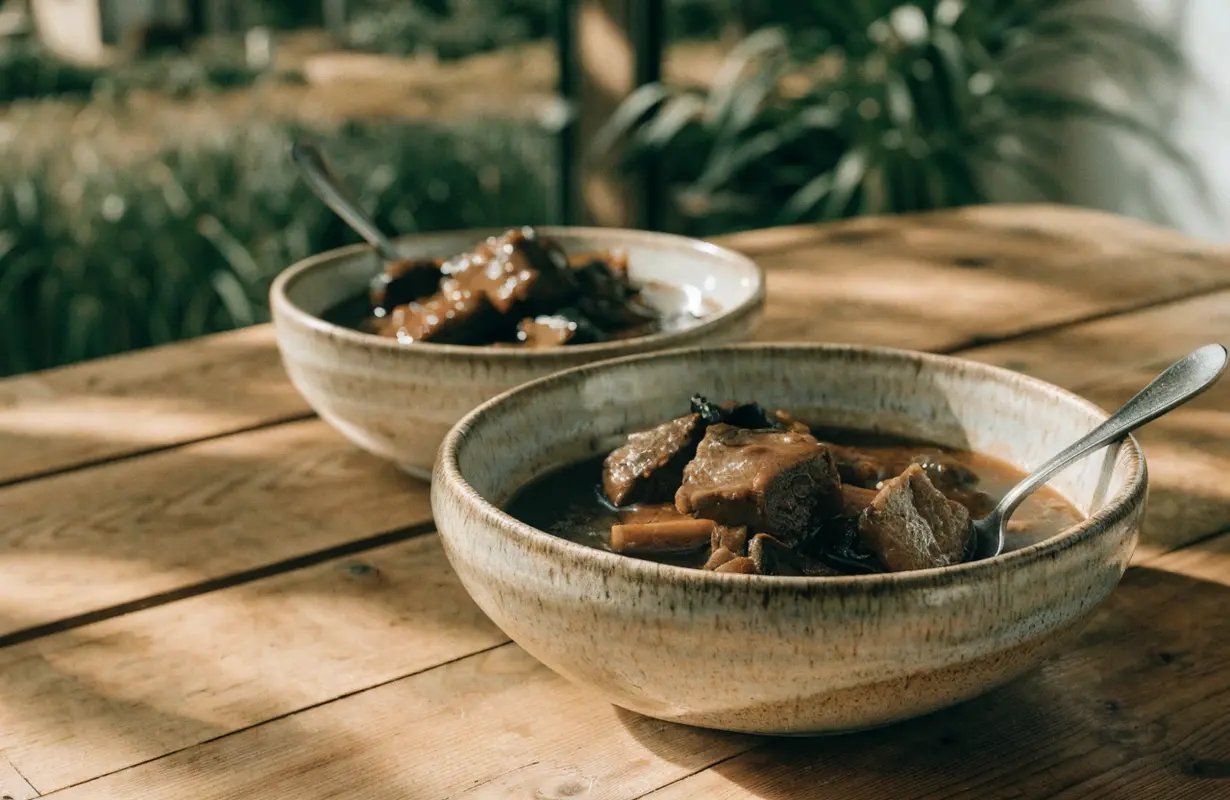
Why You’ll Love This Classic Beef Stew
There are plenty of reasons to make this old-fashioned beef stew a regular part of your cooking routine:
- Rich, slow-developed flavor: Searing the beef and cooking the aromatics creates layers of savory flavor that simple boiling cannot achieve.
- Tender, juicy beef: A slow braise gives connective tissue time to soften, making suitable cuts wonderfully tender.
- Hearty vegetables: Potatoes, carrots, celery, and onions add color, texture, and a naturally satisfying character.
- A thick, flavorful gravy: Beef stock, tomato paste, herbs, and the browned bits left in the pot combine to create a delicious sauce.
- One-pot convenience: Most of the cooking happens in the oven, leaving you free to prepare other parts of the meal.
- Easy make-ahead preparation: The stew can be prepared in advance, refrigerated, and gently reheated when you are ready to serve it.
This recipe is ideal for family dinners, relaxed weekends, cold evenings, and gatherings where you want to serve something warm and welcoming without preparing several complicated dishes.
Ingredients for Classic Slow-Braised Beef Stew
The best classic slow-braised beef stew starts with straightforward ingredients. Each one contributes to the final flavor, texture, or consistency of the gravy.
Main Ingredients
For approximately six servings, gather the following:
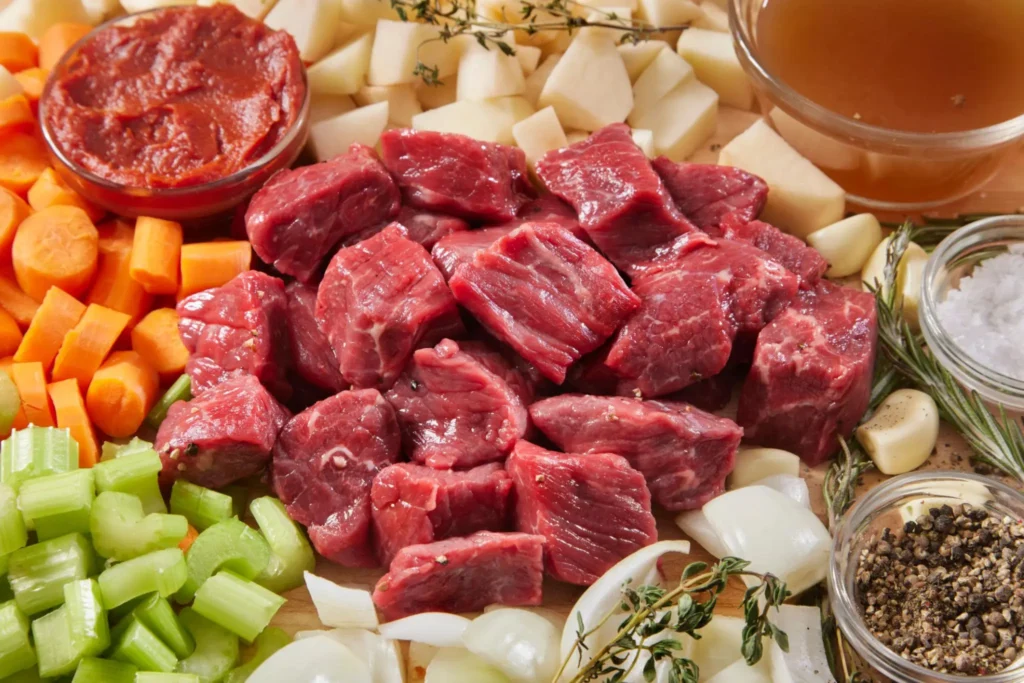
- 2½ pounds (1.1 kg) beef chuck roast, cut into 1½- to 2-inch cubes
- 2 tablespoons olive oil, for browning the beef
- 1 large yellow onion, diced
- 3 medium carrots, peeled and cut into thick chunks
- 2 celery stalks, sliced
- 3 garlic cloves, finely minced
- 2 tablespoons tomato paste
- 3 tablespoons all-purpose flour, optional, for thickening
- 1 cup dry red wine, optional
- 4 cups beef stock, plus extra if needed
- 1½ pounds potatoes, cut into large chunks
- 2 bay leaves
- 1 teaspoon dried thyme or several fresh sprigs
- 1 small rosemary sprig
- 1 tablespoon Worcestershire sauce
- Salt and freshly ground black pepper, to taste
- Fresh parsley, chopped, for garnish
These quantities provide a useful starting point, but the final seasoning and amount of liquid can be adjusted to suit your pot and ingredients.
Choosing the Best Beef for Stew
The most important ingredient is the beef. Choose beef chuck roast whenever possible because it has a good balance of flavor, marbling, and connective tissue. During slow braising, the connective tissue gradually softens, helping the meat become tender and giving the sauce a richer texture.
Other suitable choices include:
- Chuck shoulder: A flavorful option for long, gentle cooking.
- Beef brisket: Produces a deep beef flavor and works well when cut into substantial pieces.
- Beef short ribs: Add richness, although they may require adjustments to the recipe and cooking time.
- Pre-cut stewing beef: Convenient, but the cut and size can vary, so check tenderness rather than relying entirely on the clock.
For additional guidance on selecting suitable meat, refer to this guide to beef cuts for slow cooking.
Equipment You’ll Need
You do not need specialized kitchen equipment to make excellent beef stew. A few dependable tools are enough.
- Dutch oven: The preferred option because it retains heat and distributes it evenly.
- Sharp chef’s knife: Makes it easier to cut the beef and vegetables into uniform pieces.
- Cutting board: Provides a stable surface for preparation.
- Kitchen tongs: Help turn the beef during browning.
- Wooden spoon: Useful for scraping browned bits from the bottom of the pot.
- Measuring cups and spoons: Help maintain consistent ingredient quantities.
- Ladle: Makes serving the stew easier.
How to Make Classic Slow-Braised Beef Stew
The process is simple: prepare the beef, brown it thoroughly, develop the flavor base, and let everything cook slowly until the meat becomes tender.
Step 1: Prepare and Season the Beef
Pat the beef cubes dry with paper towels. Removing excess surface moisture is important because wet meat tends to steam before it browns.
Season the cubes generously with salt and freshly ground black pepper. If you prefer a slightly thicker stew, toss the beef with some of the flour before browning.
Cutting the meat into evenly sized pieces helps it cook more consistently. Pieces around 1½ to 2 inches are large enough to remain substantial during braising while becoming tender within a reasonable cooking period.
Allow the seasoned beef to sit briefly while you prepare the onions, carrots, celery, and garlic. Keep the ingredients ready before you begin cooking, since the initial browning and sautéing stages move relatively quickly.
Step 2: Sear the Beef Until Deeply Browned
Place your Dutch oven over medium-high heat and add the olive oil. When the oil is hot, add a portion of the beef in a single layer.
Brown the cubes on several sides, turning them with tongs as necessary. Avoid moving them constantly; the meat needs contact with the hot surface to develop a rich brown crust.
Work in batches rather than crowding the pot.
Overcrowding creates excess moisture and lowers the surface temperature, making it difficult to achieve good browning. Once each batch is browned, transfer the beef to a plate and continue with the remaining pieces.
This stage is one of the biggest contributors to a flavorful slow-braised beef stew. The browned surface develops complex savory notes that later become part of the gravy.
Do not worry if the beef is still raw in the center. It will finish cooking during the long braise.
Step 3: Cook the Onions, Celery, and Garlic
Reduce the heat to medium. Add the chopped onion and celery to the same pot, using a small splash of stock if the bottom appears too dry.
Stir the vegetables, scraping up the browned bits left by the beef. Cook for approximately five minutes, or until the onions soften and begin to turn golden.
Add the garlic and cook for another 30–60 seconds. Garlic burns quickly, so it is better to add it after the firmer vegetables have started softening.
The mixture should smell fragrant and savory. If the bottom of the pot becomes excessively dark, lower the heat and add a small amount of liquid before continuing.
Step 4: Add Tomato Paste and Deglaze the Pot
Stir in the tomato paste and cook it for one to two minutes. This briefly concentrates its flavor and reduces the raw tomato taste.
Pour in the red wine, if using, and scrape the bottom of the pot with a wooden spoon. This process is called deglazing. It loosens the browned residue and incorporates it into the developing sauce.
Allow the wine to simmer for a few minutes so that it reduces slightly. You do not need to eliminate every trace of alcohol, but you should allow the liquid to blend with the aromatic vegetables.
If you are not using wine, add a portion of the beef stock instead and scrape the pot thoroughly.
Step 5: Return the Beef and Add the Braising Liquid
Return the browned beef and any juices collected on the plate to the Dutch oven.
Add the beef stock, Worcestershire sauce, bay leaves, thyme, and rosemary. Stir gently to combine the ingredients.
The liquid should come partway up the meat and vegetables. You do not necessarily need to submerge every ingredient because the covered pot traps moisture during braising.
Bring the mixture to a gentle simmer on the stovetop. Avoid allowing it to boil vigorously.
Once small bubbles appear and the liquid is hot, cover the Dutch oven with its lid and prepare to transfer it to the oven.
Step 6: Braise the Beef Slowly in the Oven
Preheat the oven to 300°F (150°C).
Place the covered Dutch oven in the oven and cook the beef for approximately 1½ to 2 hours before checking its progress. Depending on the cut and cube size, the total braising time will often fall around 2½ to 3½ hours.
During this stage, the beef gradually softens as its connective tissue breaks down. The braising liquid also absorbs the flavor of the meat, herbs, tomato paste, and aromatics.
Check the pot occasionally:
- Make sure the liquid has not reduced excessively.
- Add a little extra stock if the pot becomes too dry.
- Keep the lid on between checks to retain heat and moisture.
- Avoid stirring aggressively, which can break apart the beef before it is tender.
The meat is ready when a fork slides into a cube easily and the fibers separate without much resistance. If it still feels firm or rubbery, cover the pot and continue cooking.
Remember: A specific cooking time is only a guide. The tenderness of the beef determines when the braise is finished.
Step 7: Add the Potatoes and Carrots at the Right Time
If you prefer vegetables that hold their shape, do not necessarily add every vegetable at the beginning.
After the beef has been braising for approximately 1½ to 2 hours, check how tender it has become. Add the potatoes and carrots when the meat is beginning to soften but still needs additional cooking.
Cut the vegetables into substantial, relatively uniform pieces. Smaller pieces cook faster and are more likely to disintegrate into the gravy.
Return the lid and continue braising until both the meat and vegetables reach the desired texture.
If you want a softer, more traditional stew with vegetables that blend slightly into the sauce, you can add them earlier. The ideal timing depends on whether you prefer distinct vegetable pieces or a thicker, more rustic consistency.
For peas, add them during the final five minutes or so of cooking. Their small size means they require much less time than potatoes or carrots.
Step 8: Finish the Gravy and Adjust the Seasoning
Remove the bay leaves and rosemary stems. Taste the gravy and adjust the salt and pepper.
If the sauce is too thin, transfer the pot to the stovetop and simmer it uncovered for several minutes. Stir gently and watch the consistency as excess liquid evaporates.
For a faster method, mix one tablespoon of cornstarch with one tablespoon of cold water to form a smooth slurry. Stir it into the simmering stew gradually, allowing the sauce to thicken before adding more.
If the gravy is already thick, loosen it with a small amount of warm beef stock.
Finish with chopped fresh parsley and a final crack of black pepper. Let the stew rest briefly before serving so the contents settle and the gravy becomes easier to ladle.
1. Choose the Right Cut of Beef
Start with beef chuck roast or another suitable braising cut. These cuts have the structure needed to withstand long cooking and develop a tender texture.
If you buy pre-cut stewing beef, try to select pieces of similar size. This makes it easier to determine when the batch is ready.
2. Brown the Meat in Batches
Resist the temptation to put all the beef into the pot at once. Crowded meat releases moisture and tends to turn gray instead of developing a browned crust.
A few extra minutes spent browning the beef can significantly improve the final flavor.
3. Avoid Boiling the Stew Too Hard
A vigorous boil is not necessary. Maintain a gentle simmer so the meat cooks steadily without excessive agitation.
If the liquid bubbles rapidly when you check the pot, reduce the heat.
4. Give the Beef Enough Time
One of the most common mistakes is removing beef from the oven simply because the suggested cooking time has passed.
If the meat remains tough, continue braising it in covered intervals of 20–30 minutes. Toughness often means the connective tissue has not softened sufficiently.
5. Add Vegetables According to Their Cooking Time
Large potato and carrot pieces can tolerate a substantial cooking period, but smaller pieces soften much faster.
Add delicate ingredients toward the end, and avoid stirring vigorously once the vegetables are tender.
6. Build Flavor in Layers
For a more complex gravy, follow this order:
- Brown the beef.
- Soften the onions and celery.
- Add the garlic and tomato paste.
- Deglaze the pot.
- Add the stock, herbs, and beef.
- Adjust the seasoning at the end.
Each stage contributes something different to the final dish.
7. Make the Stew Ahead of Time
If your schedule allows, prepare the stew a day before serving. After proper cooling and refrigeration, reheat it gently.
The flavors often seem more integrated after resting overnight, and the gravy can be easier to adjust when reheating.
Common Beef Stew Problems and How to Fix Them
Even an experienced cook may occasionally end up with beef stew that is too thin, too salty, or not quite tender enough. Most problems have a straightforward solution.
Why Is My Beef Stew Meat Tough?
The beef may need more time rather than more seasoning or a higher temperature.
Keep the pot covered and continue cooking at a gentle temperature. Check again after 20–30 minutes.
Also make sure you are using a cut suited to braising. Lean cuts intended for quick cooking may not produce the same results.
Why Is My Beef Stew Too Watery?
A thin gravy usually means the liquid needs further reduction or thickening.
Try one of these methods:
- Simmer the stew uncovered until some liquid evaporates.
- Add a small amount of flour mixed with cold water.
- Use a cornstarch slurry for a quick finish.
- Mash one or two cooked potato pieces into the gravy for a rustic texture.
Make adjustments gradually to avoid turning the sauce into a paste.
Why Is My Beef Stew Too Thick?
Stir in warm beef stock a little at a time. Allow the liquid to blend with the gravy before adding more.
Avoid pouring in a large quantity at once, which can dilute the flavor.
Why Does My Beef Stew Taste Bland?
Check the seasoning first. A little additional salt can make the other flavors more noticeable.
If the stew still tastes flat, try a small splash of Worcestershire sauce or a little wine reduction. Taste after each addition rather than adding several ingredients at once.
Classic Beef Stew Variations and Substitutions
One of the best features of classic slow-braised beef stew is how easily it can be adapted without losing its traditional character.
Gluten-Free Beef Stew
To make a gluten-free version, omit the all-purpose flour and thicken the gravy with cornstarch mixed with cold water.
Check the labels on your beef stock and Worcestershire sauce to ensure they suit your requirements.
Beef Stew with Mushrooms
Add sliced mushrooms for a deeper, earthy flavor. For the best texture, brown them separately or sauté them after the beef and before the onions.
Add them during the later stages of cooking if you want them to retain more structure.
Beef Stew with Root Vegetables
Parsnips, turnips, and rutabaga work well alongside carrots and potatoes. Cut them into similar-sized pieces and adjust their cooking times according to their firmness.
These vegetables create a rustic stew with varied textures and a slightly sweeter, more complex flavor.
Slow Cooker Beef Stew
A slow cooker is useful when you want to leave the stew cooking while you attend to other tasks.
For the best results:
- Brown the beef in a skillet before transferring it to the cooker.
- Sauté the aromatics and tomato paste separately.
- Add the stock and herbs according to your appliance’s instructions.
- Keep the lid closed during cooking.
- Add vegetables at a suitable stage if your model and recipe allow.
- Thicken the gravy at the end if necessary.
Frequently Asked Questions About Classic Slow-Braised Beef Stew
1. What Is the Best Cut of Beef for Slow-Braised Beef Stew?
Beef chuck roast is one of the best choices because it contains connective tissue and marbling that suit long, moist cooking. As the beef braises, the connective tissue softens and contributes to the sauce’s rich texture. Brisket and some cuts of short ribs are also suitable alternatives.
2. How Long Does Classic Slow-Braised Beef Stew Take to Cook?
Plan for approximately 2½–3½ hours of oven braising at 300°F (150°C), depending on the cut, the size of the beef cubes, and your oven. Preparation takes additional time. The stew is ready when the beef is fork-tender and the vegetables have reached your preferred consistency.
3. How Do You Make Beef Stew Meat Tender?
Choose a suitable braising cut, brown it properly, and cook it slowly in a covered pot with enough liquid. Avoid rushing the cooking process. If the beef remains firm after the suggested cooking time, continue braising until it separates easily with a fork.
4. Should Beef Stew Be Cooked Covered or Uncovered?
Keep the pot covered during most of the braising process to retain moisture and maintain a steady cooking environment. If the gravy is too thin near the end, remove the lid and simmer briefly to reduce the liquid. A combination of covered braising and uncovered finishing often produces excellent results.
Conclusion: Make the Perfect Classic Slow-Braised Beef Stew
A delicious classic slow-braised beef stew does not require complicated ingredients or advanced cooking skills. The secret is choosing the right beef, developing flavor through proper browning, adding the vegetables at the right time, and allowing the stew to braise slowly until everything becomes tender.
Print
Classic Slow-Braised Beef Stew (Tender & Rich)
- Total Time: PT2H55M
- Yield: 6 servings 1x
Ingredients
- 2½ pounds (1.1 kg) beef chuck roast, cut into 1½-inch cubes
- 2 tablespoons olive oil
- 1 large yellow onion, diced
- 3 carrots, peeled and cut into thick slices
- 3 celery stalks, chopped
- 4 garlic cloves, minced
- 2 tablespoons tomato paste
- 3 tablespoons all-purpose flour
- 1 cup (240 ml) dry red wine (optional; substitute additional beef broth)
- 4 cups (950 ml) beef broth
- 1 pound (450 g) Yukon Gold or russet potatoes, cut into chunks
- 2 tablespoons Worcestershire sauce
- 2 teaspoons fresh thyme leaves, or 1 teaspoon dried thyme
- 2 bay leaves
- 1 teaspoon salt, plus more to taste
- ½ teaspoon freshly ground black pepper
- 1 tablespoon chopped fresh parsley, for garnish (optional)
- Optional additions
- 1 cup sliced mushrooms
- ½ cup frozen peas, added during the final 10 minutes
- ½ teaspoon smoked paprika for extra depth of flavor
Instructions
1. Prepare the beef. Pat the beef chuck cubes dry with paper towels. Season them with salt and black pepper. Drying the beef helps it develop a rich brown crust when seared.
2. Brown the beef. Heat the olive oil in a large Dutch oven over medium-high heat. Working in batches, sear the beef on all sides until deeply browned, about 3–4 minutes per batch. Transfer the browned beef to a plate.
3. Sauté the vegetables. Add the diced onion, carrots, and celery to the same pot. Cook for 5–7 minutes, stirring occasionally, until the onion softens. Add the minced garlic and cook for another 30 seconds.
4. Build the flavor. Stir in the tomato paste and cook for 1–2 minutes. Sprinkle the flour over the vegetables and stir well, cooking for another minute to remove the raw flour taste.
5. Deglaze the pot. Pour in the red wine, if using, and scrape the bottom of the pot with a wooden spoon to release the browned bits. Let it simmer for 2–3 minutes. If skipping the wine, use a little beef broth for this step.
6. Add the broth and seasonings. Return the browned beef and any accumulated juices to the pot. Pour in the beef broth, then add the Worcestershire sauce, thyme, and bay leaves. Stir to combine. The liquid should mostly cover the beef.
7. Slow-braise the stew. Bring the mixture to a gentle simmer. Cover the pot with its lid and transfer it to a preheated oven at 325°F (160°C). Cook for approximately 1½ hours.
8. Add the potatoes. Carefully stir in the potato chunks. Cover the pot again and continue cooking for another 45–60 minutes, until the beef is fork-tender and the potatoes are cooked through.
9. Check the consistency. Remove the bay leaves. If the gravy is too thin, simmer the stew uncovered on the stovetop for several minutes, stirring gently. If it is too thick, add a little beef broth until it reaches your preferred consistency.
10. Taste and finish. Adjust the salt and black pepper as needed. Stir in the optional frozen peas during the final 10 minutes of cooking, if desired. Garnish with chopped fresh parsley before serving.
11. Rest and serve. Let the stew rest for 10 minutes before serving. Spoon it into warm bowls and serve with crusty bread, biscuits, or mashed potatoes to soak up the rich, savory gravy.
- Prep Time: PT25M
- Cook Time: PT2h30M
- Category: Dinner
- Method: Slow Braising
- Cuisine: American
Nutrition
- Serving Size: Approximately 1½–2 cups
- Calories: 480 kcal
- Sugar: 6 g
- Sodium: 650 mg
- Fat: 20 g
- Saturated Fat: 7 g
- Unsaturated Fat: 11 g
- Trans Fat: 0.5 g
- Carbohydrates: 32 g
- Fiber: 5 g
- Protein: 38 g
- Cholesterol: 105 mg