
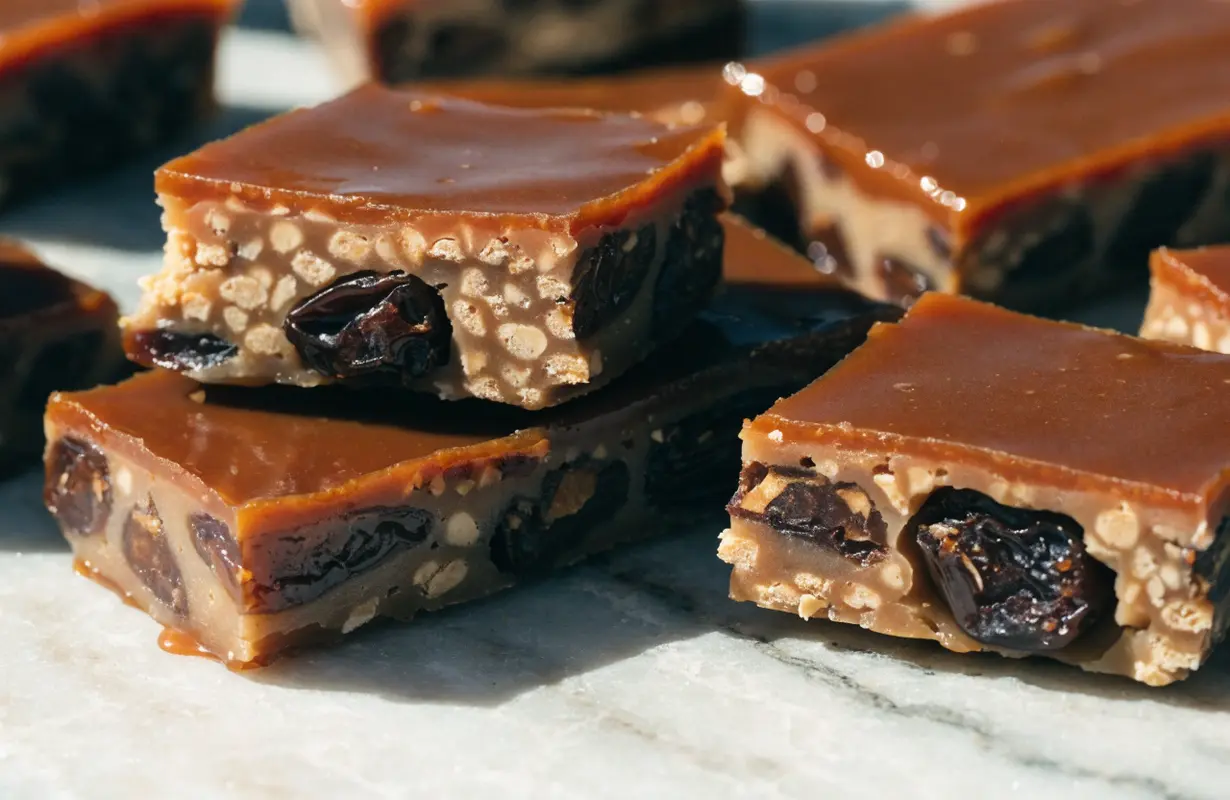
What Are Date-Caramel Candy Bars?
Date-caramel candy bars are layered chocolate treats made with a filling prepared from blended dates. When soft dates are processed into a paste, they develop a thick, sticky consistency and a deep, caramel-like flavor. Adding nut butter creates a creamier texture that works particularly well between a firm base and a chocolate topping.
Unlike traditional caramel, which is generally prepared by heating sugar, date caramel can be made simply by blending softened fruit with a few additional ingredients. This means you can prepare the filling without a candy thermometer or a bubbling saucepan of caramel.
The bars can be assembled in a loaf pan, a square baking tin, or individual silicone molds. After the layers are assembled, chilling helps everything firm up, making the finished bars easier to remove and slice.
The combination of a chewy center, a compact base, and a chocolate shell makes these treats especially enjoyable. Each layer contributes something different, creating a homemade candy bar with plenty of flavor and texture.
Why You’ll Love This Date-Caramel Candy Bars Recipe
There are several reasons to make these chocolate date bars at home.
- Simple preparation: The filling comes together in a food processor, and the layers are assembled without complicated techniques.
- No-bake method: The bars can be prepared without an oven when you use the no-bake base described in this recipe.
- Rich chocolate finish: A smooth layer of melted chocolate gives the bars their familiar candy-bar appearance.
- Chewy caramel center: Blended dates create a thick filling that contrasts beautifully with the chocolate coating.
- Easy customization: Add peanuts, almonds, coconut, or a pinch of sea salt to create your favorite combination.
- Make-ahead convenience: Prepare the bars in advance and keep them chilled until you’re ready to serve them.
- Flexible presentation: Slice them into long bars, small squares, or bite-size pieces for a dessert platter.
Another advantage is that you can control the thickness of every layer. Prefer a thick caramel center? Spread it generously. Love chocolate? Add a slightly thicker coating or dip individual bars for a more complete shell.
What Makes Date Caramel Different?
Traditional caramel is usually made by heating sugar until it melts and develops a golden color. Depending on the recipe, butter, cream, and other ingredients may be added to create a smooth sauce or chewy candy.
Date caramel uses a different approach. Soft dates are blended until they form a thick paste. Their naturally sticky texture creates a filling that resembles caramel in consistency, while their distinctive flavor gives the finished bars a deep, sweet taste.
Nut butter helps make the mixture creamier and easier to spread. A little vanilla adds warmth, while a pinch of salt balances the sweetness.
The texture depends on the ingredients and how much moisture you add. A thick mixture works best for layered candy bars because it stays in place when you spread the chocolate over the top.
For this recipe, the goal is not to create a runny caramel sauce. Instead, aim for a smooth, dense filling that can be sliced cleanly once chilled.
Ingredients You’ll Need
This recipe uses three main components: a base, a date-caramel filling, and a chocolate topping. The following quantities make approximately 8 to 10 bars, depending on how you slice them.
For the Base
- 1 cup (100 g) walnuts
- ½ cup (90 g) soft, pitted dates
- 1 teaspoon vanilla extract
- A small pinch of salt
The walnuts create a compact, slightly crumbly base, while the dates help bind the ingredients together. Vanilla adds a subtle flavor that complements the filling and chocolate.
For the Date-Caramel Filling
- 1 cup (180 g) soft, pitted Medjool dates
- ¼ cup (60 g) smooth peanut butter or almond butter
- ¼ teaspoon fine sea salt
- 1–2 tablespoons warm water, only if needed
Medjool dates are especially convenient because they are usually soft and easy to blend. Peanut butter gives the filling a familiar candy-bar flavor, while almond butter creates a milder, more delicate taste.
Start with a small amount of water and add more only when necessary. The finished filling should be thick enough to spread without running.
For the Chocolate Topping
- 1 cup (170 g) dark or semisweet chocolate chips, or chopped chocolate
- 1 teaspoon coconut oil, optional
- Flaky sea salt, optional
Choose a chocolate that you enjoy eating on its own. Dark chocolate creates a more pronounced contrast with the sweet filling, while semisweet chocolate provides a balanced finish.
The coconut oil is optional, but a small amount can help the melted chocolate spread more easily.
Optional Add-Ins
You can also prepare these bars with:
- ¼ cup chopped roasted peanuts
- 2 tablespoons chopped almonds
- 2 tablespoons shredded coconut
- 2 tablespoons crispy rice cereal
- A pinch of cinnamon
- Extra flaky sea salt for finishing
Choose one or two additions rather than adding everything at once. This keeps the layers manageable and lets the date-caramel flavor remain the star of the recipe.
Kitchen Equipment You’ll Need
You don’t need specialist candy-making equipment for this recipe. Gather the following items before you begin:
- Food processor or powerful blender
- Measuring cups or kitchen scale
- Small microwave-safe bowl
- Rubber spatula
- Mixing bowl
- Loaf pan or small square baking pan
- Parchment paper
- Sharp knife and cutting board
- Refrigerator or freezer
A loaf pan is particularly convenient because it creates a compact block that can be sliced into bars. If you own silicone candy-bar molds, you can use them to create individual portions instead.
Parchment paper is important because it allows you to lift the chilled layers out of the pan without scraping the chocolate or damaging the base.
How to Make Date-Caramel Candy Bars
Follow these steps to create neat, layered bars with a chewy center and a smooth chocolate finish.
Step 1: Prepare the Pan
Line a loaf pan with parchment paper, leaving some paper extending over the long sides. This creates handles that make it easier to lift out the finished bars.
If you’re using silicone candy molds, place them on a flat tray so they remain stable while you fill them.
Step 2: Make the Base
Add the walnuts, dates, vanilla extract, and salt to a food processor.
Pulse until the nuts are finely chopped and the dates begin to bind the mixture. Continue processing until the ingredients form a crumbly dough that holds together when pressed between your fingers.
The mixture should not be completely smooth. A little texture gives the base a pleasant bite.
If it seems too dry, add a teaspoon of warm water and pulse again. Repeat only if needed.
Step 3: Press the Base into the Pan
Transfer the mixture to your prepared pan.
Press it firmly into an even layer using the back of a spoon, a spatula, or clean fingertips. Pay particular attention to the corners, where loose crumbs can make the bars break apart later.
Try to keep the base the same thickness throughout. An uneven base can make some bars much thinner than others.
Place the pan in the refrigerator while you prepare the caramel.
Step 4: Prepare the Dates for the Filling
Check that the dates are soft enough to blend easily. If they feel firm, place them in a bowl and cover them with warm water for 10–15 minutes.
Drain thoroughly and remove any remaining pits.
Soft dates are easier to process and produce a smoother filling. If your dates are already very soft, you can skip the soaking step.
Step 5: Blend the Date Caramel
Place the dates, peanut butter or almond butter, and sea salt in the food processor.
Blend until the mixture becomes thick and creamy. Stop occasionally to scrape down the sides of the bowl so the ingredients blend evenly.
If the mixture is too stiff to process, add warm water one teaspoon at a time. Avoid adding too much because a loose filling can make the layers difficult to assemble.
Taste the mixture and adjust the salt if needed. The finished date caramel should be smooth enough to spread but thick enough to stay in place.
Step 6: Spread the Caramel over the Base
Remove the pan from the refrigerator.
Spoon the date caramel onto the chilled base. Spread it evenly using a small spatula or the back of a spoon.
Work gently so you don’t disturb the base underneath. Make sure the filling reaches the corners and forms a consistent layer.
If you want a little crunch, sprinkle chopped roasted peanuts or almonds over the filling. Press them lightly into the caramel so they remain in place.
Step 7: Chill the Caramel Layer
Return the pan to the refrigerator for approximately 20–30 minutes, or until the filling feels firm enough to support the chocolate.
The exact time will depend on the thickness of the layers and the temperature of your refrigerator.
Don’t rush this step. A stable caramel layer makes it much easier to spread the chocolate without mixing the two layers together.
Step 8: Melt the Chocolate
Place the chocolate in a clean, dry, microwave-safe bowl.
Microwave in short intervals of about 15–20 seconds, stirring after each interval. Continue until the chocolate is nearly melted, then stir until the remaining pieces disappear.
Alternatively, place the chocolate in a heatproof bowl over a saucepan of gently simmering water. Make sure the bottom of the bowl doesn’t touch the water, and keep steam and water droplets away from the chocolate.
If desired, stir in one teaspoon of coconut oil to make the coating easier to spread.
Step 9: Add the Chocolate Topping
Pour the melted chocolate over the chilled caramel layer.
Spread it evenly with a spatula, working from the center toward the edges. Gently tilt the pan to help the chocolate settle into a smooth surface.
If you want to decorate the bars, add a small sprinkle of flaky sea salt or finely chopped nuts before the chocolate sets.
For individually coated bars, you can instead chill the assembled base and filling until firm, cut them into portions, and dip each piece in melted chocolate.
Step 10: Chill Until Firm
Place the pan in the refrigerator for about 45–60 minutes, or until the chocolate has completely set.
You can also place the bars in the freezer for a shorter period, checking regularly so they become firm without being unnecessarily difficult to cut.
Once the chocolate has set, lift the slab out of the pan using the parchment paper.
Step 11: Slice into Bars
Let the slab sit at room temperature briefly if it is too firm to cut.
Use a sharp knife to slice it into approximately 8–10 bars, depending on your preferred size. For smaller dessert portions, cut each bar into two or three pieces.
For cleaner edges, warm the knife under hot water, dry it completely, and make a steady cut. Repeat between slices as necessary.
Arrange the finished Date-Caramel Candy Bars on a serving plate, or place them in an airtight container for later.
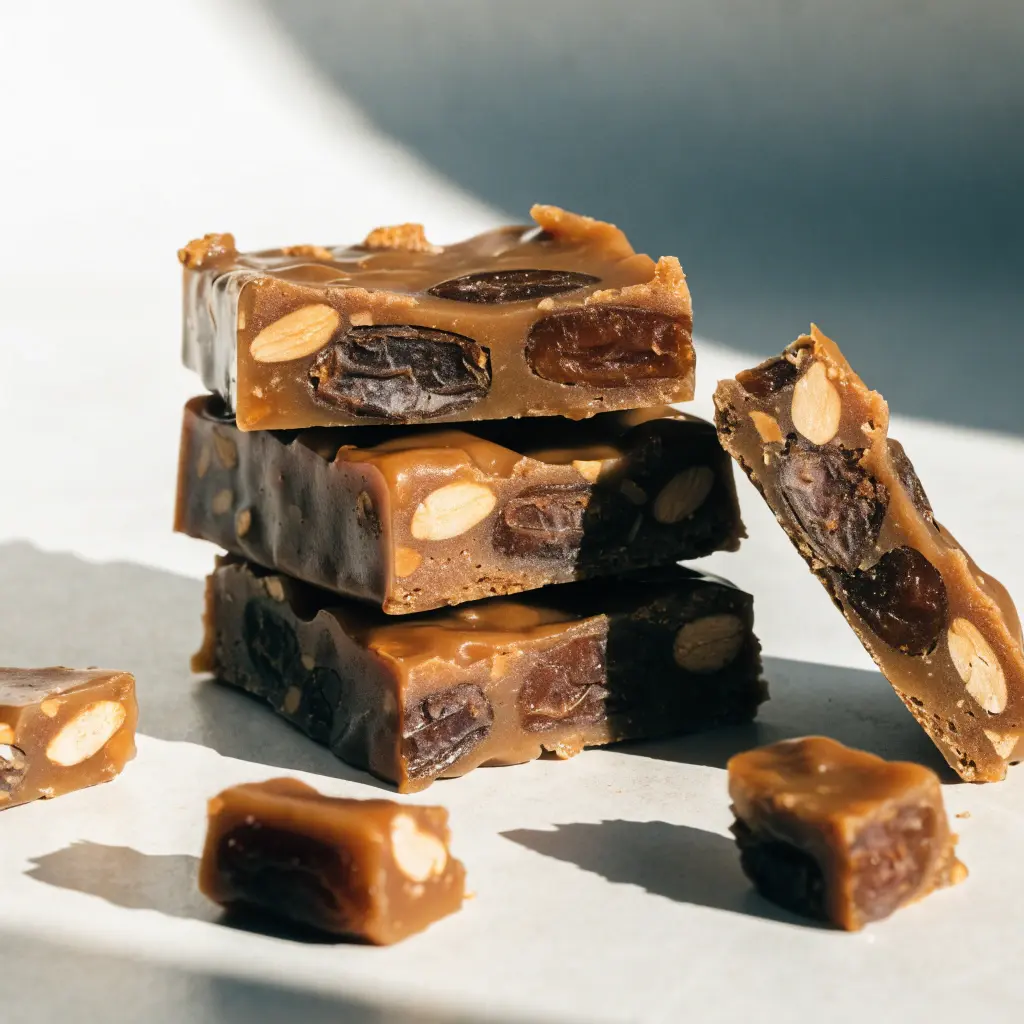
Common Mistakes and How to Fix Them
Even a simple no-bake recipe can need a little adjustment. Here are the most common problems and how to solve them.
The Date Caramel Is Too Thick
If the food processor struggles to blend the dates, they may be too dry.
- Soak the dates in warm water.
- Drain them thoroughly.
- Add a small amount of warm water while blending.
- Scrape down the sides of the processor as needed.
The Filling Is Too Runny
A loose filling may contain too much water or overly moist dates.
- Chill the mixture before assembling.
- If necessary, blend in a small amount of additional dates.
- Avoid adding liquid unless the processor genuinely needs it.
The filling should hold its shape when spread over the base.
The Base Crumbles Apart
A crumbly base may need more processing or firmer pressing.
- Continue processing until the dates bind the nuts.
- Add a teaspoon of water only if the mixture is too dry.
- Press the mixture firmly into the pan.
- Chill the base before adding the filling.
The Chocolate Turns Grainy
Chocolate may become grainy if it overheats or comes into contact with water.
- Use a completely dry bowl and utensils.
- Heat in short intervals.
- Stir frequently.
- Keep steam and water droplets away from the chocolate.
If the chocolate has seized badly, it may not be suitable for a smooth candy coating.
The Layers Separate
If the caramel slides off the base, the base may be too loose or the filling may not have been pressed gently into place.
Make sure the base is compact and the caramel is spread evenly. Chill the layers before adding the chocolate.
Delicious Date-Caramel Candy Bar Variations
Once you’ve mastered the basic recipe, try one of these combinations.
Salted Date-Caramel Chocolate Bars
Sprinkle flaky sea salt over the melted chocolate before chilling. The salty finish creates a pleasing contrast with the sweet filling.
Peanut Butter Date-Caramel Bars
Use peanut butter in the caramel and add chopped roasted peanuts between the filling and chocolate. This version has a familiar peanut-and-chocolate flavor.
Almond and Dark Chocolate Bars
Use almond butter in the filling and sprinkle chopped almonds over the top. Dark chocolate complements the mild, nutty flavor.
Coconut Date-Caramel Bars
Add shredded coconut to the base or sprinkle it over the chocolate. Coconut adds texture and a distinctive flavor.
Extra-Crunchy Candy Bars
Mix a small amount of crispy rice cereal or chopped roasted nuts into the filling. Fold gently so the additions remain crisp and evenly distributed.
Vegan Chocolate Candy Bars
Use dairy-free chocolate and plant-based ingredients throughout the recipe. Check the packaging to ensure every ingredient matches your requirements.
Nut-Free Date-Caramel Bars
Replace the walnuts with sunflower seeds and use sunflower seed butter instead of peanut or almond butter. The finished texture may differ slightly, so make sure the base binds properly before chilling.
Espresso Chocolate Bars
Add a small pinch of espresso powder to the melted chocolate. It creates a deeper, roasted flavor that pairs well with the date filling.
Serving Ideas and Occasions
These homemade candy bars are versatile enough for everyday desserts and special gatherings.
- With coffee or tea: Serve a small bar alongside your favorite hot drink.
- On a dessert platter: Arrange sliced bars with cookies, brownies, and other homemade sweets.
- For celebrations: Cut the bars into small squares for parties and family gatherings.
- As homemade gifts: Place fully set bars in a suitable container, separating the layers with parchment paper.
- For a dessert table: Alternate dark and milk chocolate versions for a varied presentation.
- As a frozen treat: Serve a bar directly from the freezer if you enjoy a firmer texture.
For the best texture, let refrigerated bars sit briefly at room temperature before serving. This allows the caramel to soften slightly while the chocolate remains firm.
Storage, Freezing, and Make-Ahead Instructions
How to Store Date-Caramel Candy Bars
Place the finished bars in an airtight container and refrigerate them. Separate the layers with parchment paper to prevent the chocolate from sticking to neighboring pieces.
Because the caramel contains dates and may contain added water, refrigeration is a sensible default for this recipe. Avoid leaving the bars out for extended periods, especially in warm weather.
For the best results, prepare a quantity that you can enjoy while the chocolate and filling retain their preferred texture. Follow the storage conditions appropriate to the ingredients you use.
Can You Freeze Date-Caramel Candy Bars?
Yes. These bars can be frozen for longer storage.
- Place the sliced bars on a parchment-lined tray in a single layer.
- Freeze until firm.
- Transfer the bars to a freezer-safe container.
- Place parchment paper between layers to prevent sticking.
- Label the container with the preparation date.
For the best texture, thaw a bar in the refrigerator or let it soften briefly at room temperature. Avoid repeatedly thawing and refreezing the same batch.
How to Make the Bars Ahead
You can prepare the bars a day before serving. Once the chocolate has set, slice them and store them in an airtight container in the refrigerator.
Frequently Asked Questions
Can You Make Caramel from Dates?
Yes. Soft dates can be blended into a thick paste that resembles caramel in texture and flavor. Adding a little nut butter makes the mixture creamier and easier to spread. Unlike conventional caramel, this version doesn’t require heating sugar to a specific temperature.
Do Date-Caramel Candy Bars Need to Be Baked?
No. This recipe uses a no-bake base, date filling, and melted chocolate topping. The refrigerator does the work of firming the layers, so you don’t need to turn on the oven.
What Are the Best Dates for Making Date Caramel?
Medjool dates are a convenient choice because they are usually soft and blend easily. Other varieties can also work. If the dates are dry or firm, soak them in warm water and drain them well before blending.
Can I Make Date-Caramel Candy Bars Without a Food Processor?
Yes, although the texture may be less smooth. Soak the dates until soft, then mash them thoroughly with a fork or sturdy utensil. Finely chop the nuts for the base and mix the ingredients by hand. A powerful blender is another alternative.
Why Is My Date Caramel Too Sticky?
Dates naturally have a sticky texture. Chilling the filling can make it easier to handle. You can also lightly oil a spatula or use the back of a spoon to spread the mixture evenly. Avoid adding too much water, which can make it even harder to work with.
Final Thoughts
These Date-Caramel Candy Bars combine a compact nut-and-date base, a chewy caramel-style filling, and a smooth chocolate topping. The preparation is straightforward, and the recipe gives you plenty of room to experiment with different chocolates, nut butters, and crunchy additions.
Print
Easy Date-Caramel Candy Bars Recipe
- Total Time: PT1H30M
- Yield: 10 bars 1x
Ingredients
For the base
- 1 cup (100 g) walnuts
- ½ cup (90 g) soft, pitted dates
- 1 teaspoon vanilla extract
- Pinch of salt
For the date caramel
- 1 cup (180 g) soft, pitted Medjool dates
- ¼ cup (60 g) smooth peanut butter or almond butter
- ¼ teaspoon sea salt
- 1–2 tablespoons warm water, as needed
For the chocolate topping
- 1 cup (170 g) dark or semisweet chocolate
- 1 teaspoon coconut oil, optional
- Flaky sea salt, optional
Instructions
- Line a loaf pan with parchment paper.
- Process the walnuts, dates, vanilla, and salt until the mixture holds together when pressed.
- Press the base firmly into the pan and refrigerate.
- Blend the dates, nut butter, and sea salt until smooth, adding a little water only if necessary.
- Spread the date caramel evenly over the base.
- Chill for 20–30 minutes until the filling firms.
- Melt the chocolate gently, stirring until smooth. Add coconut oil if desired.
- Spread the melted chocolate over the filling and sprinkle with flaky sea salt if using.
- Refrigerate for 45–60 minutes or until the chocolate sets.
- Lift the slab out of the pan and slice into 8–10 bars using a sharp knife.
- Store in an airtight container in the refrigerator or freeze for longer storage.
- Prep Time: PT25M
- Category: Dessert
- Method: No-Bake
- Cuisine: American
Nutrition
- Serving Size: 1 bar
- Calories: 290 Kcal
- Sugar: 23 g
- Sodium: 95 mg
- Fat: 18 g
- Saturated Fat: 6 g
- Unsaturated Fat: 11 g
- Trans Fat: 0 g
- Carbohydrates: 31 g
- Fiber: 4 g
- Protein: 5 g
- Cholesterol: 0 mg