
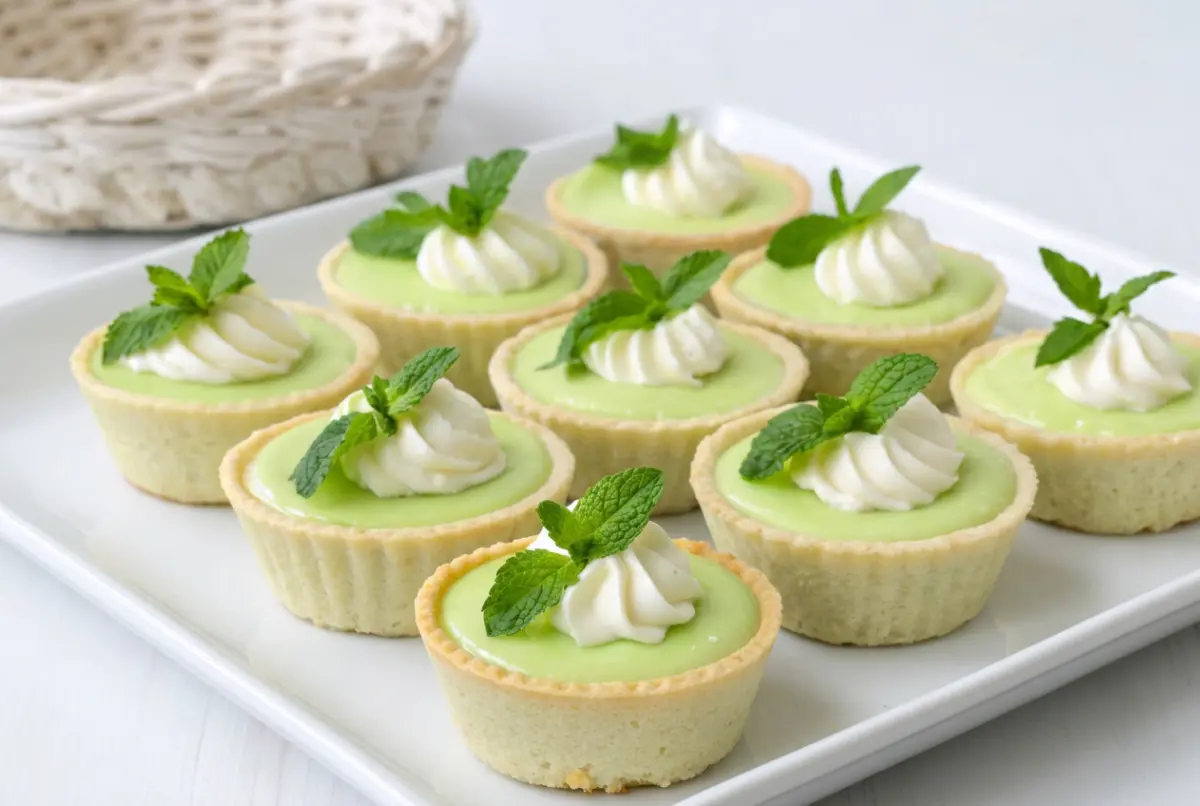
What Are No-Bake Key Lime Pie Cups?
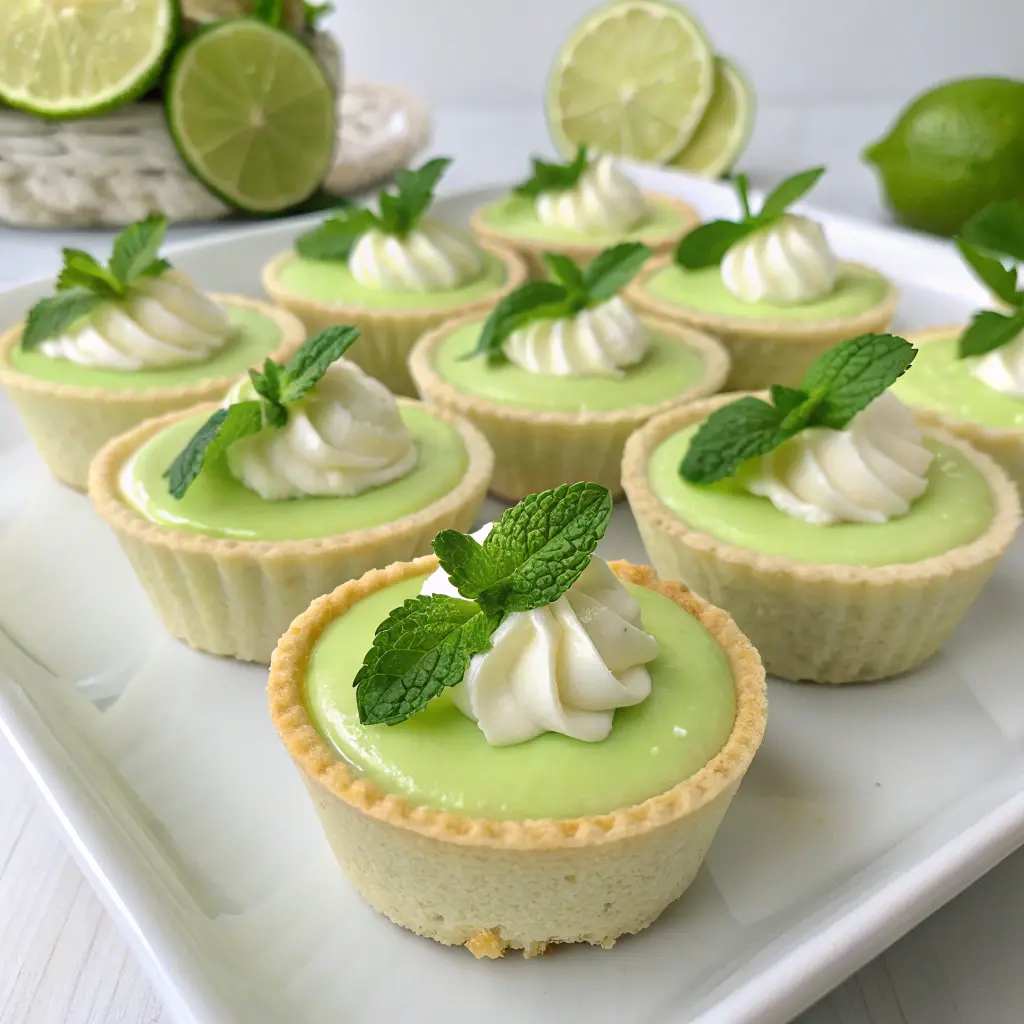
No-Bake Key Lime Pie Cups are individual servings inspired by the classic key lime pie. Instead of making one large pie, the graham cracker crust and creamy lime filling are layered directly into small dessert cups.
The result is a spoonable dessert with several textures in every bite.
You get:
- Buttery graham cracker crumbs
- Smooth and creamy lime filling
- Bright citrus zest
- Light whipped cream
- A refreshing sweet-tart flavor
Traditional key lime pie is usually associated with a graham cracker crust and a rich lime filling. The cup version keeps those familiar flavors while making the dessert easier to assemble and serve.
Why You’ll Love This No-Bake Key Lime Pie Cups Recipe
This recipe is designed to be simple without sacrificing the classic flavor combination that makes key lime desserts so popular.
1. No Oven Required
The biggest attraction is right in the name: no baking required.
You don’t need to preheat an oven or wait for a pie crust to bake and cool. The dessert comes together with simple mixing, layering, and chilling.
2. Easy Individual Servings
Instead of preparing one large pie, you assemble several small cups.
This is perfect when you want a dessert that’s already divided into individual servings.
3. Creamy and Tangy
The filling combines rich ingredients with lime juice and zest for a balance of sweet, creamy, and tangy flavors.
4. Perfect for Entertaining
These cups can be prepared ahead and kept chilled until you’re ready to serve them.
They’re especially attractive on a dessert table because guests can immediately see the individual portions.
5. Easy to Customize
You can change the toppings, crumbs, or fruit layers to create your own version.
Try:
- Toasted coconut
- Fresh berries
- Chocolate cookie crumbs
- White chocolate
- Extra lime zest
- Crushed graham crackers
Ingredients for No-Bake Key Lime Pie Cups Recipe
The ingredient list is straightforward, which is one of the reasons this dessert is so approachable.
For the Graham Cracker Layer
- 1 ½ cups graham cracker crumbs
- 4 tablespoons unsalted butter, melted
- 2 tablespoons granulated sugar
For the Key Lime Filling
- 8 ounces cream cheese, softened
- 1 (14-ounce) can sweetened condensed milk
- ½ cup key lime juice
- 1 tablespoon fresh lime zest
- 1 teaspoon vanilla extract
- Pinch of salt
For the Whipped Cream
- 1 cup cold heavy whipping cream
- 2 tablespoons powdered sugar
- ½ teaspoon vanilla extract
For Garnish
- Extra lime zest
- Lime slices or wedges
- Graham cracker crumbs
Kitchen Equipment
You don’t need much equipment to make these No-Bake Key Lime Pie Cups.
Essential Equipment
- Mixing bowls
- Hand mixer or stand mixer
- Food processor
- Citrus juicer
- Fine zester
- Measuring cups and spoons
- Rubber spatula
- Small dessert cups or ramekins
- Piping bag, optional
If you don’t have a food processor, place the graham crackers in a sealed bag and crush them with a rolling pin.
Best Cups to Use
Small 4-ounce dessert cups are ideal for individual portions.
You can also use:
- Small glass jars
- Mini mason jars
- Ramekins
- Clear plastic party cups
- Small stemless glasses
Clear containers are especially nice because they allow the layers to show.
How to Make No-Bake Key Lime Pie Cups Recipe
Step 1: Prepare the Graham Cracker Crumbs
Begin by crushing the graham crackers until you have fine, even crumbs.
You can use a food processor or place the crackers inside a sturdy zip-top bag and crush them with a rolling pin.
Add the crumbs to a bowl and stir in the melted butter and sugar.
The mixture should resemble damp sand and hold together lightly when pressed.
Don’t turn the crumbs into a hard paste.
You want enough butter to give the mixture a pleasant texture while still keeping some of the natural crunch.
Step 2: Make the Creamy Key Lime Filling
Place softened cream cheese in a large mixing bowl.
Beat until smooth and creamy.
This step is important because it removes lumps before you introduce the condensed milk and lime juice.
Add the sweetened condensed milk gradually.
Continue mixing until the mixture becomes smooth.
Next, add the key lime juice.
Pour it in gradually rather than all at once.
Add the fresh lime zest and vanilla extract.
Mix until everything is evenly incorporated.
The finished filling should look smooth, thick, and creamy.
What Should the Filling Look Like?
It should be:
- Thick enough to spoon or pipe
- Completely smooth
- Creamy rather than watery
- Pale and glossy
- Strongly scented with lime
Avoid overmixing once the filling has reached the desired consistency.
Step 3: Make the Whipped Cream
Pour cold heavy whipping cream into a chilled mixing bowl.
Beat on medium speed until it begins to thicken.
Add powdered sugar and vanilla extract.
Continue beating until the cream reaches your preferred consistency.
For piping, you want relatively firm peaks.
Be careful not to keep mixing after the cream reaches the desired texture.
Over-whipped cream can become grainy and eventually separate.
Set the whipped cream aside in the refrigerator while you assemble the cups.
Step 4: Build the First Graham Cracker Layer
Place a small spoonful of graham cracker crumbs into the bottom of each dessert cup.
Use the back of the spoon to gently level the crumbs.
You don’t need to press them extremely firmly.
A lightly packed layer gives the dessert a pleasant contrast between the creamy filling and crumbly base.
Step 5: Add the Key Lime Filling
Spoon the lime filling over the graham cracker layer.
For cleaner edges, use a piping bag.
Fill each cup evenly.
Try to leave a little space at the top for the whipped cream and garnish.
If you’re making the cups for a party, take a moment to check that the filling levels are similar.
Even layers create a much more polished presentation.
Step 6: Add Another Layer of Graham Crumbs
For a more noticeable layered dessert, sprinkle another small layer of graham crumbs over the filling.
This creates a beautiful contrast when viewed through a clear cup.
You can keep the layer thin or make it slightly thicker depending on how much crunch you prefer.
Step 7: Finish With More Key Lime Filling
Add another layer of creamy lime filling.
Smooth the surface with a small spatula or spoon.
Leave enough room at the top for your whipped cream.
Don’t fill the cups all the way to the rim.
A little empty space makes the dessert easier to carry and decorate.
Step 8: Add Whipped Cream
Now comes the finishing layer.
Pipe or spoon a swirl of homemade whipped cream over each cup.
A piping bag with a star-shaped tip creates a particularly attractive presentation.
If you’re serving the dessert casually, a simple spoonful of whipped cream works just as well.
Step 9: Garnish the Pie Cups
Finish each dessert with your favorite garnish.
Classic Garnishes
- Fresh lime zest
- Thin lime slice
- Graham cracker crumbs
Creative Garnishes
- Toasted coconut
- White chocolate curls
- Fresh berries
- Mint leaves
- Crushed cookies
Don’t overload the cups.
A small amount of garnish keeps the dessert elegant and lets the key lime flavor remain the star.
Step 10: Chill Before Serving
Place the finished cups in the refrigerator.
Allow enough time for the filling to become properly chilled and firm.
Depending on the exact filling and serving size, chilling times can vary. A few hours is a useful general target, while preparing the dessert the day before is especially convenient.
The chilling stage is important because it allows the layers to settle and gives the filling a firmer spoonable consistency.
Serve the cups cold.
Common Mistakes to Avoid
Using Cold Cream Cheese
Problem: The filling has lumps.
Solution: Allow the cream cheese to soften before mixing.
Adding Too Much Lime Juice
Problem: The filling becomes overly tart or too loose.
Solution: Measure the lime juice carefully.
Not Chilling Long Enough
Problem: The filling doesn’t have the texture you want.
Solution: Refrigerate for several hours and consider making the dessert the day before.
Over-Whipping the Cream
Problem: The whipped cream becomes grainy.
Solution: Stop mixing once firm peaks form.
Making the Graham Layer Too Thick
Problem: The crumbs dominate every bite.
Solution: Keep the crumb layers relatively thin and balanced.
Filling the Cups Too High
Problem: Toppings spill over the edges.
Solution: Leave some space at the top.
Using Too Much Garnish
Problem: The dessert becomes visually crowded.
Solution: Choose one or two toppings and keep them simple.
Delicious Variations
One of the best things about this dessert is how easily you can customize it.
Coconut Key Lime Pie Cups
Add a layer of toasted coconut between the graham crumbs and lime filling.
Finish with a small sprinkle of toasted coconut.
The combination of coconut and lime works especially well for a tropical-inspired dessert.
Strawberry Key Lime Cups
Add finely diced strawberries between the layers.
The berries provide a beautiful color contrast.
Raspberry Lime Pie Cups
Fresh raspberries create a striking red-and-green presentation.
Add a few raspberries directly on top of the whipped cream.
Chocolate Key Lime Cups
Replace the graham crackers with crushed chocolate cookies.
The deeper chocolate flavor creates an interesting contrast with the bright lime filling.
White Chocolate Key Lime Cups
Add small white chocolate curls as a garnish.
The creamy sweetness pairs nicely with the tart citrus flavor.
Best Toppings and Garnishes
You can keep the topping classic or make it more creative.
Traditional
- Whipped cream
- Lime zest
- Lime slices
- Graham cracker crumbs
Tropical
- Toasted coconut
- Pineapple pieces
- Coconut flakes
Berry-Inspired
- Strawberries
- Blueberries
- Raspberries
- Blackberries
Elegant
- White chocolate curls
- Thin lime twists
- Small mint leaves
Easy Party Presentation
For a large gathering, place all the finished cups on a tray and add the garnish just before serving.
This creates a neat, coordinated dessert display without requiring individual plating.
What to Serve With No-Bake Key Lime Pie Cups
These little desserts work particularly well after casual meals and summer gatherings.
Drinks
Serve them with:
- Iced tea
- Lemonade
- Sparkling water
- Lime-infused water
- Iced coffee
- Fresh fruit drinks
Meals
Their bright citrus flavor pairs nicely with meals featuring:
- Grilled foods
- BBQ favorites
- Seafood dishes
- Summer salads
- Sandwiches
- Light pasta dishes
The dessert can also be served completely on its own as an afternoon treat.
Storage Instructions
Once assembled, keep the No-Bake Key Lime Pie Cups covered and refrigerated.
If you’re making them ahead, arrange the cups on a tray before placing them in the refrigerator.
Cover them carefully so they don’t absorb odors from other foods.
For general food-storage guidance, USDA recommends refrigerating perishable foods promptly and notes that leftovers are generally kept refrigerated for 3–4 days.
For the best texture, however, these pie cups are especially enjoyable within the first couple of days.
The graham cracker layers can gradually soften as they sit next to the creamy filling.
Storage Tips
- Keep cups refrigerated.
- Cover tightly.
- Keep garnishes fresh.
- Add delicate toppings shortly before serving.
- Avoid leaving the dessert at room temperature for extended periods.
If you’re serving them at a party, keep the cups chilled until guests are ready to eat.
Freezing Guide
Can you freeze No-Bake Key Lime Pie Cups?
Yes, depending on the exact filling and toppings, they can be prepared as a frozen dessert.
For the best result, consider freezing the filling and crumb layers while adding fresh whipped cream and delicate garnishes after thawing.
How to Freeze
- Assemble the crumb and lime filling layers.
- Cover each cup tightly.
- Place the cups on a level freezer shelf.
- Freeze until firm.
- Move them to the refrigerator when you’re ready to serve.
- Add fresh whipped cream and garnish after thawing.
What Happens to the Graham Cracker Layer?
The crumbs may soften slightly after freezing and thawing.
If maximum crunch is important, prepare a fresh small batch of graham crumbs and add them just before serving.
Freezing Tip
Use freezer-safe containers and leave enough space around the top so the topping doesn’t get crushed.
Make-Ahead Tips
This is an excellent make-ahead dessert.
You can prepare the cups several hours before serving, giving them plenty of time to chill.
The Day Before
For an especially easy party dessert:
- Prepare the graham crumbs.
- Make the lime filling.
- Assemble the cups.
- Cover them.
- Refrigerate overnight.
- Add whipped cream and garnish before serving.
For Parties
If you’re making a large batch:
- Arrange cups on trays.
- Use identical cups for consistent portions.
- Prepare the filling in one large bowl.
- Pipe the filling into the cups.
- Add toppings shortly before serving.
For transportation, use cups with secure lids and keep them upright and chilled.
Frequently Asked Questions
Can I use regular limes instead of key limes?
Yes. Regular Persian or Tahiti limes are a practical substitute when fresh key limes aren’t available.
The flavor will be slightly different, but you’ll still get the bright citrus character that makes this dessert so delicious.
Adding fresh zest can help intensify the lime flavor.
How long do No-Bake Key Lime Pie Cups need to chill?
A few hours is a good general target, but the exact time depends on the filling ingredients and the size of the cups.
For the most convenient option, prepare them the day before and let them chill overnight.
Can I make Key Lime Pie Cups ahead of time?
Absolutely.
They’re particularly well suited to make-ahead preparation.
Prepare the cups several hours in advance and refrigerate them until serving.
For the freshest appearance, add whipped cream and delicate garnishes shortly before serving.
Can I freeze No-Bake Key Lime Pie Cups?
Yes, you can freeze many versions of this dessert.
For better presentation, freeze the cups without delicate toppings and add fresh whipped cream and garnish after thawing.
Keep the thawing process slow by moving the cups from the freezer to the refrigerator.
Can I use bottled key lime juice?
Yes.
Bottled key lime juice is convenient when fresh key limes aren’t available.
For a fresher citrus aroma, combine bottled juice with freshly grated lime zest.
Conclusion
This No-Bake Key Lime Pie Cups Recipe is an easy, refreshing dessert that brings together creamy key lime filling, buttery graham cracker crumbs, and fluffy whipped cream in perfectly portioned cups. With no oven required, it’s a simple way to create an impressive dessert without spending hours in the kitchen.
Print
Easy No-Bake Key Lime Pie Cups Recipe
- Total Time: PT3H00M
- Yield: 10 individual dessert cups 1x
- Diet: Gluten Free
Description
These No-Bake Key Lime Pie Cups are creamy, tangy, and irresistibly easy to make. Layers of buttery graham cracker crumbs, smooth key lime filling, and fluffy whipped cream create a refreshing individual dessert that’s perfect for parties, summer gatherings, and make-ahead entertaining. No oven required!
Ingredients
For the Graham Cracker Layer
- 1 ½ cups graham cracker crumbs
- 4 tablespoons unsalted butter, melted
- 2 tablespoons granulated sugar
For the Key Lime Filling
- 8 ounces cream cheese, softened
- 1 (14-ounce) can sweetened condensed milk
- ½ cup key lime juice
- 1 tablespoon fresh lime zest
- 1 teaspoon vanilla extract
- Pinch of salt
For the Whipped Cream
- 1 cup cold heavy whipping cream
- 2 tablespoons powdered sugar
- ½ teaspoon vanilla extract
For Garnish
- Extra lime zest
- Lime slices or wedges
- Graham cracker crumbs
Instructions
- Prepare the graham cracker crumbs: In a medium bowl, combine the graham cracker crumbs, melted butter, and sugar. Stir until evenly combined and the crumbs resemble damp sand.
- Make the lime filling: Beat the softened cream cheese in a large bowl until completely smooth. Gradually add the sweetened condensed milk and mix until creamy.
- Add the lime flavor: Slowly mix in the key lime juice, lime zest, vanilla extract, and salt. Beat just until the filling is smooth and well combined.
- Prepare the whipped cream: In a chilled bowl, beat the cold heavy cream with powdered sugar and vanilla until firm peaks form. Do not overbeat.
- Assemble the cups: Add a layer of graham cracker crumbs to the bottom of each small dessert cup. Spoon or pipe a layer of key lime filling over the crumbs.
- Create another layer: Add a thin layer of graham cracker crumbs, followed by another layer of key lime filling. Leave enough room at the top for the whipped cream.
- Add the whipped cream: Spoon or pipe whipped cream over each cup.
- Garnish: Sprinkle with extra graham cracker crumbs and fresh lime zest. Add a small lime slice or wedge if desired.
- Chill: Cover the cups and refrigerate for at least 3 hours, or preferably overnight, until the filling is well chilled and firm.
- Serve: Serve cold and garnish with additional lime zest or a fresh lime slice just before serving.
Notes
- Use softened cream cheese to create a smooth, lump-free filling.
- Fresh key lime juice gives the most distinctive flavor, but regular lime juice can be used if key limes aren’t available.
- For the best presentation, use clear 4-ounce dessert cups so the layers are visible.
- Prep Time: PT20M
- Category: Dessert
- Method: No-Bake
- Cuisine: American
Nutrition
- Serving Size: 1 dessert cup
- Calories: 390 kcal
- Sugar: 29 g
- Sodium: 250 mg
- Fat: 24 g
- Saturated Fat: 14 g
- Unsaturated Fat: 8 g
- Trans Fat: 0.3 g
- Carbohydrates: 40 g
- Fiber: 1 g
- Protein: 6 g
- Cholesterol: 75 mg