
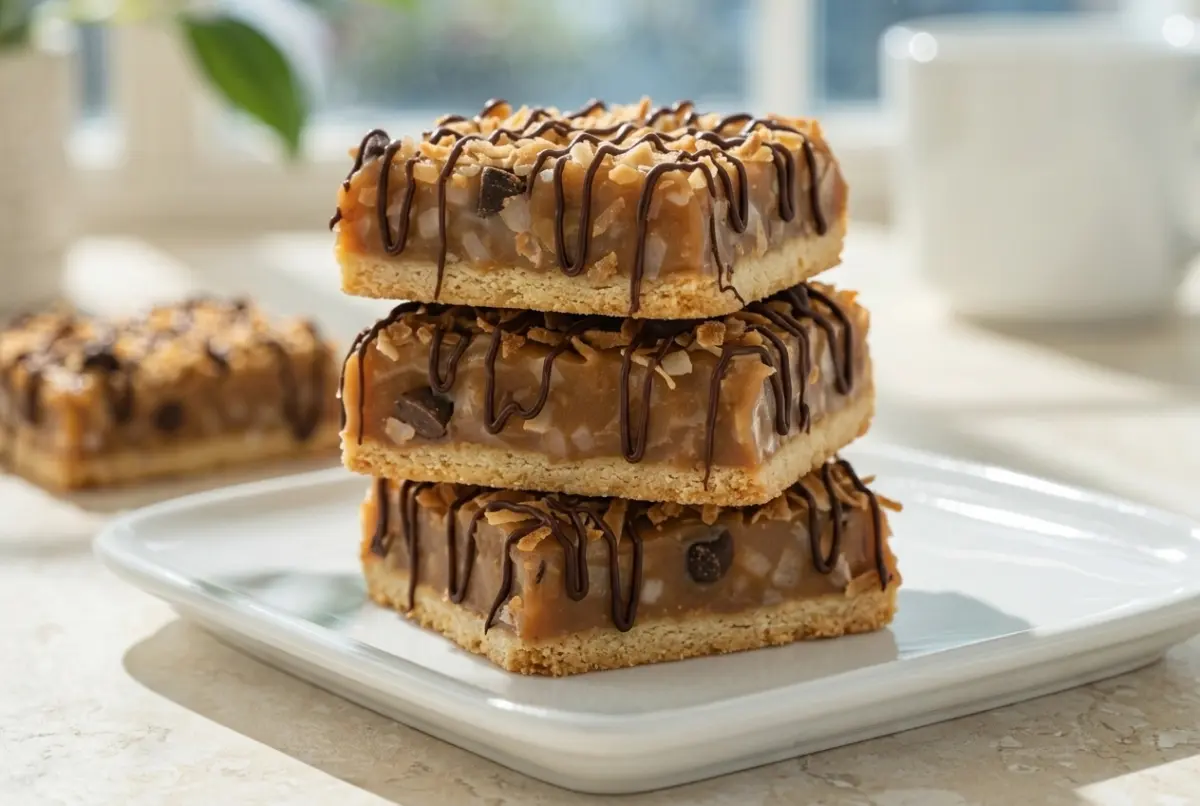
What Are Samoa Cookie Bars?
Samoa Cookie Bars are a homemade dessert inspired by the familiar caramel, coconut and chocolate cookie combination. Instead of forming individual round cookies, the dough is pressed into a baking pan and baked as one large cookie layer.
The finished dessert is cut into bars after the caramel and chocolate have set. This makes the recipe much easier to prepare when you are baking for a crowd.
Most versions follow the same basic idea:
- A buttery shortbread-style cookie base
- A layer of toasted shredded coconut
- A rich caramel topping
- Melted chocolate
- A decorative chocolate drizzle
Why You’ll Love This Samoa Cookie Bars Recipe
There are plenty of reasons to add these caramel coconut cookie bars to your baking list.
- Easy to prepare: Everything starts in one baking pan.
- No individual cookie shaping: There is no need to cut dozens of tiny cookies.
- Buttery cookie base: The bottom layer has a tender, rich texture.
- Toasted coconut: Toasting brings out a deeper, more pronounced coconut flavor.
- Chewy caramel: The caramel gives the bars their signature sticky texture.
- Chocolate finish: Melted chocolate adds a smooth, rich contrast.
- Beautiful presentation: A simple drizzle makes the bars look bakery-worthy.
- Great for sharing: One pan can be sliced into plenty of portions.
- Make-ahead friendly: The layers can be prepared in advance.
- Easy to customize: You can change the chocolate, caramel or coconut to suit your preference.
These bars are particularly useful when you want something that looks impressive without requiring complicated pastry techniques.
Ingredients for Samoa Cookie Bars Recipe
For the Cookie Base
- 1 cup (226 g) unsalted butter, softened
- 1/2 cup (100 g) granulated sugar
- 1 teaspoon vanilla extract
- 2 cups (250 g) all-purpose flour
- 1/4 teaspoon salt
For the Caramel Coconut Layer
- 3 cups (210 g) sweetened shredded coconut
- 11 oz (312 g) soft caramel candies
- 3 tablespoons heavy cream
- 1 teaspoon vanilla extract
- 1/4 teaspoon salt
For the Chocolate Topping
- 8 oz (225 g) semi-sweet or dark chocolate chips
- 1 teaspoon coconut oil, optional, for smoother melted chocolate
For Decoration
- 2–3 tablespoons toasted shredded coconut, optional
- 2 tablespoons melted chocolate for the final drizzle
How to Make Samoa Cookie Bars Recipe
Step 1: Prepare the Baking Pan
Begin by preheating your oven according to the recipe temperature.
Line your baking pan with parchment paper, leaving some paper hanging over the sides. This creates a simple sling that makes it much easier to remove the finished bars.
For an even cleaner release:
- Lightly grease the pan first.
- Add the parchment.
- Press the paper firmly into the corners.
- Leave extra parchment extending over two opposite sides.
An 8-inch or 9-inch square pan works well for thick bars, while a larger rectangular pan produces thinner bars.
Step 2: Make the Cookie Base
Place the softened butter and sugar in a mixing bowl. Beat until the mixture becomes smooth and creamy.
Add the vanilla and mix again.
Gradually add the flour and salt. Mix just until the dough comes together.
Do not overmix once the flour has been incorporated. Overworking the dough can make the finished cookie layer less tender.
Transfer the dough to the prepared pan.
Use your fingertips, the back of a spoon or the flat bottom of a measuring cup to press it evenly across the pan.
Pay special attention to the corners.
An uneven cookie base can create problems later because the caramel layer will follow the shape of the cookie. A level base gives you attractive, uniform bars.
Step 3: Bake the Cookie Layer
Place the pan in the preheated oven and bake until the cookie layer is set and lightly golden around the edges.
You do not want an extremely dark base.
The cookie layer will continue to firm as it cools, so avoid baking it until it becomes hard and deeply browned.
Remove the pan from the oven and place it on a cooling rack.
Let the cookie base cool completely before adding the caramel coconut layer.
This cooling step is important. A hot cookie base can make the caramel spread too quickly and make the layers difficult to control.
Step 4: Toast the Coconut
While the cookie base cools, prepare the coconut.
Spread the shredded coconut in a thin layer on a baking sheet.
Toast it until it becomes lightly golden and fragrant.
Stir the coconut regularly so that it browns evenly.
Keep a close eye on it during the final minutes because coconut can go from golden to burnt surprisingly quickly. King Arthur Baking also highlights the problem of uneven browning and recommends paying close attention while toasting coconut.
Once toasted, transfer the coconut to a cool plate or bowl.
Do not leave it on the hot baking sheet because the residual heat can continue browning it.
Allow it to cool before mixing it with the caramel.
Step 5: Prepare the Caramel
You can prepare the caramel layer using either caramel candies or a homemade caramel sauce.
For a quick method, place caramel candies in a saucepan with a small amount of cream, milk or butter.
Heat gently while stirring.
Continue until the mixture becomes smooth and easy to spread.
Avoid high heat. Caramel can scorch quickly, and overheating can make it too firm once cooled.
If you prefer homemade caramel, prepare it according to your chosen caramel method and allow it to reach a thick, spreadable consistency.
The goal is a caramel that can hold the coconut without immediately running off the sides of the cookie base.
Step 6: Combine the Caramel and Toasted Coconut
Place most of the toasted coconut into a mixing bowl.
Pour the warm caramel over it.
Stir carefully until the coconut is evenly coated.
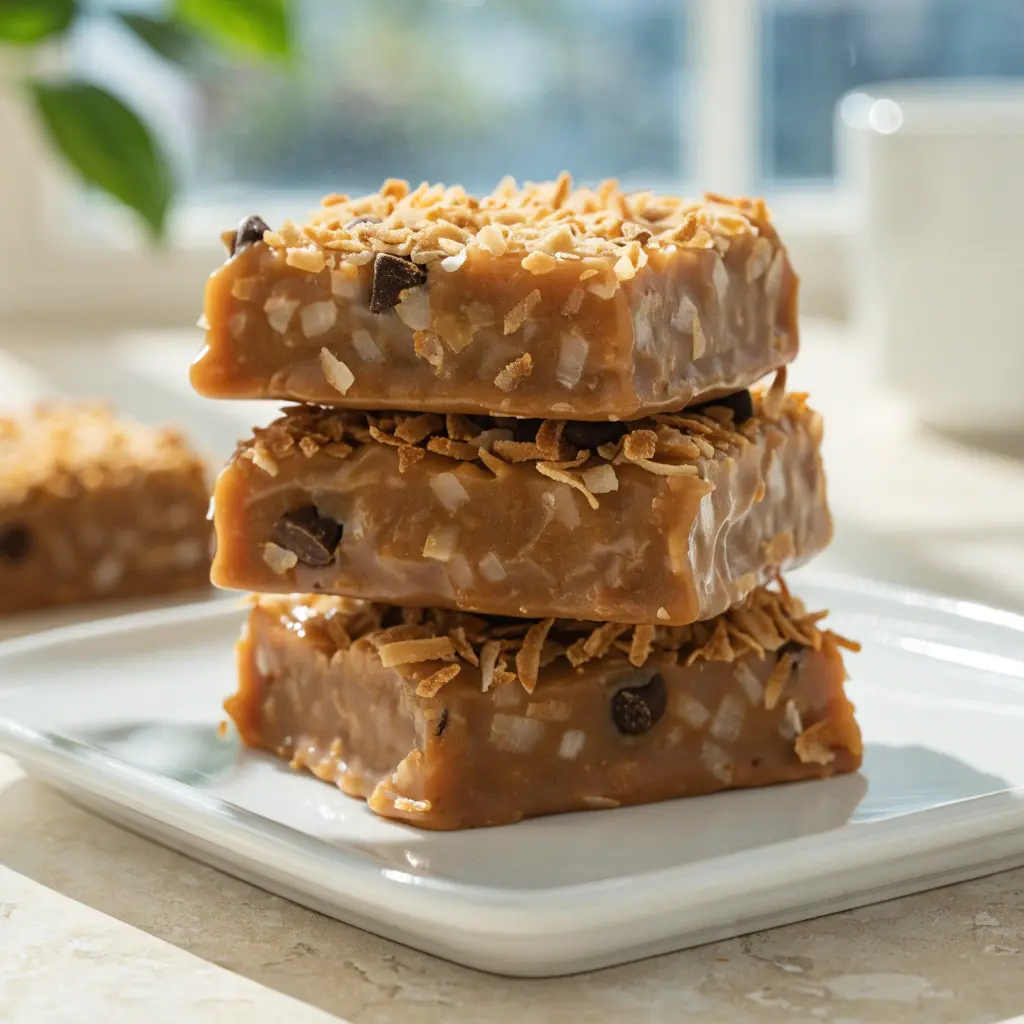
The mixture should look thick, sticky and generously filled with coconut.
If you want a particularly attractive topping, reserve a small amount of toasted coconut to sprinkle over the chocolate later.
Step 7: Spread the Caramel Coconut Layer
Make sure the cookie base is completely cool.
Spoon the caramel coconut mixture over the top.
Use a spatula to spread it evenly from edge to edge.
Press gently rather than aggressively compacting the topping.
You want the coconut and caramel to form a cohesive layer without crushing all of the texture.
If the caramel starts becoming difficult to spread, warm the mixture very briefly before continuing.
Step 8: Let the Caramel Layer Set
Allow the caramel layer to cool and firm before moving on to the chocolate.
You can leave the pan at room temperature if the caramel sets quickly, or place it in the refrigerator for a short period.
The caramel should be firm enough that the chocolate can sit on top without sinking into it.
This is also the stage where patience pays off. Cutting or decorating the bars while the caramel is still extremely soft can result in messy layers.
Step 9: Add the Chocolate
Melt the chocolate gently.
If using a microwave, heat it in short intervals and stir between each interval.
Alternatively, melt it over a double boiler.
Once smooth, spread a thin layer of chocolate over the bottom of the bars if desired.
Then turn the bars over carefully once the chocolate has set.
For the top, drizzle melted chocolate in thin lines across the caramel coconut layer.
Move your hand quickly from side to side to create the classic zigzag pattern.
You can also add a few flakes of toasted coconut while the chocolate is still soft.
Step 10: Let the Chocolate Set
Allow the chocolate to firm completely before cutting.
If your kitchen is warm, place the bars in the refrigerator for a short time.
Do not leave them chilled for too long if you want the caramel to remain pleasantly chewy.
Once the chocolate has set, lift the entire slab from the pan using the parchment paper.
Place it on a cutting board.
Step 11: Cut and Serve
Use a sharp knife to cut the slab into squares or rectangles.
For cleaner cuts:
- Use a large sharp knife.
- Wipe the blade between cuts.
- Cut straight down rather than sawing aggressively.
- Allow the bars to soften slightly if the chocolate is very firm.
Serve the Samoa Cookie Bars once the layers have reached the texture you prefer.
Expert Tips for Perfect Samoa Cookie Bars
A few simple techniques can make a big difference.
Toast the Coconut Carefully
The coconut should be golden rather than dark brown.
Stir it regularly and remove it from the heat as soon as it reaches the color you want.
Press the Cookie Dough Evenly
Uneven dough creates uneven bars.
Use a measuring cup or flat-bottomed glass to create a consistent thickness.
Cool the Cookie Base Completely
Do not rush this stage.
A cool base gives you much better control when adding the caramel.
Keep the Caramel Spreadable
If caramel becomes too firm while you are working, warm it gently.
If it becomes extremely runny, allow it to cool slightly before spreading.
Melt Chocolate Slowly
Chocolate responds better to gentle heat.
Stir frequently and avoid overheating it.
Chill Before Slicing
A short chilling period can make the layers easier to cut.
However, let the bars sit for a few minutes before serving if the caramel becomes very firm in the refrigerator.
Common Mistakes to Avoid
1. Burning the Coconut
This is one of the easiest mistakes to make.
Coconut can look pale one moment and suddenly become very dark. Stay nearby while it toasts.
2. Making the Cookie Base Too Thick
A very thick base can overpower the caramel coconut topping.
Press the dough into a consistent layer.
3. Adding Caramel to a Hot Base
Always give the cookie layer time to cool.
Otherwise, the caramel can become difficult to control.
4. Making the Caramel Too Thin
A loose caramel sauce can slide from the bars.
Allow it to thicken enough to hold the coconut.
5. Overheating Chocolate
Chocolate can seize or scorch if heated too aggressively.
Use short heating intervals and stir frequently.
6. Cutting Too Soon
If you slice before the caramel and chocolate have set, the layers can smear.
Give the bars enough time to firm.
7. Using a Dull Knife
A sharp knife produces cleaner edges and reduces pressure on the delicate layers.
8. Overloading the Top With Chocolate
A dramatic drizzle looks attractive, but too much chocolate can hide the toasted coconut and make the bars difficult to eat.
Samoa Cookie Bars Variations
Dark Chocolate Samoa Bars
For a deeper chocolate flavor, use dark chocolate for the coating and drizzle.
The slightly bitter chocolate creates a beautiful contrast with the sweet caramel and coconut.
Milk Chocolate Samoa Bars
Milk chocolate gives the bars a softer, sweeter flavor.
This option works particularly well if you are serving the bars to children or anyone who prefers a milder chocolate taste.
Salted Caramel Samoa Bars
Add a small sprinkle of flaky sea salt over the caramel before adding the chocolate.
The salt creates a pleasant contrast with the sweet coconut and caramel.
Homemade Caramel Samoa Bars
If you enjoy making desserts completely from scratch, prepare your own caramel.
This gives you control over the thickness and flavor of the caramel layer.
Gluten-Free Samoa Cookie Bars
You can adapt the cookie base using a suitable gluten-free flour blend.
The important thing is to use a blend designed for baking and follow its recommended substitution guidelines.
Vegan Samoa Cookie Bars
A plant-based version can be made by replacing butter with a suitable dairy-free alternative and choosing dairy-free chocolate.
The caramel layer can also be adapted using coconut-based or other plant-based ingredients.
Mini Samoa Bars
For parties, cut the finished slab into small bite-sized pieces.
Mini bars are especially convenient for dessert tables because guests can take a small serving without committing to a large square.
How to Store Samoa Cookie Bars
Once the chocolate and caramel have completely set, place the bars in an airtight container.
If you stack multiple layers, separate them with parchment paper.
For longer storage, refrigeration can help keep the caramel firm and the chocolate set.
USDA guidance recommends keeping leftovers properly covered and refrigerated and notes that refrigerated leftovers are generally best used within 3–4 days.
For these cookie bars specifically, keep the container tightly sealed so the cookie base does not absorb moisture or refrigerator odors.
If serving the bars after refrigeration, allow them to sit briefly at room temperature. This helps the caramel soften slightly and makes the texture more pleasant.
Can You Freeze Samoa Cookie Bars?
Yes, Samoa Cookie Bars can be frozen.
For the best results, allow the finished bars to cool and set completely.
Then:
- Cut the bars into individual portions.
- Wrap each bar tightly.
- Place the wrapped bars in a freezer-safe container.
- Add parchment between layers if needed.
- Label the container.
- Freeze until needed.
When ready to serve, transfer the bars to the refrigerator and allow them to thaw gradually.
USDA notes that freezing keeps food safe for extended periods, although quality can decline with long freezer storage.
Because these bars contain several distinct textures, freezing may slightly change the caramel or cookie texture. For the best presentation, use them after a reasonable freezer-storage period rather than keeping them indefinitely.
How to Make Samoa Cookie Bars Ahead of Time
These bars are ideal for preparing ahead.
You can make the cookie base a day in advance and keep it covered once completely cool.
The toasted coconut can also be prepared ahead and stored in an airtight container.
For a simple make-ahead schedule:
The day before:
- Bake the cookie base.
- Toast the coconut.
- Prepare the caramel.
- Assemble the coconut caramel layer.
- Allow the layers to set.
On serving day:
- Add the chocolate.
- Allow the chocolate to set.
- Slice the bars.
- Arrange them on a serving platter.
Frequently Asked Questions About Samoa Cookie Bars
What are Samoa Cookie Bars made of?
Samoa Cookie Bars are typically made with a buttery cookie or shortbread base, a caramel and toasted coconut topping, and melted chocolate. The three layers recreate the familiar flavor combination in an easy bar format.
Are Samoa Cookie Bars the same as Samoa cookies?
They are inspired by the same flavor combination, but the preparation is different. Traditional cookies are formed individually, while Samoa Cookie Bars are assembled in a baking pan and cut into portions afterward.
Can I use caramel sauce instead of caramel candies?
Yes, as long as the caramel sauce is thick enough to create a stable layer. A very thin caramel sauce may run off the sides or make the cookie base soggy.
Can I use homemade caramel?
Absolutely. Homemade caramel works beautifully in this recipe. Just make sure it reaches a thick, spreadable consistency before combining it with the toasted coconut.
What type of coconut is best?
Sweetened shredded coconut is a popular choice for a classic sweet dessert. Unsweetened coconut works well if you prefer to keep the overall flavor less sweet.
What to Serve With Samoa Cookie Bars
These caramel coconut chocolate bars are easy to serve alongside your favorite drinks and desserts.
Try them with:
- Freshly brewed coffee
- Espresso
- Black tea
- Chai tea
- Hot chocolate
- Vanilla ice cream
- Whipped cream
- Fresh berries
- A dessert platter
For parties, arrange the bars on a large serving plate with the chocolate drizzle facing upward.
Conclusion
These Samoa Cookie Bars are an easy and irresistible way to enjoy the classic combination of buttery cookie, toasted coconut, chewy caramel, and rich chocolate. With a simple layered preparation, you can create a beautiful homemade dessert without the time-consuming process of shaping individual cookies.
Print
Samoa Cookie Bars Recipe
- Total Time: PT1H12M
- Yield: 16 bars 1x
- Diet: Vegetarian
Description
These Samoa Cookie Bars combine a buttery cookie base with toasted coconut, chewy caramel, and rich chocolate for an irresistible homemade dessert. Easy to layer and slice, they deliver classic Samoa-inspired flavors without the hassle of making individual cookies.
Ingredients
Instructions
- Prepare the Pan: Preheat the oven to 350°F (175°C). Line an 8-inch or 9-inch square baking pan with parchment paper, leaving some overhang on the sides for easy removal.
- Make the Cookie Base: In a large bowl, beat the softened butter and sugar until smooth and creamy. Mix in the vanilla extract.
- Add the Dry Ingredients: Gradually add the flour and salt. Mix just until a soft dough forms. Avoid overmixing.
- Press Into the Pan: Transfer the dough to the prepared pan. Press it evenly across the bottom using your fingers or the flat bottom of a measuring cup.
- Bake: Bake for approximately 18–22 minutes, or until the edges are lightly golden and the center is set. Remove from the oven and allow the cookie base to cool completely.
- Toast the Coconut: Spread the shredded coconut evenly on a baking sheet. Toast at 350°F (175°C) for about 5–8 minutes, stirring every few minutes, until lightly golden. Watch carefully to prevent burning. Let it cool.
- Prepare the Caramel: Place the caramel candies and heavy cream in a saucepan over low heat. Stir continuously until completely melted and smooth. Remove from the heat and stir in the vanilla and salt.
- Combine Coconut and Caramel: Add most of the toasted coconut to the melted caramel, reserving a small amount for decoration. Stir until the coconut is evenly coated.
- Add the Caramel Layer: Spread the caramel-coconut mixture evenly over the cooled cookie base. Gently press and smooth the surface with a spatula.
- Chill: Refrigerate the bars for approximately 20–30 minutes, or until the caramel layer is firm enough to handle.
- Melt the Chocolate: Melt the chocolate chips gently in the microwave in 15–20 second intervals, stirring after each interval. Continue until smooth. Stir in the coconut oil if using.
- Add the Chocolate: Spread a thin layer of melted chocolate over the bottom of the bars if desired. Allow it to set, then carefully turn the slab over.
- Drizzle the Top: Drizzle the remaining melted chocolate over the caramel coconut layer in thin, zigzag lines. Sprinkle with the reserved toasted coconut if desired.
- Set the Bars: Refrigerate for another 15–20 minutes, or until the chocolate has completely set.
- Slice and Serve: Lift the bars from the pan using the parchment paper. Place them on a cutting board and cut into squares or rectangles with a sharp knife. Wipe the knife between cuts for clean layers.
- Enjoy: Serve the Samoa Cookie Bars once the chocolate has set and the caramel has reached a pleasantly chewy texture.
- Prep Time: PT20M
- Cook Time: PT22M
- Category: Dessert
- Method: Baking
- Cuisine: American
Nutrition
- Serving Size: 1 Samoa Cookie Bar
- Calories: 385 kcal
- Sugar: 31 g
- Sodium: 155 mg
- Fat: 21 g
- Saturated Fat: 14 g
- Unsaturated Fat: 6 g
- Trans Fat: 0 g
- Carbohydrates: 48 g
- Fiber: 3 g
- Protein: 4 g
- Cholesterol: 30 mg